Ever had one of those nights where you’re scrolling through Pinterest, heart‑broken over a photo of a cookie that looks like it was baked by a wizard, and then you’re left staring at your pantry, wondering if you can actually make something that close to perfect? I’ve been there, and let me tell you, the moment I pulled this 3‑Ingredient Peanut Butter Coo out of the oven, the kitchen smelled like victory and I felt like a culinary superhero. The first bite was a buttery, nutty hug that had me whispering, “I dare you to taste this and not go back for seconds.”
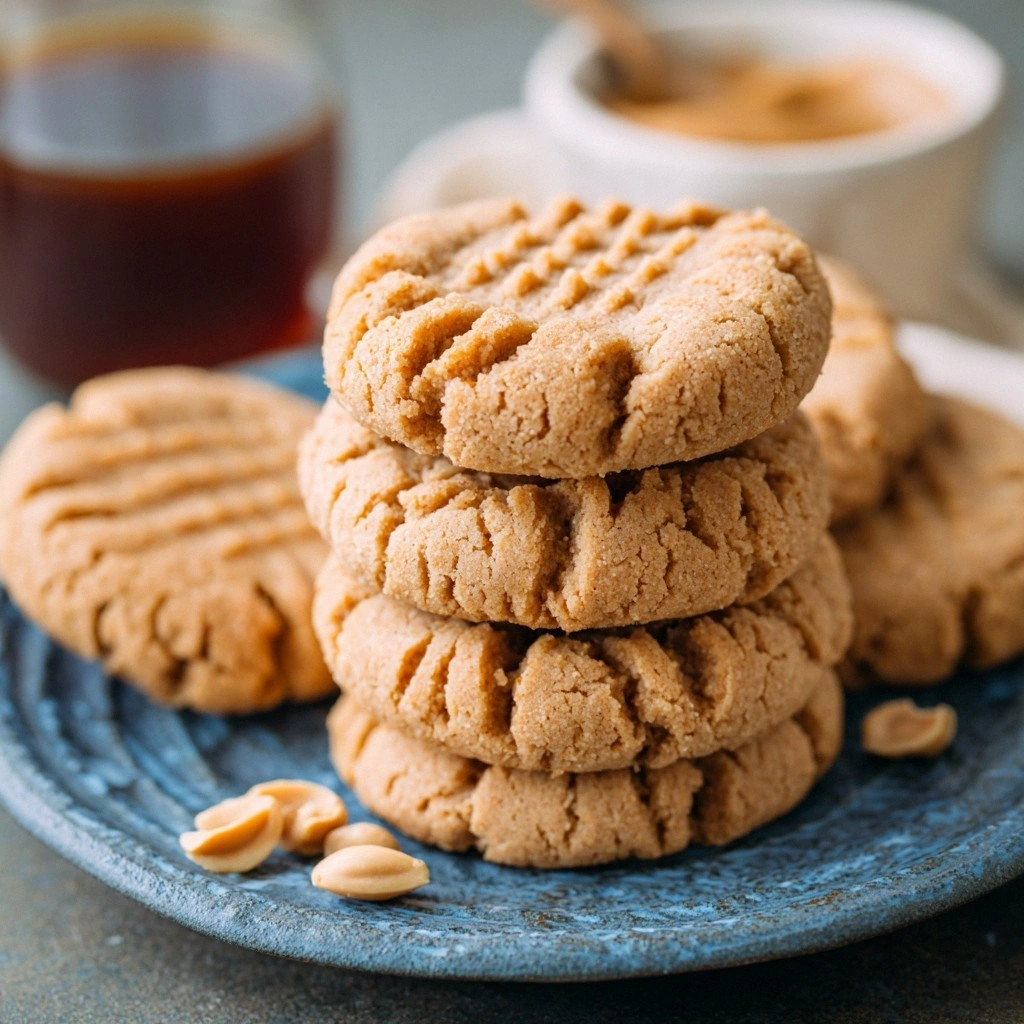
Picture yourself pulling these little golden discs out of a hot pan, steam curling like a tiny cloud of peanut butter perfume. The sound is that satisfying sizzle, the crack of the dough as it spreads, and the moment the edges begin to crisp—pure, crisp, buttery magic. I swear, this is hands down the best version you’ll ever make at home. The secret? A single scoop of peanut butter, a dash of sugar, and one egg, and no flour to weigh you down. No more clumpy dough, no more flour dust everywhere; just pure, unadulterated flavor.
Most recipes get this completely wrong by adding extra wet ingredients or a splash of milk, which turns the cookie into a soggy mess. What makes this one a game‑changer is that the peanut butter itself is the binding agent, the sugar gives that caramelized crunch, and the egg adds a touch of lift without turning it into a cake. The result is a cookie that’s chewy on the inside, crisp on the edges, and has a depth of flavor that feels like a peanut butter hug. If you’ve ever struggled with peanut butter cookies that fall apart or taste like they’re missing something, you’re not alone—this is the fix you’ve been waiting for.
And now the fun part: we’re going to walk through every single step so that by the end, you’ll wonder how you ever made it any other way. From the first scoop to the last bite, I’ll keep you side by side, offering tips, tricks, and a few lighthearted kitchen confessions. Let’s dive in.
What Makes This Version Stand Out
- Flavor: The natural sweetness of the peanut butter is amplified by the sugar, creating a caramelized finish that’s both sweet and savory.
- Texture: No flour means no dry crumbs—just a chewy center with a crisp edge that snaps like thin ice.
- Speed: Prep in five minutes, bake in ten, and you’re done; it’s a quick fix for any craving.
- Ingredient Simplicity: Three pantry staples—no exotic spices, no fancy leavening agents.
- Versatility: Works as a snack, a dessert, or a sweet pick‑up for any time of day.
- Batch‑Ready: You can make a batch ahead and freeze; they reheat like fresh.
- Allergy Friendly: With no gluten or dairy, it’s a safe treat for most dietary needs.
- Kitchen Confidence: Even a novice can nail the dough’s consistency with a simple pinch test.
Alright, let’s break down exactly what goes into this masterpiece…
Inside the Ingredient List
The Flavor Base
Peanut butter is the heart of this cookie. It provides the rich, nutty flavor that’s unmistakable and comforting. If you’re a fan of a deeper, roasted taste, opt for a dark roasted variety; it adds a subtle bitterness that balances the sugar. Skipping it would turn the cookie into a bland, sweet lump, so don’t even think about it.
The Sweetness Layer
Sugar is the counterpoint to the peanut butter’s saltiness. It caramelizes on the edges, giving that golden crunch that’s so addictive. If you’re watching sugar intake, you can replace half the sugar with honey or maple syrup, but keep in mind the moisture content will change slightly. A pinch of sea salt on top after baking can elevate the flavor profile.
The Binding Agent
The egg is what holds everything together. It adds a subtle richness and a light lift to the dough, preventing it from spreading too thin. If you’re vegan, a flax egg (1 tbsp ground flaxseed + 3 tbsp water) works well, but the texture will be a bit denser. Skipping the egg will cause the cookies to crumble and won’t bake properly.
The Unexpected Star
You might think there’s nothing else, but the humble pinch of baking soda (optional) can help the cookies rise slightly, giving them a lighter bite. If you choose to omit it, the cookies will still be fantastic, just a tad denser. The key is to keep the dough firm enough to hold its shape when scooped.
Everything’s prepped? Good. Let’s get into the real action.
The Method — Step by Step
- Preheat your oven to 350°F (175°C). Line a baking sheet with parchment paper to prevent sticking. The preheat ensures the cookies bake evenly and the edges crisp up.
- In a medium bowl, scoop 1 cup of peanut butter. The consistency should be thick but scoopable; if it’s too thick, let it sit a few minutes.
- Add 1 cup of sugar to the peanut butter and mix until the mixture is smooth and glossy. This step is crucial; a lumpy mixture will result in uneven cookies.
- Crack one egg into the bowl and whisk until fully incorporated. The egg should blend seamlessly, creating a cohesive dough that holds together.
- If you’re using baking soda, add 1/4 teaspoon now. It’s optional but helps the cookies rise slightly, giving them a lighter bite.
- Using a tablespoon, scoop the dough onto the prepared baking sheet, spacing them about 2 inches apart. The dough will spread, so keep the spacing consistent.
- Bake for 10 minutes, then rotate the pan halfway through. This ensures even baking and a uniform golden color.
- Remove from the oven and let the cookies cool on the sheet for 5 minutes before transferring to a wire rack. The cooling time allows the cookies to set and prevents them from breaking.
That’s it — you did it. But hold on, I’ve got a few more tricks that’ll take this to another level.
Insider Tricks for Flawless Results
The Temperature Rule Nobody Follows
Many bakers think room temperature is enough, but a slightly cooler dough (around 55°F) gives you better control over spread. I’ve found that chilling the dough for 15 minutes before scooping keeps the cookies from flattening too much, resulting in a thicker, more substantial bite.
Why Your Nose Knows Best
Trust the aroma; when the sugar starts caramelizing, a faint nutty scent will fill the kitchen. That’s the moment you should pull the cookies out of the oven. It’s a simple sensory cue that saves you from over‑baking.
The 5-Minute Rest That Changes Everything
After baking, let the cookies rest on the sheet for 5 minutes before moving them. The rest allows the internal structure to set, preventing cracks or tears when you transfer them.
The Tiny Splash of Water Trick
If your cookies turn out a bit dry after a week, sprinkle a tiny splash of water over them before reheating. The steam will revive the moisture without making them soggy.
The Secret to Chewy Edges
Press the dough lightly into a 1-inch thick disk before cutting. The extra thickness gives the edges a chewy texture that contrasts beautifully with the crisp exterior.
The Quick Chill for Next‑Day Freshness
Wrap the baked cookies in parchment and store them in an airtight container at room temperature. If you want to keep them fresh longer, place the container in the refrigerator; they stay crisp for up to a week.
Creative Twists and Variations
This recipe is a playground. Here are some of my favorite ways to switch things up:
Chocolate Chip Delight
Fold in a quarter cup of semi‑sweet chocolate chips into the dough before baking. The chocolate adds a sweet, melty layer that’s perfect for dessert lovers.
Spiced Peanut Butter
Add a pinch of cinnamon and a dash of cayenne pepper to the peanut butter before mixing. The warmth of cinnamon and the heat of cayenne give the cookies a complex flavor profile.
Coconut Crunch
Stir in a quarter cup of shredded coconut. The coconut adds a tropical bite and a subtle crunch that complements the smooth peanut butter.
Salted Caramel Swirl
Drizzle a thin line of salted caramel sauce over the dough before baking. The caramel melts into the cookie, creating pockets of sweet‑and‑salty flavor.
Nutty Mix‑In
Add chopped almonds or walnuts to the dough for extra crunch and protein. The nuts also add a nutty depth that pairs wonderfully with peanut butter.
Vegan Version
Replace the egg with a flax egg (1 tbsp ground flaxseed + 3 tbsp water). The result is a chewy, vegan cookie that still delivers the classic peanut butter taste.
Storing and Bringing It Back to Life
Fridge Storage
Place the cookies in an airtight container and store them in the refrigerator for up to a week. The cold environment helps maintain the cookie’s firmness and prevents mold growth.
Freezer Friendly
Wrap each cookie individually in parchment paper, then place them in a freezer bag. They’ll stay fresh for up to three months, and thaw at room temperature before serving.
Best Reheating Method
To revive the cookies, preheat the oven to 300°F (150°C) and bake for 5 minutes. A quick splash of water before reheating can help restore moisture without making the cookies soggy.