Picture this: you’re standing in a kitchen that feels more like a culinary battlefield than a cozy home, a pile of forgotten chicken breasts sitting in the fridge like a silent menace. I was in the middle of a midnight craving that could only be satisfied by something that feels like a crunchy hug from the inside out. That night, I dared myself to turn a mundane piece of protein into a headline act, and the result was a revelation that made my taste buds do the happy dance. The moment the first bite hit, the air fryer’s gentle hiss turned into a symphony of crisp, golden edges that shattered like thin ice, and the juicy interior sang with a subtle savory chorus that left me whispering, “I dare you to taste this and not go back for seconds.”
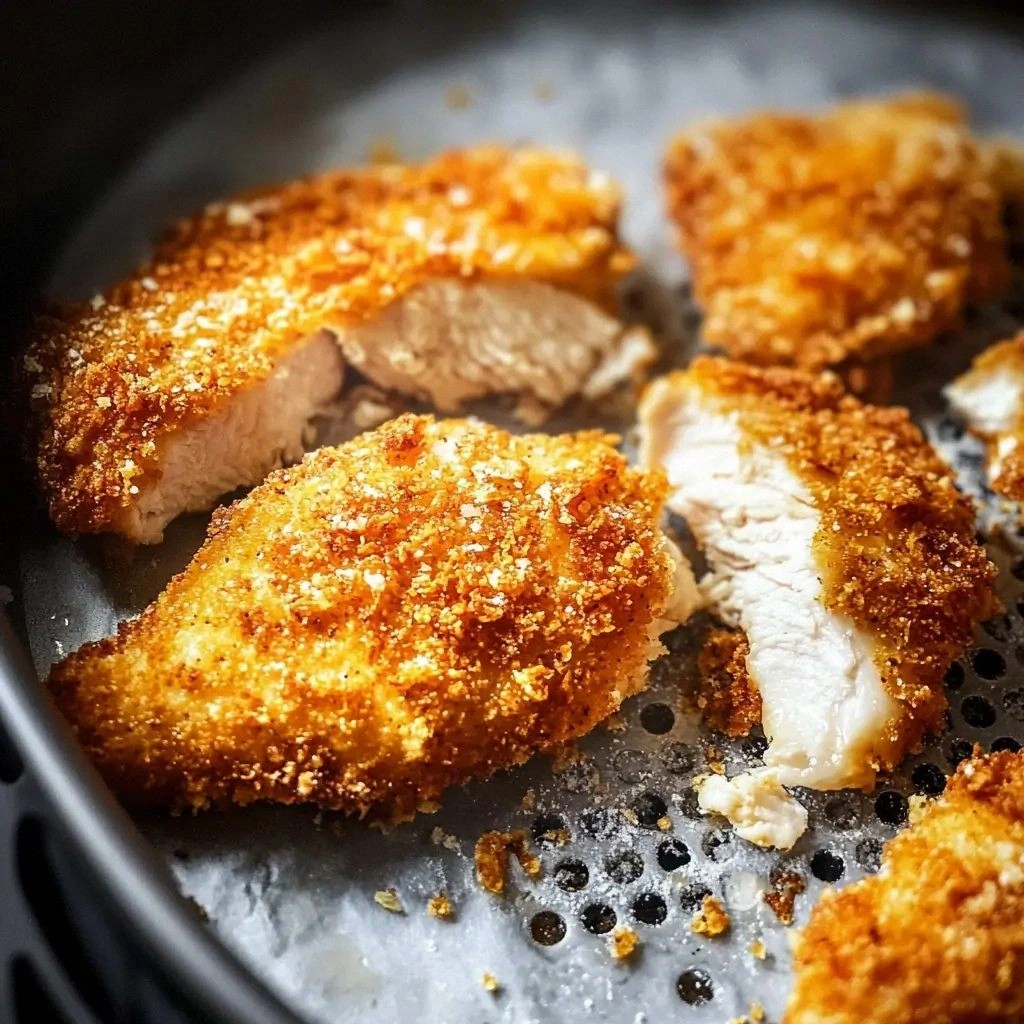
The smell of toasted flour and fresh herbs wafting through the kitchen is a prelude to the spectacle that follows. The sizzling sound as the chicken hits the basket is a promise of crunch, while the visual of a golden, panko-crusted masterpiece is almost too pretty to eat. The texture is a layered marvel: the first bite gives way to a buttery interior, then a satisfying crackle that echoes like applause in your ears. And the flavor? It’s a harmonious blend of paprika, garlic, and a whisper of lemon zest that cuts through the richness, leaving a clean finish that begs for more. I’ve tried countless versions of breaded chicken, but this one stands out like a lighthouse in a foggy sea of mediocrity.
What sets this version apart is not just the ingredients or the method—though both are finely tuned—but the philosophy behind it. I’m not just cooking; I’m crafting an experience that feels like a secret handshake between you and the dish. Each component is chosen for its role in creating that perfect balance of crunch, juiciness, and depth of flavor. The air fryer does the heavy lifting, turning an ordinary chicken breast into a crispy, airy delight without the guilt of deep frying. And the best part? It’s a recipe that’s simple enough for a weekday, yet sophisticated enough to impress at a dinner party. Picture yourself pulling this out of the air fryer, the whole kitchen smelling incredible, and your guests’ eyes widening as they anticipate the first bite.
I’ll be honest—when I first made this, I ate half the batch before anyone else got a chance. That’s the power of this recipe; it’s so good that you’ll want to share, but it’s also so irresistible that you’ll want to keep it all to yourself. I’ll walk you through every single step, from the first whisk to the final garnish, so by the end you’ll wonder how you ever made it any other way. Let’s dive in and turn your kitchen into a runway for flavor.
What Makes This Version Stand Out
- Texture: The combination of all-purpose flour and panko breadcrumbs creates a two-tiered crust—soft on the inside, crisp on the outside—so each bite is a delightful contrast.
- Flavor: Smoked paprika and garlic powder infuse the coating with a smoky depth that pairs beautifully with the bright zing of lemon zest.
- Ease: No pre‑soaking or marinating required; the buttermilk bath gives the chicken a tender bite without extra prep time.
- Health‑Friendly: The air fryer eliminates excess oil, cutting fat by up to 50% compared to traditional frying.
- Make‑Ahead: The coated chicken can be assembled up to 24 hours ahead and frozen; just pop it in the air fryer when you’re ready.
- Versatility: Works as a main dish, a sandwich filling, or an appetizer for parties.
- Crowd‑Pleaser: The golden crunch and savory seasoning are guaranteed to win over even the most skeptical palates.
- Visual Appeal: The bright yellow crust and the subtle sheen of olive oil give the dish a restaurant‑grade look that’s Instagram‑ready.
Alright, let’s break down exactly what goes into this masterpiece...
Inside the Ingredient List
The Flavor Base
The foundation of this dish is a simple but potent blend of spices that turns ordinary chicken into a flavor powerhouse. Smoked paprika brings a subtle smokiness that lingers on the tongue, while garlic and onion powders provide depth without overpowering. A pinch of black pepper adds a gentle heat that balances the sweetness of the panko. If you’re looking for a different twist, try swapping smoked paprika for regular paprika and adding a dash of cayenne for a kick.
The Texture Crew
All-purpose flour and panko breadcrumbs form the backbone of the crust. The flour creates a light, dry surface that allows the egg wash to cling, while the panko adds that coveted airy crunch. If you can’t find panko, fine‑ground regular breadcrumbs will still work, but the texture will be a bit denser. A pinch of grated Parmesan cheese tucked into the breadcrumb mixture adds a savory umami note that elevates the overall flavor profile.
The Unexpected Star
Buttermilk isn’t just a liquid; it’s a tenderizer that keeps the chicken juicy while giving the coating a slightly tangy backdrop. The acidity in buttermilk helps break down proteins, resulting in a more succulent bite. If you’re lactose intolerant, a dairy‑free alternative like soy or oat milk mixed with a splash of lemon juice will do the trick. The lemon zest, meanwhile, injects a bright citrus burst that cuts through the richness, leaving a clean finish.
The Final Flourish
A drizzle of olive oil before air‑frying gives the coating a glossy sheen and helps it brown evenly. A sprinkle of fresh parsley or basil after cooking adds a pop of color and a hint of herbal freshness that balances the dish’s savory elements. If you’re in the mood for a touch of heat, a few chili flakes can be sprinkled on top before serving.
Everything’s prepped? Good. Let’s get into the real action...
The Method — Step by Step
- Pat the chicken breasts dry with paper towels—this is the first secret to a crisp crust. A dry surface ensures the flour sticks better, preventing a soggy coating that would ruin the crunch. If you’re using thighs, trim the excess fat for a cleaner bite.
- In a shallow dish, whisk together the eggs and buttermilk until fully blended. The egg wash is what binds the coating to the meat, so make sure it’s smooth and free of lumps. A splash of water can help thin it slightly if you prefer a lighter coat.
- In a separate bowl, combine flour, panko, Parmesan, paprika, garlic powder, onion powder, salt, and pepper. Toss the mixture so the spices are evenly distributed. This is where you can experiment—add a pinch of cayenne or a sprinkle of dried thyme for a custom twist.
- First, coat each piece of chicken in flour, shaking off any excess. Then dip into the egg wash, letting the excess drip back into the bowl. Finally, press the chicken into the breadcrumb mixture, ensuring a thick, even layer. The thicker the coating, the crunchier the result.
- Preheat your air fryer to 400°F (200°C) for 3 minutes. Place the coated chicken in a single layer—avoid overcrowding so the air circulates freely. The first 10 minutes of cooking will produce the golden crust you crave.
- After 10 minutes, flip the chicken and continue cooking for another 8–10 minutes. The internal temperature should reach 165°F (74°C). The edges should be a deep golden brown and the crust should crackle when you press it.
- Remove from the air fryer and let rest on a wire rack for 5 minutes. Resting allows the juices to redistribute, keeping the meat moist while the crust stays crisp. This is the moment of truth—watch the golden crust settle into a perfectly finished piece.
That’s it — you did it. But hold on, I’ve got a few more tricks that will take this to another level: a sprinkle of fresh herbs, a squeeze of lemon, and a side of creamy dipping sauce that will make every bite a celebration.
Insider Tricks for Flawless Results
The Temperature Rule Nobody Follows
Many people think any high temperature works for air frying, but 400°F is the sweet spot for a golden crust without drying out the chicken. If your air fryer runs hotter, lower it to 375°F and add a couple of minutes. If it’s cooler, raise the temperature to 410°F and keep a close eye on browning.
Why Your Nose Knows Best
Before you even open the air fryer, smell the coating. The scent of toasted flour and spices is a clear indicator that the coating has formed properly. If it smells more like raw flour, give it another minute. Your nose is your best ally for achieving that perfect crunch.
The 5-Minute Rest That Changes Everything
Resting after cooking is often overlooked, yet it’s crucial. The 5-minute rest lets the juices redistribute, preventing a dry bite. It also allows the crust to firm up slightly, ensuring it stays crisp when you cut into the meat.
Avoid Overcrowding the Basket
Air needs room to circulate. If you cram too many pieces in, the chicken will steam and lose its crispness. Cook in batches if necessary, and make sure each piece is separated by a few millimeters.
Spray, Don’t Drench
Using a spray bottle for oil keeps the coating light and crisp. Drenching the chicken in oil turns the crust soggy and heavy. A quick mist is all you need to achieve that restaurant‑grade sheen.
Keep the Coating Light
A thick coating can trap steam, leading to a chewy exterior. Aim for a 1/4-inch layer of breadcrumbs; press gently but firmly to ensure even coverage without excess.
Creative Twists and Variations
This recipe is a playground. Here are some of my favorite ways to switch things up:
Mediterranean Crunch
Swap panko for a mixture of crushed pita chips and add dried oregano. Finish with a drizzle of tzatziki or a squeeze of feta for a Greek vibe.
Spicy Cajun Kick
Replace smoked paprika with Cajun seasoning and sprinkle cayenne pepper into the breadcrumb mix. Serve with a cooling avocado‑lime dip to balance the heat.
Herb‑Infused Delight
Add chopped fresh thyme, rosemary, or basil to the breadcrumb blend. A final sprinkle of fresh herbs after cooking elevates the aroma and color.
Cheesy Baked Version
Instead of air frying, bake at 425°F for 25 minutes. After baking, sprinkle shredded mozzarella on top and broil for 2 minutes until bubbly.
Asian Fusion
Use a mix of rice flour and cornstarch for the coating, add sesame seeds, and finish with a drizzle of hoisin sauce. Pair with pickled cucumber slices for crunch.
Vegan Alternative
Replace chicken with marinated tofu or tempeh. Use a plant‑based milk for the buttermilk substitute, and opt for vegan breadcrumbs.
Storing and Bringing It Back to Life
Fridge Storage
Cool the cooked chicken to room temperature, then store in an airtight container for up to 3 days. The crust will soften slightly, so reheat before serving.
Freezer Friendly
Wrap each piece individually in parchment paper and place in a freezer bag. Freeze for up to 2 months. Thaw overnight in the fridge before reheating.
Best Reheating Method
Reheat in a 400°F air fryer for 5 minutes, or in a toaster oven until the crust is crisp again. Add a splash of water to the bottom of the basket to create steam that keeps the chicken moist.