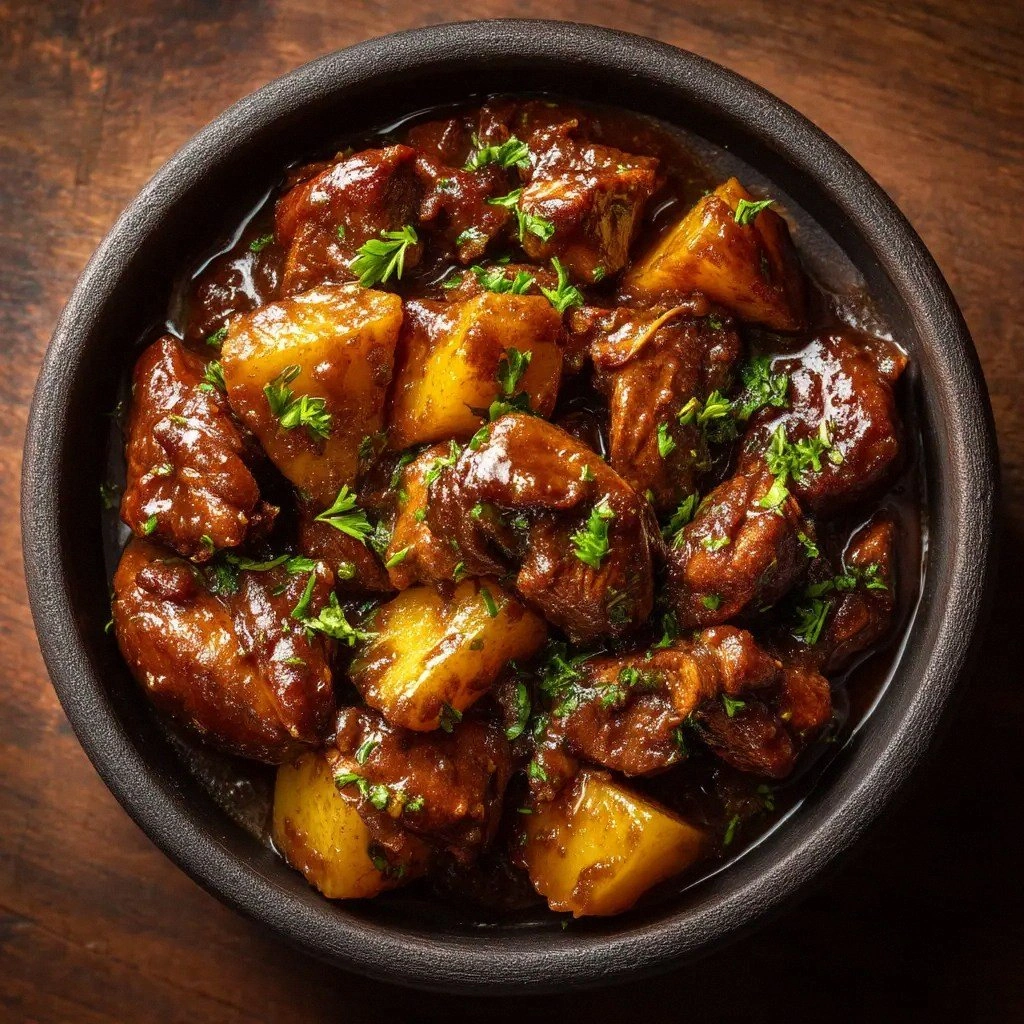
I was halfway through a midnight snack raid when the kitchen lights flickered and the fridge door opened with a sigh that sounded like a sigh of relief. The air was thick with the scent of fresh cilantro and the sharp tang of lime, a promise that something delicious was about to happen. My fingers hovered over the pantry, searching for that one ingredient that could turn a bland plate into a party. Then I remembered the forgotten box of fajita seasoning that had been hiding behind the canned beans. I pulled it out, feeling the familiar crunch of the paper, and knew I was about to unleash a flavor storm.
The next thing I did was slice the chicken breasts into thin ribbons, the kind that look almost like strips of silk when they hit the hot skillet. The sizzling sound that greeted me was a sweet, metallic note, like a tiny drumbeat that said “Get ready.” The aroma of seared meat mingled with the peppery perfume of bell peppers, creating a heady cocktail that made my mouth water. My mind ran through the possibilities—could this be the secret sauce that turns an ordinary night into a fiesta? I decided to find out.
I tossed the chicken in a generous dusting of fajita seasoning, letting the spices coat every surface like a bright, fiery coat of paint. The olive oil glistened in the pan, reflecting the kitchen lights in a glossy sheen that made the whole space feel like a gourmet studio. I could hear the vegetables crackle as they hit the heat, a sound that promised crisp edges that would shatter like thin ice when bitten. The lime’s citrus burst added a bright pop, cutting through the richness of the cheese that would soon follow. This moment was the foundation of everything that came next.
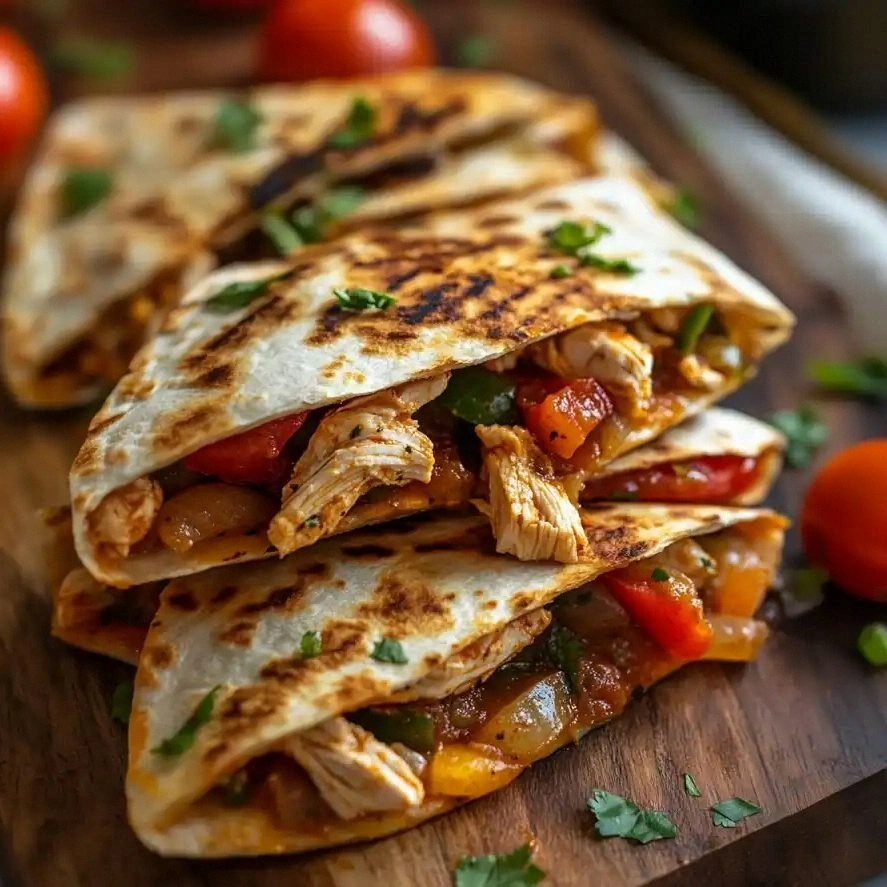
I dare you to taste this and not go back for seconds; the combination of smoky chicken, caramelized peppers, and zesty lime will have you craving more with each bite. I’ve been told that the first bite is like a fireworks display—bright, explosive, and leaving a lingering sweetness on your palate. The second bite is a gentle hug, with melted cheddar and Monterey Jack forming a velvety blanket over the filling. The third bite is a revelation, where the guacamole’s coolness and the salsa’s tang create a perfect harmony. And the fourth? Well, that’s when you realize you’re not just eating a quesadilla; you’re experiencing a flavor revolution.
Picture yourself pulling this out of the oven, the whole kitchen smelling incredible, and the sound of the first crunch echoing in your ears. The sizzling edges of the tortilla, crisped to a golden perfection, will make your senses dance. The cheese will melt into a gooey, golden river that runs down the sides of the quesadilla. The lime will add a bright, almost electric tang that will make you want to dance. This is the kind of dish that turns a simple dinner into a celebration.
I’ve spent hours tweaking this recipe, and the result is hands down the best version you’ll ever make at home. The secret lies in the balance of spices, the timing of the cooking, and the choice of cheeses that melt together like a dream. It’s a dish that’s simple enough for a beginner, yet sophisticated enough to impress your guests. If you’ve ever struggled with making fajitas that don’t turn out soggy or overcooked, you’re not alone—and I’ve got the fix. Let me walk you through every single step—by the end, you’ll wonder how you ever made it any other way.
What Makes This Version Stand Out
- Flavor: The blend of fajita seasoning and lime creates a bright, punchy profile that cuts through the richness of the cheese and the heartiness of the chicken.
- Texture: Crispy edges on the tortilla, tender chicken, and caramelized peppers combine to give a satisfying contrast in every bite.
- Visual Appeal: The vibrant colors of red and yellow peppers, the golden cheese melt, and the fresh green cilantro make this dish a feast for the eyes.
- Ease of Prep: Every component can be prepped in under 15 minutes, making this a go-to recipe for busy weeknights.
- Versatility: Swap in tofu, shrimp, or extra veggies for a different twist, and the core flavor stays intact.
- Make‑Ahead Potential: Assemble the quesadillas ahead of time, refrigerate, and pop them in a skillet when you’re ready to serve.
Alright, let's break down exactly what goes into this masterpiece…
Inside the Ingredient List
The Flavor Base
The chicken breasts are the heart of this dish, providing a lean protein that absorbs the spices like a sponge. The fajita seasoning, a pre-made blend of cumin, paprika, garlic powder, and chili powder, gives the dish its signature smoky kick. The lime juice brightens the entire plate, adding a citrusy brightness that cuts through the richness of the cheeses. If you skip the lime, the quesadilla will taste flat and less vibrant; the acidity is what makes the flavors pop. For a fresher twist, squeeze a splash of fresh orange juice instead of lime for a sweeter note.
The Texture Crew
The red and yellow bell peppers bring a sweet, slightly earthy crunch that contrasts nicely with the soft chicken. The small onion adds a sharp bite that mellows as it cooks, creating a subtle depth. The flour tortillas are chosen for their pliability; they hold the filling together without tearing. The cheddar and Monterey Jack cheeses melt into a silky, gooey sauce that binds the filling, while the sour cream and guacamole add cool, creamy layers that balance the heat. If you’re aiming for a lighter version, replace the cheese with a low-fat blend or skip it entirely.
The Unexpected Star
Salsa is more than just a condiment; it’s a burst of freshness that lifts the whole dish. The guacamole provides a buttery, earthy counterpoint to the spicy, smoky elements. Together they create a multi-dimensional taste experience. If you’re in a hurry, a jarred salsa will do, but homemade will elevate the dish to gourmet status. The guacamole’s avocado base also adds healthy fats, making the meal more satiating.
The Final Flourish
A squeeze of lime before serving adds a final zing that awakens the palate. The fresh cilantro garnish offers a herbal brightness that ties all the components together. The combination of sour cream, salsa, and guacamole creates a layered texture that feels indulgent without being heavy. If you’re looking to cut calories, simply reduce the amount of cheese and replace it with a low-fat Greek yogurt drizzle. Every ingredient plays a role, and together they create a harmonious symphony of flavors.
Everything's prepped? Good. Let's get into the real action…
The Method — Step by Step
- Heat a large skillet over medium-high heat and add the tablespoon of olive oil. Once the oil shimmers, add the sliced chicken breast strips, spreading them out in a single layer. Sauté for 2-3 minutes on each side until the chicken is golden brown and cooked through. The sizzling sound should be audible, indicating the pan is hot enough. Let the chicken rest for a minute before chopping into bite-sized pieces.
- In a bowl, toss the chicken with the tablespoon of fajita seasoning, ensuring every piece is coated. The seasoning should coat the chicken like a fine dusting of gold. Sprinkle the seasoning over the chicken evenly, then stir to combine. This step is crucial for flavor depth. If you’re in a hurry, you can skip the seasoning and use a pre-made spice blend.
- Add the sliced bell peppers and onion to the same skillet, stirring them into the chicken. Cook for 5-7 minutes until the vegetables soften but still retain a slight crunch. The peppers should be bright and slightly caramelized, and the onion should have a translucent glow. Keep the heat moderate to avoid burning the spices. Once done, remove from heat and set aside.
- Squeeze the juice of one lime over the chicken and vegetable mixture, then stir gently to combine. The lime juice should coat the filling, giving it a bright, citrusy finish. Let the mixture rest for 2 minutes so the flavors meld. The aroma will be more pronounced, making your mouth water. If you like a stronger lime flavor, add a second squeeze.
- Warm the flour tortillas in a dry skillet or microwave for a few seconds until they’re pliable. This step prevents the tortillas from cracking when you fold them. If you’re using a microwave, wrap them in a damp paper towel to keep them moist. Once warm, lay each tortilla flat on a clean surface. You’re now ready to assemble.
- Spread a generous layer of shredded cheddar and Monterey Jack cheese over half of each tortilla. The cheese should cover the tortilla like a blanket, ensuring every bite has a gooey center. Add the chicken and vegetable mixture on top of the cheese, then top with a spoonful of sour cream, salsa, and guacamole. The layering should be balanced but not overcrowded. Fold the tortilla in half, sealing the edges with a quick press.
- Return the assembled quesadillas to the skillet over medium heat. Cook for 2-3 minutes on each side until the tortilla is golden brown and the cheese has melted. The edges should be crispy and slightly charred. Use a spatula to flip gently, ensuring the filling stays intact. The aroma of melted cheese will fill the kitchen.
- Once cooked, transfer the quesadillas to a cutting board and let them rest for a minute. Slice each quesadilla into wedges with a sharp knife, angling the cuts for a neat presentation. The cheese should ooze slightly, giving a visual cue of its gooeyness. Arrange the wedges on a plate, topping with extra salsa and guacamole if desired. This final touch adds a pop of color and flavor.
- Serve immediately while the quesadillas are still hot and the cheese is molten. Pair with a side of crunchy tortilla chips for an extra crunch. A drizzle of lime over the top will elevate the dish further. The combination of textures—crispy, chewy, creamy—creates a satisfying bite. Your guests will thank you for this culinary masterpiece.
- If you’re a perfectionist, let the quesadilla rest a few more minutes before cutting to allow the cheese to set slightly. This makes slicing cleaner and reduces the risk of the filling spilling out. Store any leftovers in an airtight container in the refrigerator for up to 3 days. Reheat in a skillet or microwave, adding a splash of water to keep the tortillas from drying out. Enjoy the same deliciousness as the first bite.
That's it — you did it. But hold on, I've got a few more tricks that'll take this to another level…
Insider Tricks for Flawless Results
The Temperature Rule Nobody Follows
Cooking the chicken at the right temperature is crucial; too low and it’ll steam, too high and it’ll char. Set your skillet to medium-high and let it preheat until a few drops of water sizzle on contact. Once the chicken hits the pan, let it sear for 2 minutes before flipping; this locks in juices. If you’re unsure, use a meat thermometer to check for 165°F. A quick test: the juices should run clear, not pink.
Why Your Nose Knows Best
Your nose is your best judge of doneness; a strong, buttery aroma signals that the cheese is melting just right. The first hint of that aroma comes when the tortilla edges start to brown, turning a golden amber color. Don’t wait for the cheese to melt fully—just a few seconds will give you that perfect gooey texture. If you’re impatient, keep the heat moderate to avoid burning.
The 5-Minute Rest That Changes Everything
Letting the quesadilla rest for 5 minutes after cooking allows the cheese to set slightly, making slicing cleaner. The rest also lets the flavors meld, creating a more cohesive taste profile. During this pause, the tortilla softens just enough to make it easier to cut. If you’re in a rush, a 2-minute rest still works, but the texture will be less refined.
The Secret Ingredient Swap
If you’re not a fan of cheddar, try swapping it for pepper jack for a spicy kick. The pepper jack’s mild heat will complement the fajita seasoning without overpowering it. Another option is to use a blend of mozzarella and provolone for a milder, creamier melt. The key is to use cheeses that melt well and have a balanced flavor profile.
The Quick Fix for a Messy Kitchen
Line your skillet with parchment paper or a silicone mat to prevent sticking and make cleanup a breeze. The parchment will absorb excess oil and keep the tortilla from sticking to the pan. After cooking, simply lift the parchment with the quesadilla and toss it away. This hack saves you from scrubbing the skillet for hours.
Creative Twists and Variations
This recipe is a playground. Here are some of my favorite ways to switch things up:
Spicy Jalapeño Kick
Add sliced jalapeños to the veggie mix for an extra heat layer. The jalapeños’ bright green color also adds a pop of visual contrast. Pair with a mild salsa to balance the spice. This variation works well for those who love a fiery bite.
Mediterranean Twist
Swap the fajita seasoning for a blend of oregano, thyme, and garlic. Replace the lime with a splash of lemon juice. Add diced tomatoes and olives for a Mediterranean flair. The result is a fresh, herbaceous flavor profile that’s surprisingly different.
Vegan Version
Use plant-based chicken strips or marinated tofu for the protein. Replace the cheeses with vegan cheddar and jack. Use a non-dairy sour cream and a homemade salsa. The texture remains similar, but the dish is entirely plant-based.
Breakfast Brunch
Add a fried or scrambled egg to the filling before assembling. Top with a drizzle of maple syrup for a sweet-savory combo. This version turns the quesadilla into a hearty breakfast that’s perfect for brunch.
Pico de Gallo Upgrade
Swap the regular salsa for a fresh pico de gallo made with diced tomatoes, onions, cilantro, and lime juice. The fresh crunch adds a new layer of texture. The pico’s brightness balances the richness of the cheese.
Cheesy Quesadilla Bowl
Instead of folding, layer the filling in a bowl, top with cheese, and bake until melted. Serve with a side of guacamole. This bowl format is great for a quick, mess-free meal.
Storing and Bringing It Back to Life
Fridge Storage
Store cooked quesadillas in an airtight container for up to 3 days. Keep them in the fridge at 40°F or below. When ready to eat, reheat in a skillet over medium heat for 2-3 minutes. The cheese will melt again, and the tortilla will regain its crispness. For a quick snack, let them sit at room temperature for 15 minutes before reheating.
Freezer Friendly
Wrap each quesadilla individually in parchment paper and place them in a freezer bag. They can be frozen for up to 2 months. Thaw overnight in the refrigerator before reheating. Reheat in a skillet or microwave, adding a splash of water to keep the tortilla from drying out. This method preserves the flavor and texture.
Best Reheating Method
The skillet is the king of reheating; it restores the crispy edges and melts the cheese evenly. Use a low to medium heat to avoid burning the tortilla. If you’re short on time, a microwave works, but the tortilla may become soggy. Add a tiny splash of water before microwaving to create steam, which keeps the tortilla moist. Finish with a quick toast in the skillet for a golden finish.
I’ve spent countless nights experimenting with this recipe, and each time I discover a new nuance that elevates the dish. From the first sizzling bite to the final drizzle of lime, every element is carefully orchestrated to create a symphony of flavors. I’m sure you’ll find yourself reaching for this recipe again and again, whether you’re cooking for friends, family, or just yourself. The combination of crisp tortillas, tender chicken, and melty cheese is a comfort that feels like a hug from the inside out. And the best part? The leftovers are just as good, if not better, after a quick reheat. So grab your skillet, set the mood, and let the kitchen magic begin.
Remember, cooking is an art, but it’s also a science. Pay attention to the details, trust your instincts, and don’t be afraid to experiment. Every tweak you make is a step toward mastering this dish. And if you ever feel stuck, revisit the hacks and tricks above—they’re designed to save you time and elevate your cooking. Happy cooking, and enjoy every bite of these unforgettable Chicken Fajitas Quesadillas Re!