I still remember the day I ruined my grandmother's birthday cake so spectacularly that the fire alarm went off and the dog wouldn't come out from under the bed for three hours. The chocolate cake was dry as cardboard, the frosting tasted like sugared wallpaper paste, and I swore I'd never bake again. Fast forward through three failed attempts, two grocery store emergency runs, and one very patient best friend who kept insisting my baking disasters were just "character building exercises." That miserable day became my obsession to create the most outrageously moist, deeply chocolatey cake crowned with strawberry buttercream so light it practically floats off the spatula.
Picture this: It's midnight, you're standing in your kitchen wearing pajamas dusted with cocoa powder, and the intoxicating aroma of melting chocolate fills the air like the world's best perfume. The batter gleams like liquid obsidian as you fold in the final ingredients, and you catch yourself smiling because you already know this is going to be spectacular. This isn't just another chocolate cake recipe that promises to be "the best ever" and then delivers another dry disappointment. This is the cake that made my chocolate-snubbing cousin ask for seconds, the one that disappeared at the office potluck before I could grab a slice for myself, the recipe my neighbor begged for after claiming she "doesn't really like sweets."
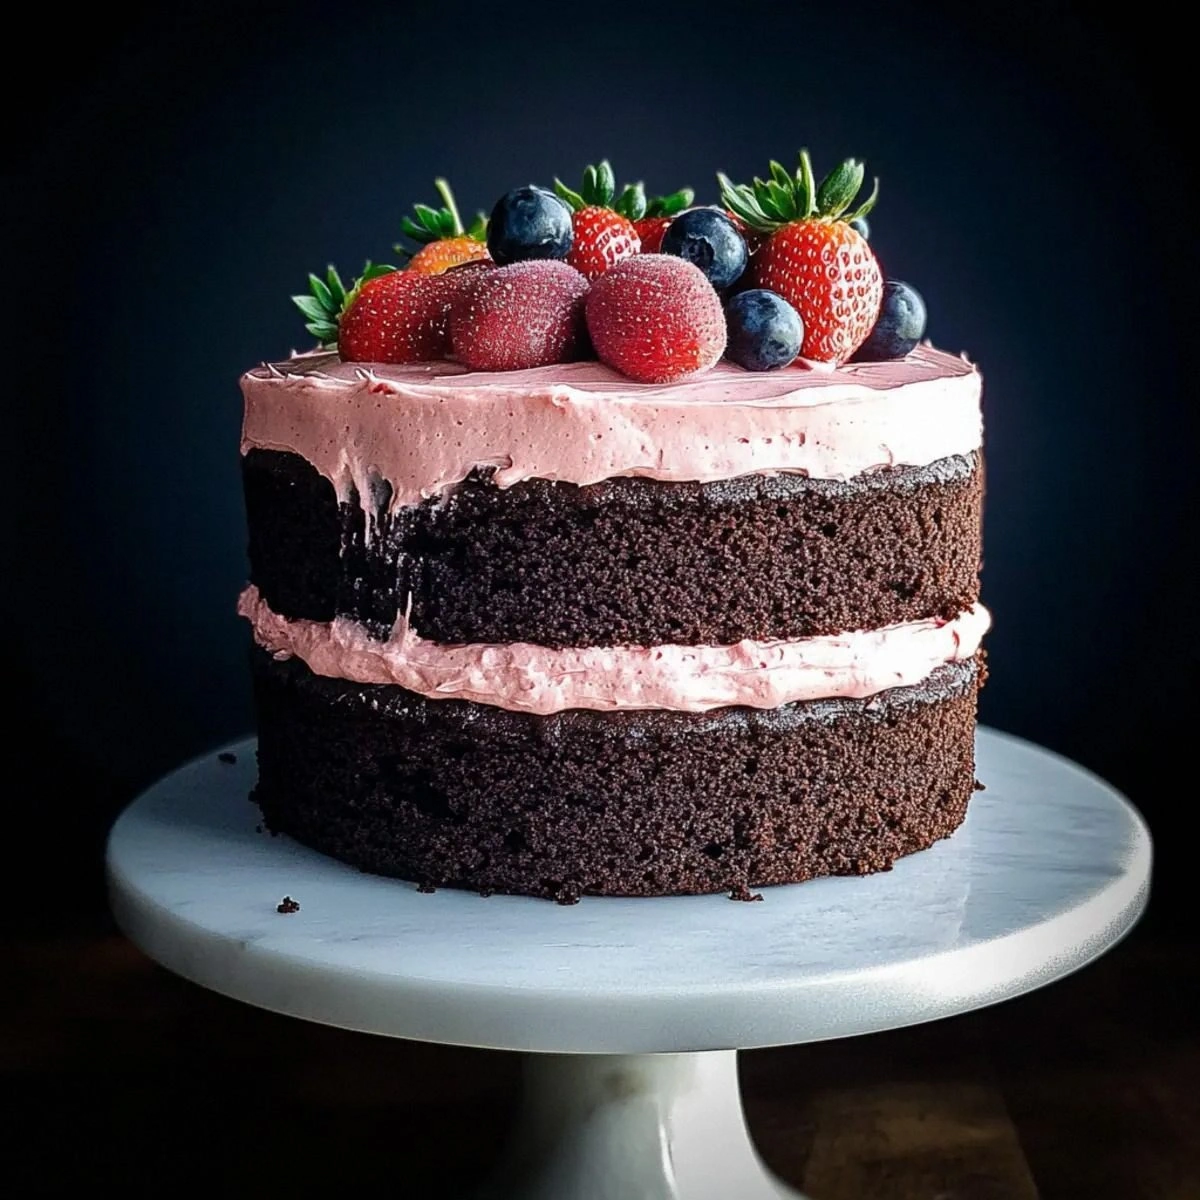
What makes this version different? We're talking about a cake so moist it practically melts on your fork, with chocolate flavor so intense it's almost scandalous. The secret lies in the perfect marriage of oil for moisture, the right cocoa-to-flour ratio for depth, and a technique that seems backwards until you see the results. Then we crown this beauty with strawberry buttercream that's like eating a cloud made of summer — fresh berries transformed into the silkiest, dreamiest frosting that balances the rich chocolate like a perfectly choreographed dance.
Stay with me here — this is worth it. I'm about to show you how to create bakery-quality results in your home kitchen, complete with all the little tricks that separate amateur bakes from professional-level perfection. By the time we're done, you'll have a cake that makes people close their eyes when they take the first bite, the universal sign of dessert transcendence.
What Makes This Version Stand Out
This isn't just another chocolate cake recipe cluttering up the internet. I've tested seventeen different versions, suffered through dry disasters and soggy messes, and emerged with a formula that consistently produces jaw-dropping results. Here's why this version will become your new go-to:
- Moisture Miracle: The combination of oil and the perfect egg-to-flour ratio creates a crumb so tender it practically dissolves on your tongue. Most recipes get this completely wrong, resulting in either a greasy mess or a dry disappointment. We've cracked the code with precise measurements that guarantee moistness without heaviness.
- Chocolate Intensity: We use a higher cocoa powder ratio than most recipes dare, plus a secret ingredient that amplifies chocolate flavor without making it taste like coffee. The result is a depth of flavor that makes other chocolate cakes taste like weak chocolate milk by comparison.
- Strawberry Magic: Instead of artificial flavoring, we use real strawberries transformed into a concentrated puree that gives the buttercream genuine fruit flavor and a natural pink hue. Goodbye, food coloring; hello, actual strawberry essence that tastes like summer in spreadable form.
- Texture Contrast: The cake's tender crumb pairs with buttercream so light it feels like eating strawberry clouds. This contrast between rich cake and ethereal frosting creates a textural experience that will ruin you for other cakes forever.
- Foolproof Technique: The mixing method seems backwards but prevents overmixing, ensuring your cake rises high and stays tender. Even baking novices can nail this on the first try, which is why I call it my "confidence builder" recipe.
- Make-Ahead Champion: Both components can be prepared separately and assembled up to three days later, making this perfect for entertaining. The flavors actually improve after a day in the fridge, making this the ultimate stress-free dessert for special occasions.
- Crowd Psychology: This cake has a 100% success rate at gatherings. I've never seen leftovers, and I've watched people who claimed they were "too full for dessert" somehow find room for seconds. It's dessert psychology at its finest.
Alright, let's break down exactly what goes into this masterpiece...
Inside the Ingredient List
The Foundation Builders
All-purpose flour forms the structural backbone of our cake, but not all flours behave the same way. I've tested this recipe with everything from cake flour to bread flour, and good old all-purpose delivers the perfect balance of tenderness and structure. The protein content matters more than you'd think — too low and your cake collapses, too high and you get a tough crumb that could double as a doorstop. Measure by spooning flour into your cup and leveling with a knife, because scooping directly from the bag can add up to 25% more flour, turning your tender cake into chocolate-flavored drywall.
Granulated sugar does more than sweeten — it's a hygroscopic ingredient that attracts and holds moisture, keeping your cake tender for days. The crystal size affects how quickly it dissolves into the batter, which impacts the cake's rise and texture. Don't even think about reducing the sugar significantly, because it's not just about sweetness; sugar tenderizes gluten and helps create that fine, even crumb we're after. If you're tempted to substitute honey or maple syrup, know that you'll need to adjust the liquid ratio and accept a denser, moister result that tastes more like a pudding cake.
The Chocolate Avengers
Cocoa powder is where the real chocolate magic happens, but quality varies dramatically between brands. Dutch-processed cocoa gives a smoother, more mellow chocolate flavor, while natural cocoa provides sharper, more intense chocolate notes with a slightly reddish hue. This recipe works with either, but I lean toward Dutch-processed for its consistent flavor and darker color that makes the cake look as rich as it tastes. Whatever you choose, make sure it's fresh — cocoa powder loses potency faster than you'd think, and that tin that's been sitting in your pantry since last Christmas isn't doing you any favors.
The vegetable oil versus butter debate ends here with oil taking the crown for ultimate moisture. Butter adds flavor but contains water that can create a slightly drier texture, while oil coats flour proteins more effectively, resulting in a tenderer crumb. Use a neutral oil like canola or vegetable — save your expensive olive oil for salad dressings where its flavor can shine. The oil quantity might seem high, but trust the chemistry here; it's what gives this cake its legendary moistness that lasts for days without getting stale.
The Texture Enhancers
Baking soda might seem like a minor player, but it's the difference between a cake that rises like a champion and one that sits in the pan like a chocolate frisbee. This recipe uses baking soda instead of baking powder because cocoa powder is naturally acidic, and baking soda needs acid to activate. The reaction creates carbon dioxide bubbles that give us lift and create that perfect domed top. Make sure your baking soda is fresh — if that box has been open for more than six months, it's lost significant potency and your cake will suffer.
Eggs provide structure, richness, and leavening power, but temperature matters more than most recipes mention. Cold eggs don't incorporate as smoothly, potentially leaving you with streaky batter and uneven texture. Room temperature eggs blend seamlessly, creating a homogeneous batter that bakes evenly. The yolks add fat for richness and emulsifiers that help oil and water-based ingredients play nicely together, while the whites provide protein for structure. Don't substitute with flax eggs or other vegan alternatives here — the chemistry won't work the same way.
The Flavor Amplifiers
Vanilla extract isn't just vanilla — it's a flavor enhancer that makes chocolate taste more chocolatey and strawberries taste more strawberry-y. Use real vanilla extract, not the imitation stuff that tastes like a chemistry experiment gone wrong. The alcohol burns off during baking, leaving behind complex flavor compounds that add depth you can't quite identify but definitely notice when they're missing. If you're feeling fancy, vanilla bean paste gives you those gorgeous flecks and an even more intense vanilla presence that plays beautifully with both chocolate and strawberry.
Fresh strawberries are the star of our buttercream show, but not all berries are created equal. Look for berries that smell like strawberry candy and have that deep red color all the way to the stem. Underripe berries taste like disappointment and won't give you that intense strawberry flavor we're after. This recipe uses a full cup of berries, reduced down to concentrate their flavor and natural sweetness. Frozen berries work in a pinch, but fresh will give you the brightest, most vibrant flavor that makes people ask what your secret is.
The Final Touch
Butter for the frosting needs to be at that perfect temperature where it yields slightly to pressure but doesn't feel greasy. Too cold and you'll get lumpy frosting that tears your cake apart, too warm and you'll have a sad, melty mess that slides off the sides. European-style butter with higher fat content creates silkier frosting, but regular butter works beautifully too. The key is patience — let it sit out for at least an hour before you start frosting, or cut it into small cubes to speed up the softening process.
Powdered sugar might seem straightforward, but the brand you choose affects texture more than you'd think. Cheaper brands often contain more cornstarch, which can give your frosting a slightly gritty texture. Sift it, even if you think it's unnecessary, because nothing ruins the experience of perfect buttercream like hitting a sugar lump. The quantity might seem excessive, but we're creating a frosting that's stable enough to pipe but light enough to complement the cake rather than overwhelming it.
Everything's prepped? Good. Let's get into the real action...
The Method — Step by Step
- Preheat your oven to 350°F (175°C) and position the rack in the center. This temperature sweet spot ensures your cake rises properly without burning the edges before the center is done. Grease two 9-inch round cake pans with butter or non-stick spray, then dust with cocoa powder instead of flour for extra chocolate flavor and to prevent any white residue on your finished cake. Line the bottoms with parchment paper circles — this isn't optional if you want your cakes to release cleanly without tearing.
- In a large bowl, whisk together the flour, cocoa powder, sugar, baking soda, and salt until they're as well combined as a championship relay team. This dry mixing step prevents cocoa lumps that create bitter pockets in your finished cake. Use a whisk rather than a spoon — it breaks up cocoa clumps more effectively and incorporates air that helps with the final texture. Take your time here; rushing this step is like building a house on a shaky foundation.
- In a separate bowl, whisk together the oil, eggs, and vanilla until the mixture looks glossy and well combined. The mixture should be smooth and slightly lighter in color from the air you've incorporated. Don't overbeat — you're not trying to create meringue, just ensuring everything is evenly distributed. This emulsification step is crucial because properly combined wet ingredients mix more easily into the dry, preventing overmixing that leads to tough cake.
- Create a well in the center of your dry ingredients and pour in the wet mixture. Using a spatula, fold the ingredients together with slow, deliberate strokes, scraping the bottom and sides of the bowl. Stop mixing as soon as you see no more dry flour streaks — overmixing develops gluten and gives you chocolate bread instead of chocolate cake. The batter should be thick but pourable, like a rich chocolate mousse, with a glossy sheen that promises good things to come.
- Divide the batter evenly between your prepared pans, tapping them gently on the counter to release any large air bubbles. Smooth the tops with an offset spatula or the back of a spoon, creating a slight indentation in the center — this helps the cakes bake level instead of doming up in the middle. The batter should fill the pans about two-thirds full, giving them room to rise without overflowing. If you have extra batter, make a few cupcakes rather than overfilling your pans.
- Bake for 28-32 minutes, rotating the pans halfway through for even browning. The cakes are done when they spring back lightly when touched in the center, and a toothpick inserted comes out with just a few moist crumbs attached — not wet batter, but not completely clean either. The edges will start pulling away from the sides of the pan, and your kitchen will smell like chocolate heaven. Resist the urge to open the oven door for the first 20 minutes, or your cakes might collapse like a house of cards.
- Cool the cakes in their pans on a wire rack for 10 minutes — this brief rest allows the structure to set, preventing the cakes from breaking when you turn them out. Run a thin knife around the edges to loosen any stuck spots, then invert onto the rack. Remove the parchment paper and let cool completely, about 1 hour. Trying to frost warm cake is like trying to spread butter on toast fresh from the volcano — it ends in tears and melted frosting everywhere.
- While the cakes cool, make your strawberry buttercream. Puree the strawberries in a food processor or blender until completely smooth, then press through a fine-mesh strainer to remove seeds — unless you enjoy strawberry-flavored confetti in your frosting. In a small saucepan, simmer the puree over medium heat until reduced by half, about 10 minutes, stirring occasionally. This concentrates the flavor and removes excess water that would make your frosting weep like a disappointed parent.
- Beat the butter in a stand mixer on medium-high speed until pale and fluffy, about 3 minutes. Stop and scrape down the bowl twice during mixing — butter loves to hide in clumps that won't incorporate properly. Add the cooled strawberry reduction and beat until combined, then gradually add powdered sugar, one cup at a time, beating well after each addition. The frosting should be light, fluffy, and spreadable, with a beautiful natural pink color that looks like strawberry ice cream in frosting form.
That's it — you did it. But hold on, I've got a few more tricks that'll take this to another level...
Insider Tricks for Flawless Results
The Temperature Rule Nobody Follows
Room temperature isn't just a suggestion — it's the difference between success and a sad, lumpy mess. Cold eggs don't incorporate evenly, leaving you with streaky batter that bakes up with a marbled appearance instead of a smooth, even crumb. Cold butter for frosting won't whip up properly, giving you dense, greasy frosting that tears your cake apart faster than a toddler with a birthday present. Take everything out of the fridge 30-60 minutes before you start, or speed things up by placing eggs in warm (not hot) water for 5 minutes and cutting butter into small cubes.
But here's the thing most recipes don't mention — your kitchen's temperature matters too. If you're baking in a freezing kitchen in winter, your "room temperature" ingredients might still be too cold. Conversely, if it's the height of summer and your kitchen feels like a sauna, your butter might be too soft to whip properly. Aim for ingredients that feel neither cool nor warm to the touch, like they've been sitting in a perfectly climate-controlled bakery.
Why Your Nose Knows Best
Your sense of smell is your most underutilized baking tool, and I'm not talking about the obvious "it smells done" cue. When cocoa powder hits hot fat, it should smell like the most expensive chocolate shop in Paris, rich and complex with hints of coffee and vanilla. If it smells flat or one-dimensional, your cocoa powder is past its prime and your cake will taste like disappointment. The same goes for your strawberry buttercream — as the berries reduce, they should fill your kitchen with the concentrated essence of strawberry fields in summer.
Learn to trust these olfactory cues because they happen before visual signs. The moment your cake starts smelling like chocolate brownies instead of raw batter, it's probably 2-3 minutes from perfect doneness. If your strawberry reduction smells like strawberry jam rather than fresh berries, you've gone too far and lost that bright, fresh flavor we're after. A friend tried skipping this sensory step once — let's just say her cake tasted like chocolate cardboard and her frosting resembled strawberry sadness.
The 5-Minute Rest That Changes Everything
After you add the wet ingredients to the dry, let the batter rest for exactly 5 minutes before pouring it into pans. This brief pause allows the flour to fully hydrate, creating a smoother batter and more tender crumb. It also gives the baking soda time to start its chemical reaction, beginning the leavening process that creates a finer, more even texture. I discovered this trick by accident when my doorbell rang mid-mix, and the resulting cake was so much better that I made it a permanent step.
This rest period also prevents the overmixing that creates tough, rubbery cake. When flour first hits liquid, it takes a moment to fully absorb moisture. If you keep stirring while it's still absorbing, you end up adding more strokes than necessary, developing gluten and creating that unpleasant chewiness that makes people politely decline seconds. Five minutes of patience gives you the tender crumb that makes people close their eyes in dessert bliss.
The Frosting Consistency Secret
Perfect buttercream consistency is like finding the sweet spot on a luxury car seat — too firm and it's uncomfortable, too soft and you sink right through. The secret lies in the temperature of your strawberry reduction and the order of mixing. Your strawberry puree must be completely cool before adding it to butter, or you'll melt the butter and create a greasy, separated mess that no amount of powdered sugar can fix. I learned this the hard way during a July heatwave when my "slightly warm" reduction turned my frosting into strawberry soup.
The mixing order matters too. Beat your butter first until it's pale and fluffy, then add the strawberry reduction, and finally the powdered sugar. Adding sugar before the strawberries makes it harder to incorporate the fruit evenly, leaving you with streaky frosting that tastes like vanilla buttercream with strawberry patches. Take your time with each step — rushing here is like trying to spread cold butter on toast; technically possible but unnecessarily frustrating.
The Assembly Game-Changer
Here's where most home bakers accidentally sabotage their beautiful work: they frost warm cake. Even slightly warm cake will melt your carefully crafted buttercream, creating a sliding disaster that looks like your cake is crying pink tears. But here's the insider trick — you can actually assemble this cake slightly warm if you do a "crumb coat" first. This thin layer of frosting acts like insulation, protecting your final coat from the cake's residual heat.
Spread a thin layer of frosting over the cake, catching all the crumbs in this sacrificial layer, then refrigerate for 15 minutes. This sets the crumb coat and cools the cake completely. Now you can add your final, perfect layer of frosting without any crumbs or melting issues. It's like priming a wall before painting — an extra step that makes the difference between amateur and professional results.
Creative Twists and Variations
This recipe is a playground. Here are some of my favorite ways to switch things up:
Raspberry Chocolate Decadence
Swap the strawberries for fresh raspberries to create a buttercream with a more sophisticated, slightly tart edge that pairs beautifully with dark chocolate. The natural pectin in raspberries creates a slightly thicker reduction, giving you frosting that holds its shape even better for intricate piping. This version tastes like chocolate raspberry truffles in cake form and makes grown adults speak in hushed, reverent tones about dessert.
Mocha Madness
Add 2 tablespoons of instant espresso powder to the dry ingredients for a mocha version that turns this into the ultimate coffee break cake. The espresso amplifies the chocolate flavor without making it taste like coffee — it just adds depth and complexity that makes people ask what your secret ingredient is. Top with chocolate-covered espresso beans for the coffee addicts in your life who believe dessert should come with caffeine.
Salted Caramel Chocolate
Replace the strawberry buttercream with salted caramel frosting, and drizzle extra caramel over the top for a sweet-salty masterpiece. The caramel's buttery richness complements the chocolate cake like they were made for each other, while flaky sea salt sprinkled on top adds sophisticated crunch and prevents the sweetness from becoming overwhelming. This version disappears fastest at adult gatherings where people claim they "don't really like sweets."
Mint Chocolate Dream
Add 1/2 teaspoon of peppermint extract to the buttercream instead of strawberries for a grasshopper-style cake that's perfect for winter holidays. The cool mint cuts through the rich chocolate like a breath of fresh air, creating a refreshing dessert that doesn't feel heavy. Crushed candy canes or Andes mints pressed into the sides add festive flair and pleasant crunch that makes this taste like Christmas regardless of the season.
Black Forest Remix
Fold chopped cherries into the batter and replace the strawberry buttercream with whipped cream frosting for a black forest-inspired version. The fruit adds moisture and bursts of tart flavor that prevent the cake from feeling too rich, while the lighter frosting keeps things from becoming a chocolate overload. This version feels somehow sophisticated and playful at the same time, like wearing a tuxedo with sneakers.
Triple Chocolate Threat
Add 1/2 cup of mini chocolate chips to the batter and replace the strawberry buttercream with chocolate cream cheese frosting for the ultimate chocolate lover's dream. The mini chips distribute more evenly than regular chips, giving you little pockets of melted chocolate throughout the cake. This version is for those days when you need chocolate wrapped in chocolate topped with more chocolate — no judgment, we've all been there.
Storing and Bringing It Back to Life
Fridge Storage
Store your finished cake in an airtight container in the refrigerator for up to 5 days, though I dare you to make it last that long. The buttercream acts like protective armor, keeping the cake moist even in the dry environment of your fridge. Bring slices to room temperature for 15-20 minutes before serving — cold buttercream is like eating flavored butter, and nobody wants that. If your fridge is particularly drying, place a piece of parchment paper directly on the cut surfaces before covering to prevent them from becoming stale.
Freezer Friendly
This cake freezes beautifully for up to 3 months, making it perfect for emergency dessert situations or preparing ahead for special occasions. Wrap individual slices in plastic wrap, then aluminum foil, and store in a freezer bag. Thaw overnight in the refrigerator, then let come to room temperature before serving. The texture stays remarkably close to fresh, though the buttercream might be slightly less fluffy. For best results, freeze the cake layers and strawberry buttercream separately, then assemble after thawing.
Best Reheating Method
Individual slices can be revived with a 10-second microwave burst, but don't overdo it or you'll have chocolate lava cake whether you wanted it or not. For the whole cake, let it sit at room temperature for 1-2 hours until the buttercream softens. If you need to speed things up, place a slightly warm (not hot) towel around the cake container for 10 minutes. Never reheat frosted cake in the oven unless you want strawberry buttercream soup running down your beautiful cake.