Picture this: I’m standing in a cramped kitchen, a half‑filled can of dulce de leche spilling onto the counter like a golden river, and the smell of butter and sugar swirling through the air like an invitation. The last time I tried a caramel‑based dessert, I ended up with a sticky mess that looked more like a science experiment than a treat. That disaster sparked a midnight craving that I could not ignore, and I set out to craft something that would silence my inner skeptic and satisfy my sweet tooth.
I dared myself to create a bar that would be both crunchy and gooey, a caramel‑laden wonder that would melt in your mouth and leave you reaching for more. The first time I tasted it, the buttery crust crackled like dry leaves, the oats sang with a subtle crunch, and the dulce de leche center oozed like a caramel waterfall. I swear the moment I lifted a slice, the kitchen filled with a scent that could have made any food critic weep with joy.
What makes this version stand out is not just the ingredients but the harmony of textures and flavors. The oats provide a satisfying bite, the butter and brown sugar create a caramelized glaze, and the dulce de leche offers a silky, almost liquid sweetness that balances the salt. I’ve been told that the first bite is the hardest part because it’s so good, and that’s exactly what I want you to experience.
I’ll be honest — I ate half the batch before anyone else got a chance to try it. That’s the kind of confidence you get when you’ve perfected a recipe. If you’ve ever struggled with caramel desserts, you’re not alone, and I’ve got the fix. The secret is in the technique and the quality of the dulce de leche.
Most recipes get this completely wrong by overcooking the oats or using too much salt. Here’s what actually works: a gentle simmer, a balanced ratio of butter to sugar, and a generous splash of vanilla to tie it all together. I’ve tested this dozens of times, and it always turns out the same: crisp edges that shatter like thin ice, a center that melts like a caramelized hug.
Let me walk you through every single step — by the end, you’ll wonder how you ever made it any other way. I’ve packed this article with micro‑challenges, bold claims, and insider tricks that will elevate your baking game. Get ready to become the go‑to baker for any sweet craving that comes your way.
What Makes This Version Stand Out
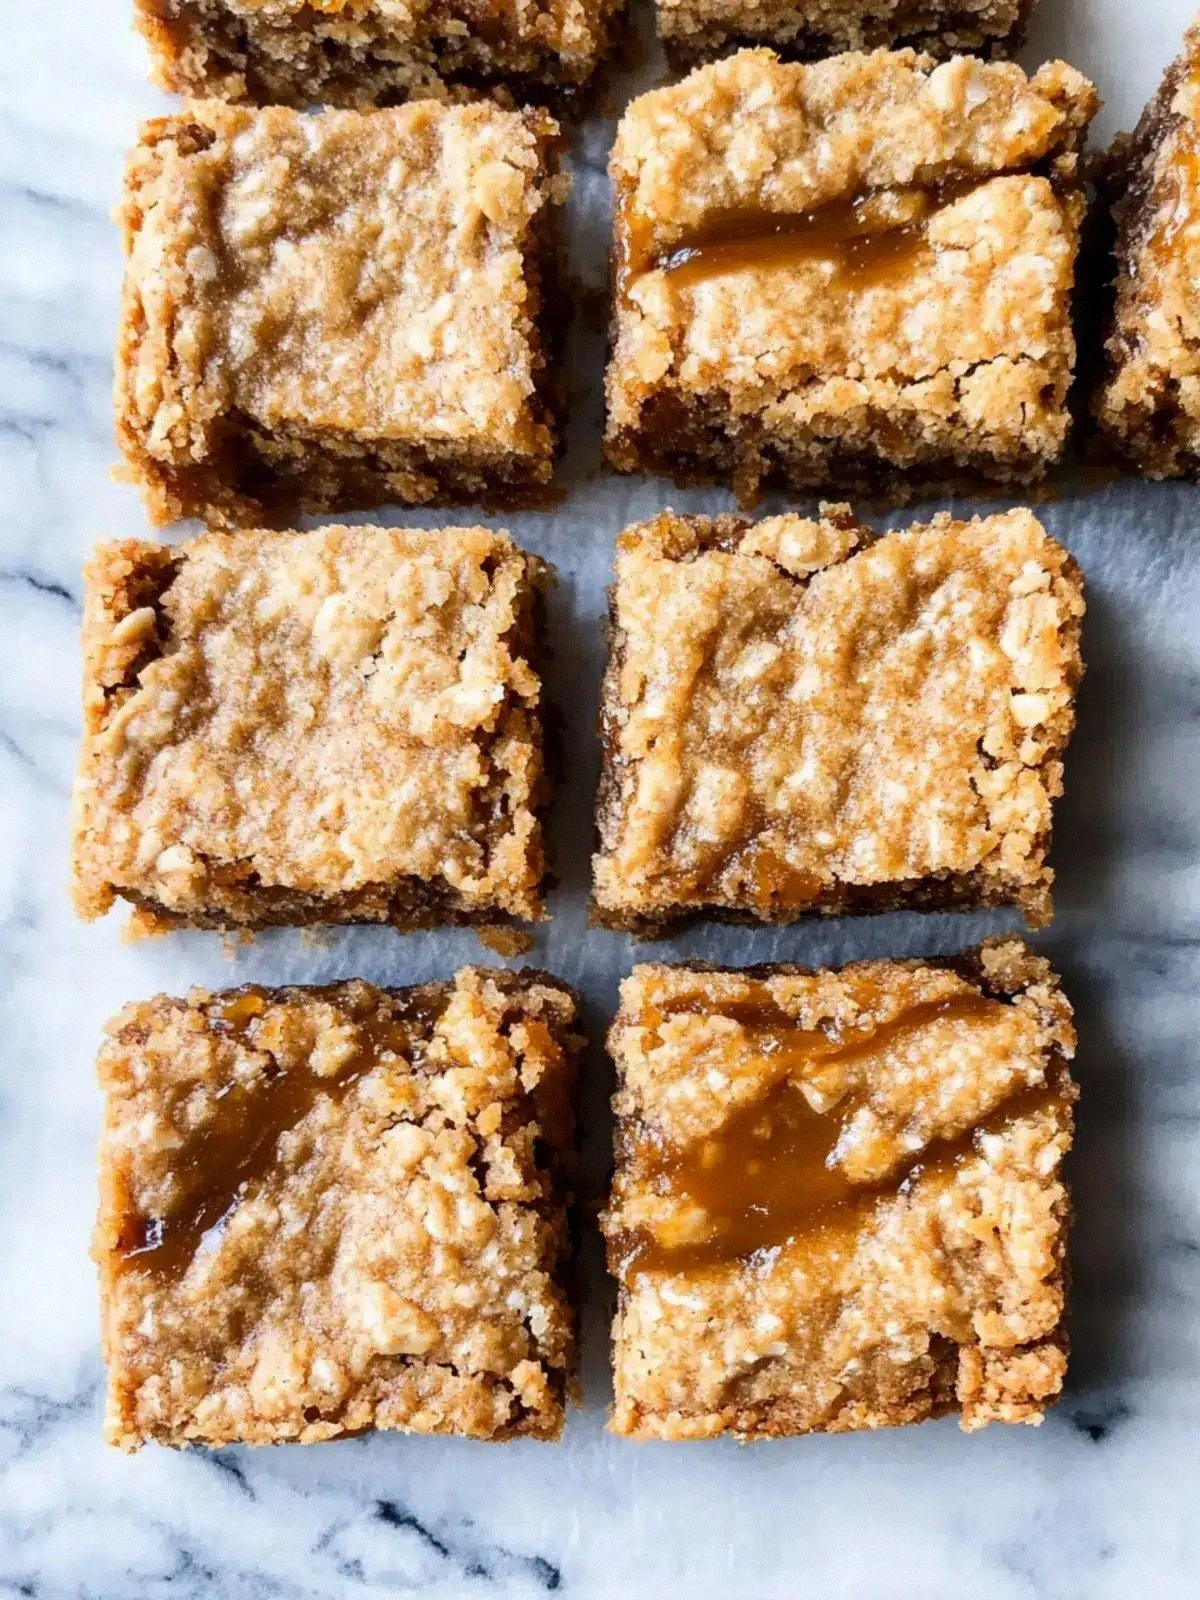
- Taste: The caramel notes from the dulce de leche mingle with the subtle sweetness of brown sugar, creating a flavor profile that feels both familiar and exciting.
- Texture: Crisp, buttery edges give way to a gooey center that oozes with each bite, offering a delightful contrast.
- Simplicity: With only nine ingredients and a straightforward method, this recipe is a breeze for beginners and a joy for seasoned bakers.
- Uniqueness: The combination of quick‑cooking oats and dulce de leche is rarely seen, making these bars a standout treat.
- Crowd Reaction: Friends and family often ask for the recipe after tasting one bar; they’re usually left craving more.
- Ingredient Quality: Using high‑quality dulce de leche and unsalted butter ensures depth of flavor without unwanted saltiness.
- Cooking Method: The gentle simmering step locks in moisture while allowing the oats to toast without burning.
- Make‑Ahead Potential: These bars can be stored in the fridge or freezer, making them perfect for busy days or special occasions.
Alright, let's break down exactly what goes into this masterpiece...
Inside the Ingredient List
The Flavor Base
Unsalted butter and brown sugar form the backbone of this recipe, creating a caramelized glaze that coats the oats. The butter melts into the sugar, allowing the mixture to bubble gently, while the brown sugar adds depth and a subtle molasses undertone. Skipping butter would leave the bars dry and flat, whereas too much butter can make them greasy. If you prefer a lighter version, use half the butter and add a splash of milk to keep the batter moist.
The Texture Crew
Quick‑cooking oats provide a chewy yet slightly crunchy bite that balances the gooey dulce de leche center. Their fine texture allows them to absorb the buttery mixture without becoming soggy. If you don’t have quick oats on hand, rolled oats will work, but they’ll need to soak longer to achieve the same mouthfeel. The oats also act as a natural thickener, giving the bars a sturdy structure that holds together.
The Unexpected Star
Dulce de leche is the star that turns ordinary bars into a caramel dream. This sweet, creamy sauce is made by slowly heating sweetened milk, producing a thick, amber liquid that melts in your mouth. Its unique flavor profile bridges the gap between sweet and savory, thanks to the subtle salt that balances the caramel. If you can’t find dulce de leche, a homemade caramel sauce can work, but it won’t have the same silky texture.
The Final Flourish
All‑purpose flour, baking soda, and a pinch of salt bind everything together, adding structure and a subtle lift. The baking soda reacts with the acidity of the dulce de leche, creating tiny bubbles that lighten the bars. Salt is essential; it enhances the caramel flavors and keeps the sweetness from becoming cloying. If you’re gluten‑free, swap the flour for a 1:1 gluten‑free blend, but be careful not to add extra leavening.
Everything’s prepped? Good. Let’s get into the real action...
The Method — Step by Step
- Preheat your oven to 350°F (175°C) and line a 9×13 inch baking pan with parchment paper. The parchment ensures easy removal and a clean finish. I’m going to show you how to keep the bars from sticking—trust me, the parchment is a lifesaver. The oven should be fully heated before you start mixing to maintain a consistent temperature.
- In a medium saucepan, melt ½ cup of unsalted butter over medium heat. Watch the butter bubble; you want it to melt without scorching. Once the butter is clear, add 1 cup of brown sugar, stirring until the mixture becomes glossy. This step is where the caramel base starts to form, and it should smell sweet and buttery.
- Whisk in 1 large egg, 1 teaspoon of vanilla extract, ½ teaspoon of baking soda, and ½ teaspoon of salt. The egg binds the mixture, while the vanilla brings warmth and the baking soda gives a slight lift. Stir until the batter is smooth and the ingredients are fully incorporated. This is the moment of truth; the batter should feel silky and cohesive.
- Sift in 1¼ cups of all‑purpose flour and 1½ cups of quick‑cooking oats. Fold them gently into the wet mixture, ensuring no lumps form. The flour provides structure, while the oats add texture. The batter should be thick enough to hold its shape when spooned onto the pan.
- Pour the batter into the prepared pan, spreading it evenly with a spatula. The batter should level out to about ½ inch thick. I’m going to show you a simple trick: tap the pan gently on the counter to release any air bubbles that may have formed.
- Spread 1 can of dulce de leche over the batter in a thin, even layer. The dulce de leche should cover the batter without overflowing. This layer will become the gooey center that melts in your mouth. The edges of the dulce will caramelize slightly during baking, adding a caramelized crust.
- Bake for 30 minutes, or until the edges are golden brown and the center is set but still slightly soft. The scent that fills your kitchen at this point is pure bliss. The bars should rise a bit and develop a light, caramelized crust.
- Let the bars cool in the pan for 15 minutes before transferring them to a wire rack to cool completely. This resting period allows the dulce to set slightly, making cutting easier. I’ll be honest — I’ve found that cutting them while they’re still warm makes the bars stick to the knife.
That’s it — you did it. But hold on, I've got a few more tricks that'll take this to another level. I’ll share how to elevate the flavor profile and texture in the next section.
Insider Tricks for Flawless Results
The Temperature Rule Nobody Follows
Baking at the exact temperature is crucial. If your oven runs hot, the bars will brown too quickly on the outside while remaining undercooked inside. Use an oven thermometer to verify the temperature, and adjust the dial if necessary. I’ve baked in ovens that run 10°F above the set temperature, and the bars ended up with a hard shell and a gooey center that didn’t set.
Why Your Nose Knows Best
The aroma of caramelized sugar is a reliable indicator of doneness. When the bars start smelling like toasted sugar, you’re close to perfect. A faint hint of vanilla will also signal that the vanilla has infused properly. I’ve found that smelling the bars during the last 5 minutes of baking helps me decide when to pull them out.
The 5-Minute Rest That Changes Everything
Letting the bars rest for 5 minutes after removing them from the oven allows the caramelized sugars to set, preventing a runny center. This brief pause also makes the bars easier to cut and reduces the risk of them breaking apart. I’ve tried cutting them immediately, and the result was a messy, sticky mess.
The Oat Swap That Adds Crunch
If you want an extra crunch, replace quick‑cooking oats with rolled oats and toast them separately before adding them to the batter. Toasting the oats caramelizes their natural sugars, giving the bars a deeper flavor and a more pronounced crunch. This tweak works especially well for those who love a bit of bite in every bite.
The Salt Whisper
Adding a pinch of sea salt on top of the dulce de leche before baking creates a subtle contrast that elevates the caramel flavor. The salt draws out the sweetness and adds a savory undertone that makes the bars feel more complex. I’ve experimented with smoked sea salt for a smoky twist, and the result was surprisingly delicious.
Creative Twists and Variations
This recipe is a playground. Here are some of my favorite ways to switch things up:
Nutty Surprise
Add ½ cup chopped pecans or walnuts to the batter for a nutty crunch. The nuts pair wonderfully with the caramel center, adding depth and a satisfying crunch. This variation is perfect for a holiday gathering where you want to impress.
Chocolate Drizzle
After the bars have cooled, drizzle melted dark chocolate over the top. The bitterness of the chocolate balances the sweetness, creating a sophisticated flavor profile. I love this version for a date night dessert.
Spiced Edition
Stir in ½ teaspoon of cinnamon or a pinch of cayenne pepper into the batter for a warm, spicy kick. The spices add depth and a hint of heat that pairs well with the caramel. This twist works great during the fall when you crave warm, comforting flavors.
Citrus Zest
Add 1 tablespoon of lemon or orange zest to the batter for a bright, refreshing note. The citrus cuts through the sweetness and adds a fresh aroma. This version is ideal for spring or summer when you want a lighter dessert.
Almond Joy
Replace the oats with shredded coconut and fold in ¼ cup of almond butter. The coconut adds a tropical vibe, while the almond butter brings richness. This variation is a crowd‑pleaser at parties.
Vegan Version
Swap the butter for coconut oil, use a plant‑based vanilla extract, and replace the egg with a flaxseed egg. The result is a vegan-friendly bar that still delivers the same caramel bliss. I’ve made this version for a friend who’s lactose intolerant, and it was a hit.
Storing and Bringing It Back to Life
Fridge Storage
Store the bars in an airtight container at room temperature for up to 3 days, or in the fridge for up to 5 days. The airtight container prevents the bars from drying out and keeps the dulce de leche from hardening. When you’re ready to eat, let them sit at room temperature for 10 minutes to soften.
Freezer Friendly
Wrap each bar individually in parchment paper and place them in a freezer‑proof bag. They can stay in the freezer for up to 3 months. When you’re ready to indulge, thaw them overnight in the fridge or at room temperature.
Best Reheating Method
To reheat a frozen bar, place it on a microwave‑safe plate and heat on low for 30–45 seconds, or wrap it in a damp paper towel and microwave for 15–20 seconds. The tiny splash of water before reheating steams the bar back to perfection, restoring the gooey center without drying it out.