I remember the night I was supposed to impress a group of foodie friends with a “quick” dinner, only to find my pantry looking more like a post‑apocalyptic wasteland than a kitchen. The only thing that survived the chaos was a bag of quinoa, a handful of bell peppers, and a stubborn Instant Pot that had seen better days. I stared at the recipe book, feeling the heat of disappointment rise like steam from a pot, and decided to rewrite the narrative: this would be a bowl that sings, not a recipe that rattles.
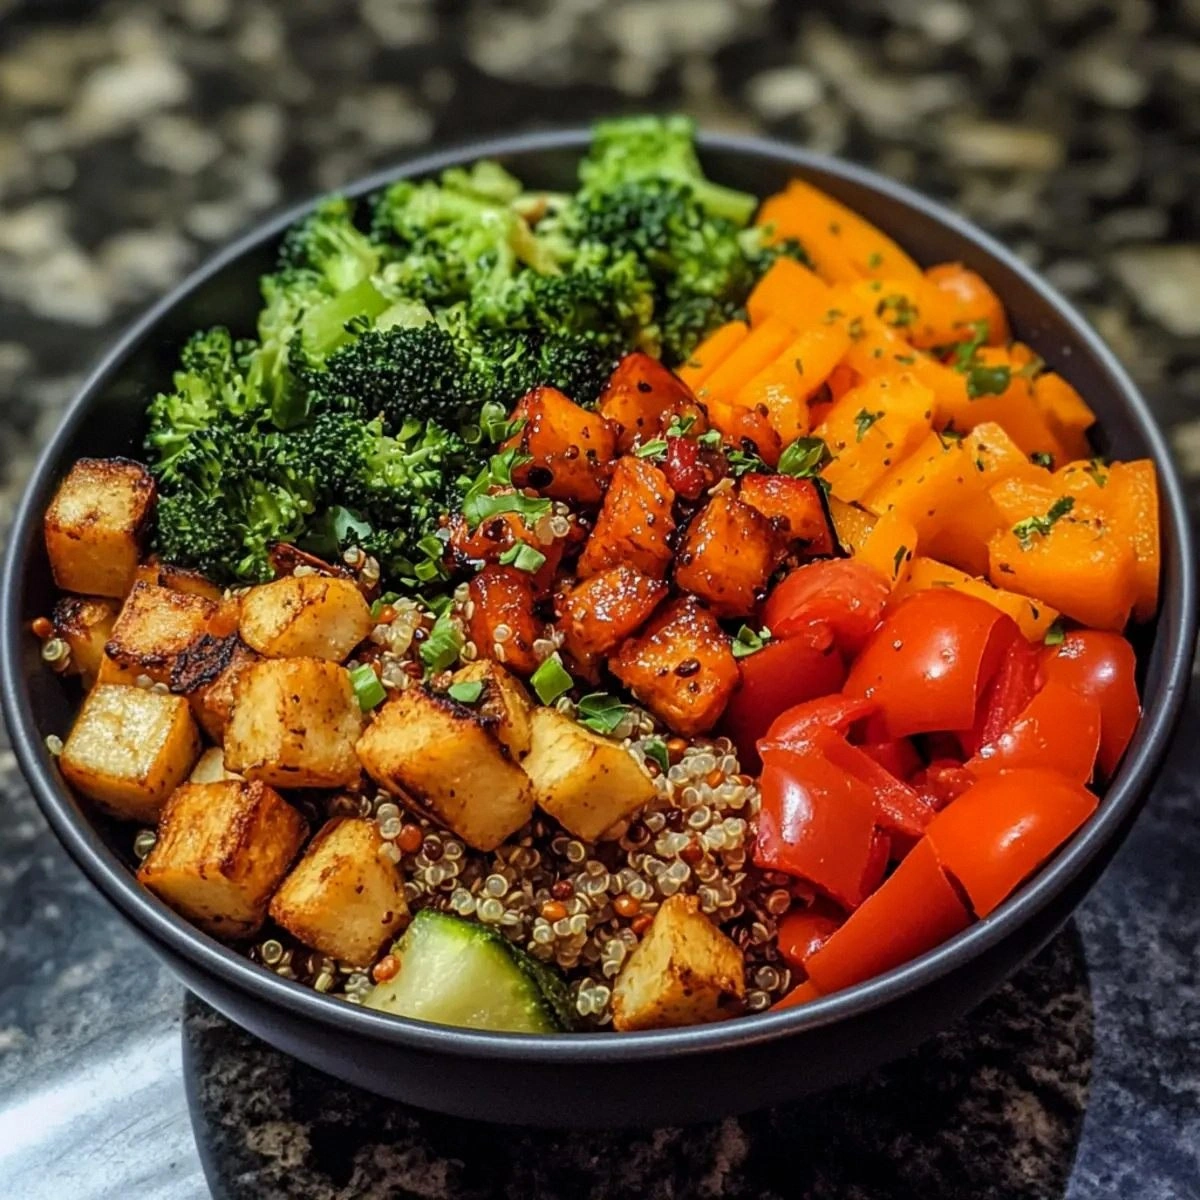
Picture the scent of sautéed garlic and the gentle sizzle of olive oil as the vegetables dance in the pot. The colors burst—crimson peppers, emerald zucchini, orange carrots—each a note in a visual symphony. The sound is a soft crackle that signals the start of something comforting, something that will transform a simple meal into a moment of pure culinary joy. The texture begins to tease your imagination; you can almost taste the tender quinoa, the crisp edges of the veggies, the silky spinach that will melt into the broth.
Why does this version feel like a revelation? Because it marries the Instant Pot’s pressure cooking prowess with fresh, vibrant vegetables, turning a mundane grain into a canvas of flavor. The quinoa absorbs the bright lemon zest and the herbaceous whisper of cilantro, creating a dish that feels both wholesome and indulgent. The method is straightforward—no fancy gadgets, no hours of chopping, just a handful of ingredients and a few minutes of trust in your appliance. I dare you to taste this and not go back for seconds.
Most recipes get this completely wrong by overcooking the vegetables or underseasoning the grains. Here, the Instant Pot’s precise timing ensures the veggies stay bright and slightly firm, while the quinoa remains fluffy and aromatic. The addition of a splash of lemon juice right before serving lifts the entire dish, giving it a fresh lift that feels like a breath of spring. Picture yourself pulling this out of the pot, the kitchen smelling incredible, the steam curling like a fragrant halo. Stay with me here—this is worth it.
Let me walk you through every single step—by the end, you'll wonder how you ever made it any other way. The journey starts with a quick sauté that builds depth, moves to a pressure cook that locks in flavor, and ends with a finishing flourish of herbs that turns the bowl into a masterpiece. I’ve already taken notes on what to keep, what to tweak, and what to celebrate. This is hands down the best version you'll ever make at home, and I’m excited to share the secrets that make it so.
What Makes This Version Stand Out
- Flavor: The bright citrus notes from lemon juice cut through the earthiness of quinoa, creating a balanced palate that feels both fresh and comforting. The garlic adds a punch that lingers without overpowering the vegetables.
- Texture: Each vegetable retains its individual bite; the carrots stay crisp, the zucchini slightly tender, and the spinach melts into a silky finish. The quinoa remains fluffy, not gummy, thanks to the precise pressure cooking time.
- Time Efficiency: The entire process takes just 45 minutes, including prep, so you can enjoy a wholesome meal without sacrificing your evening plans.
- Ingredient Quality: Using fresh, seasonal produce elevates the dish, and the quinoa’s nutty undertone provides a satisfying base that complements every element.
- Health Profile: Packed with plant‑based protein, fiber, and essential vitamins, this bowl satisfies both your body and your taste buds.
- Make‑ahead Potential: The dish keeps well in the fridge for up to three days, making it an excellent option for meal prep or a quick lunch.
Inside the Ingredient List
The Flavor Base
Olive oil is the first actor on stage, providing a silky medium that carries the garlic’s aroma and the lemon’s zing. It also helps the quinoa absorb liquid without becoming mushy. Skipping the oil may lead to a dry, uncoated grain that feels underseasoned. If you prefer a lighter version, substitute half the olive oil with vegetable broth, but be ready for a slightly less robust flavor.
Garlic is the aromatic backbone; its sharpness is tempered by the heat of the Instant Pot, releasing a subtle sweetness that lingers on the tongue. A single clove is enough to infuse the entire pot, but if you love garlic, feel free to double it. Be careful not to overcook it, or it will turn bitter. A quick sauté before sealing the pot preserves its delicate notes.
Lemon juice is the secret weapon that brightens the dish, cutting through the earthiness of quinoa and the sweetness of the vegetables. Adding it right before serving keeps the citrus flavor vibrant and prevents it from becoming muted during the cooking process. If you’re not a fan of lemon, a splash of lime or a drizzle of apple cider vinegar can offer a similar lift.
The Texture Crew
Bell peppers bring a sweet crunch that contrasts beautifully with the softer zucchini and carrots. Their vibrant color adds a visual pop, making the dish feel celebratory. If you prefer a milder flavor, choose red or yellow peppers; they’ll impart a sweeter profile. Keep the seeds and membranes in mind—removing them reduces bitterness and improves texture.
Zucchini is a versatile vegetable that absorbs flavors without losing its tender bite. It’s a great way to bulk up the dish while keeping calorie count low. Slice it into rounds or half‑moons for a uniform cooking time. If you’re short on zucchini, try swapping it with yellow squash; the result is almost indistinguishable.
Carrots add a subtle sweetness and a satisfying crunch that remains even after pressure cooking. Their orange hue brings warmth to the bowl, making it feel like a hug on a plate. If you’re craving a bit of heat, dice the carrots finely so they cook faster and blend more seamlessly with the other veggies.
The Unexpected Star
Spinach is the green that melts into the quinoa, creating a velvety texture that coats every grain. Its mild taste allows the other flavors to shine while adding a dose of iron and vitamins. Adding spinach at the end of cooking ensures it retains its vibrant green color and doesn't become too watery. If you’re a fan of leafy greens, feel free to add kale or Swiss chard for a different twist.
The Final Flourish
Fresh herbs—cilantro or parsley—are the finishing touch that brings a burst of freshness. Their bright, slightly peppery notes lift the entire bowl, making it feel light and airy. Chop the herbs finely to distribute them evenly. If you’re allergic or simply don’t like cilantro, mint or basil can be used as alternatives.
Everything’s prepped? Good. Let’s get into the real action and watch the flavors mingle.
The Method — Step by Step
- Prep the Vegetables: Start by washing all produce thoroughly. Dice the bell peppers into bite‑sized cubes, slice zucchini into half‑moons, and peel & dice carrots into small pieces. Chop the spinach into manageable chunks and mince the garlic clove finely. This step sets the stage for even cooking and ensures each bite is balanced.
- Saute the Aromatics: Turn the Instant Pot to the sauté mode and add a tablespoon of olive oil. Once the oil shimmers, add the minced garlic and sauté for 30 seconds until fragrant, being careful not to burn it. The aroma should fill the kitchen, signaling that the base is ready.
- Add the Vegetables: Toss in the diced bell peppers, zucchini, and carrots, stirring to coat them in oil and garlic. Let them cook for 2 minutes; you want them to start softening but still hold some bite. This brief sauté develops a subtle caramelization that enriches the flavor profile.
- Introduce the Quinoa: Rinse the quinoa under cold water until the water runs clear, then add it to the pot. Stir to combine, ensuring each grain is coated with the sautéed mixture. The quinoa will absorb the flavors and start to toast slightly, adding a nutty undertone.
Add 1.5 cups of vegetable broth, a tablespoon of lemon juice, and pinch of salt and pepper. Stir gently to combine. The liquid should just cover the quinoa and vegetables; this is crucial for proper pressure cooking. - Seal and Cook: Secure the Instant Pot lid and set the valve to seal. Choose the manual or pressure cook setting on high for 8 minutes. The timer will start counting down, and you’ll hear the gentle hiss of steam as the pot builds pressure.
Once the cooking cycle ends, allow the pressure to release naturally for 10 minutes. This step lets the quinoa finish its texture transformation and prevents the vegetables from overcooking. After 10 minutes, carefully quick‑release any remaining pressure. Open the lid and stir in the spinach. The residual heat will wilt the greens instantly, keeping them bright and green. Sprinkle the fresh herbs, stir, and taste. Adjust seasoning if needed before serving.
That’s it—you did it. But hold on, I’ve got a few more tricks that will take this bowl from great to unforgettable.
Insider Tricks for Flawless Results
The Temperature Rule Nobody Follows
Most people rely solely on the Instant Pot’s preset settings, but adjusting the temperature of the sauté phase can drastically alter flavor. Start the sauté at medium‑high to quickly brown the garlic, then lower to medium to prevent burning. This subtle tweak ensures a deeper caramelized flavor without sacrificing texture.
Why Your Nose Knows Best
The aroma of the sautéed garlic and bell peppers is your best indicator of readiness. When the garlic turns golden and the peppers release their fragrance, the base is perfect. Trust your nose; it will guide you to a more aromatic dish than the timer alone.
The 5‑Minute Rest That Changes Everything
After the pressure release, let the pot sit for an additional 5 minutes before opening. This rest period allows the quinoa to settle and the flavors to meld. The result is a bowl with a more cohesive taste profile and a pleasing, slightly thicker consistency.
The Secret of the Lemon
Adding lemon juice at the very end, just before serving, preserves its bright acidity. If you add it earlier, the heat will mellow the citrus notes, leading to a muted flavor. A squeeze of lemon at the table adds a fresh zing that elevates every bite.
The Final Herb Shuffle
Chop the herbs finely and sprinkle them just before serving. This technique keeps their bright color and ensures the flavor is distributed evenly. If you prefer a more pronounced herb flavor, add a handful of fresh herbs directly into the pot during the last 2 minutes of cooking.
Creative Twists and Variations
This recipe is a playground. Here are some of my favorite ways to switch things up:
Spicy Southwest Bowl
Add a teaspoon of cumin and a pinch of cayenne during the sauté. Toss in a handful of corn kernels for sweetness and crunch. Finish with a dollop of Greek yogurt and a sprinkle of shredded cheddar. This version delivers a bold, smoky flavor that pairs perfectly with a cool avocado slice.
Mediterranean Delight
Swap the lemon juice for a splash of balsamic vinegar. Add chopped sun‑dried tomatoes and kalamata olives for briny depth. Finish with crumbled feta and a drizzle of extra‑virgin olive oil. The result is a bowl that feels like a sunny afternoon in the Mediterranean coast.
Asian Fusion Twist
Replace the vegetable broth with coconut milk and a splash of soy sauce. Stir in diced tofu cubes and a handful of sliced bamboo shoots. Garnish with sliced green onions and toasted sesame seeds. The creamy, umami flavors create a comforting, Asian‑inspired bowl.
Protein‑Packed Powerhouse
Add a scoop of cooked chickpeas or lentils for extra protein. Stir in a tablespoon of tahini for creaminess and a nutty undertone. Finish with a squeeze of lime and a handful of chopped cilantro. This variation turns the bowl into a complete meal that satisfies hunger and nutrition.
Breakfast Boost
Serve the quinoa bowl with a fried or poached egg on top. Drizzle with hot sauce and sprinkle with chives. The protein from the egg pairs with the hearty grains for a satisfying breakfast or brunch. This version is perfect for those who crave a savory start to the day.
Vegan Superfood Mix
Use a plant‑based protein powder (like pea or hemp) to stir into the quinoa after cooking. Add a handful of pumpkin seeds for crunch and a boost of omega‑3s. Finish with a drizzle of tahini lemon sauce. This bowl becomes a powerhouse of nutrients for vegans and vegetarians alike.
Storing and Bringing It Back to Life
Fridge Storage
Cool the bowl completely before transferring it to an airtight container. Store in the refrigerator for up to three days. The quinoa and vegetables will retain their texture and flavor, and the fresh herbs will stay vibrant. When ready to eat, simply reheat in the microwave or on the stovetop.
Freezer Friendly
For longer storage, portion the bowl into freezer‑safe containers and freeze for up to one month. Thaw overnight in the refrigerator before reheating. A splash of water or broth during reheating prevents the quinoa from becoming dry.
Best Reheating Method
Reheat in a skillet over medium heat, stirring frequently, until the bowl reaches 165°F. Alternatively, microwave on high for 2 minutes, then stir and add a teaspoon of water or broth to maintain moisture. The quinoa will regain its fluffy texture, and the vegetables will stay tender.