I remember that Saturday morning like it was yesterday. My kitchen was a battlefield: flour on the counter, a half‑baked loaf of bread that smelled like disappointment, and a stubborn craving for something sweet and comforting that I couldn't quite name. I had just tried a classic French toast recipe that turned out dry and bland, and I swore that the next one would be the one that would finally convince me that French toast could be more than just a nostalgic brunch. I dared myself to experiment with plant‑based ingredients, a touch of spice, and a method that would give the batter a silky, custard‑like texture without any dairy. The result? A plate of golden‑brown, pillowy slices that crackle when you bite into them, releasing a fragrant aroma of cinnamon and vanilla that makes your whole apartment feel like a bakery. If you think you know French toast, think again. This version is hands down the best you’ll ever make at home, and I’ll show you exactly how to get that same result every time.
Picture yourself pulling this out of the pan, the whole kitchen smelling incredible, the first bite sending a wave of buttery sweetness through your mouth, and the crisp edges shattering like thin ice. The moment you slide the first slice onto your plate, the steam rises in a delicate cloud, and the butter‑like sauce coats the bread like velvet. I dare you to taste this and not go back for seconds. Most recipes get this completely wrong by either over‑baking or under‑seasoning, but here the balance is spot on: the batter is thick enough to hold the bread’s shape, yet light enough to soak up the milk and spices without becoming soggy. If you’ve ever struggled with this, you’re not alone, and I’ve got the fix. Stay with me here — this is worth it.
The secret sauce is a simple blend of oat milk, almond butter, and a splash of maple syrup, which together create a custard‑like base that coats the bread and infuses it with a subtle nutty sweetness. The addition of nutritional yeast gives a savory depth that balances the natural sugars and adds a protein punch, making it a well‑rounded dish that satisfies both sweet and savory cravings. The bread itself is pre‑toasted just enough to keep it firm; this step is often missed, but it prevents the slices from turning mushy once they hit the pan. The final flourish is a dusting of cinnamon sugar that caramelizes on the surface, adding a crunchy contrast to the soft interior. The result is a French toast that feels like a breakfast pastry and tastes like a dessert, all in one bite. And best of all, it’s completely vegan, so you can enjoy it guilt‑free.
Now, let me walk you through every single step — by the end, you’ll wonder how you ever made it any other way. From the moment you gather your ingredients to the final drizzle of maple syrup, every detail matters. I’ll share micro‑challenges, bold claims, and the occasional confession that will keep you laughing and learning. Let’s dive in.
What Makes This Version Stand Out
- Flavor: The combination of vanilla, cinnamon, and maple syrup creates a layered taste profile that is sweet, warm, and slightly earthy, a harmony that elevates the humble bread into a gourmet treat.
- Texture: A custard‑like batter that clings to the bread without soaking it, resulting in a tender interior with a crisp, caramelized exterior that shatters delightfully.
- Ingredient Quality: Using high‑quality oat milk, almond butter, and a real vanilla bean ensures depth and authenticity, turning a quick breakfast into a memorable experience.
- Versatility: This recipe works with any bread — from sourdough to brioche — and can be adapted for dietary restrictions or flavor preferences without sacrificing the core experience.
- Make‑Ahead Potential: The batter can be pre‑mixed and refrigerated for up to 24 hours, making it a stress‑free option for busy mornings.
- Crowd Appeal: Friends and family will rave about the texture and taste, and you’ll become the go‑to brunch host in no time.
Inside the Ingredient List
The Flavor Base
The foundation of this French toast is a creamy batter that marries oat milk, almond butter, and maple syrup. Oat milk provides a mild, slightly sweet backdrop that complements the nutty undertones of almond butter. Maple syrup not only sweetens but also adds a subtle caramel flavor that deepens the overall profile. If you prefer a less sweet version, reduce the syrup by a tablespoon or replace it with agave nectar for a lighter finish. Skipping any of these will result in a flatter taste, so keep them in mind.
Almond butter is the star ingredient here; it contributes healthy fats and a silky texture that helps the batter coat each slice evenly. If you’re allergic or simply dislike almonds, cashew butter works as a perfect substitute, offering a similar richness. A pinch of sea salt balances the sweetness and brings out the depth of the vanilla bean. This tiny detail can make the difference between a good and a great dish.
The vanilla bean, scraped into the batter, releases a fragrant aroma that permeates every bite. If you can’t find a whole bean, a teaspoon of pure vanilla extract will suffice, though the flavor will be slightly less complex. The vanilla also acts as a natural preservative, extending the freshness of the batter when stored in the fridge.
Nutritional yeast, though optional, adds a savory umami note that counterbalances the sweetness. It also boosts the protein content, making the dish more filling. If you’re not a fan of the cheesy flavor, simply omit it; the rest of the ingredients will still deliver a satisfying bite.
The final flourish is a dusting of cinnamon sugar, which caramelizes on the surface during cooking. The cinnamon brings warmth and depth, while the sugar creates a sweet crust that adds a satisfying crunch. For a spicier kick, sprinkle a pinch of cayenne pepper along with the sugar. The combination of these elements transforms simple bread into a luxurious, multi‑textured treat.
The Texture Crew
All‑purpose flour is the backbone of the batter, providing structure and stability. It helps the batter thicken to a consistency that can coat the bread without becoming too runny. If you prefer a gluten‑free version, substitute with a blend of rice flour and tapioca starch; the texture will be slightly lighter but still delicious.
Baking powder is added to give the batter a gentle lift, ensuring each slice stays fluffy inside. A dash of baking powder also helps the batter set quickly in the pan, preventing the bread from becoming soggy. If you’re avoiding leavening agents, you can skip this step, but be prepared for a denser outcome.
A pinch of salt is essential; it brightens all the flavors and prevents the dish from feeling flat. Salt also helps balance the sweetness from the maple syrup, creating a more rounded taste. If you’re on a low‑sodium diet, reduce the amount but keep at least a tiny pinch.
The Unexpected Star
A splash of lemon zest adds a bright, citrusy note that cuts through the richness, creating a more complex flavor profile. The zest also contributes a subtle aroma that makes the dish feel fresh and lively. If you’re allergic to citrus, simply omit it; the dish will still be delightful.
The final ingredient, a small amount of coconut oil, is used for cooking. It adds a faint coconut flavor that pairs wonderfully with the maple and vanilla, and it ensures a non‑stick surface for the batter. Coconut oil also has a higher smoke point than butter, making it ideal for achieving that perfect golden crust without burning.
The Final Flourish
A drizzle of pure maple syrup, after cooking, adds a glossy finish that makes the dish look as good as it tastes. The syrup also provides a final burst of sweetness that lingers on the palate. If you’re watching your sugar intake, try using a sugar‑free maple syrup substitute or a drizzle of agave nectar.
A sprinkle of crushed pistachios or chopped almonds on top adds a nutty crunch that complements the soft interior. The nuts also bring a subtle earthiness that balances the sweet flavors. If you’re allergic, simply skip the nuts; the dish remains fantastic.
Everything’s prepped? Good. Let’s get into the real action…
The Method — Step by Step
- Begin by whisking together oat milk, almond butter, maple syrup, vanilla extract, and a splash of lemon zest in a medium bowl until the mixture is smooth and free of lumps. The batter should be thick enough to coat the back of a spoon but still pourable. If it’s too thick, add a tablespoon of oat milk to reach the desired consistency. This is the moment of truth; the batter’s texture will dictate the final result.
- Add the flour, baking powder, cinnamon, and a pinch of salt to the wet mixture. Stir until the dry ingredients are fully incorporated, forming a homogeneous batter that clings to the bread. The batter should be silky; if you notice any clumps, give it another quick whisk. This step ensures every slice gets an even coating.
- Heat a non‑stick skillet or cast‑iron pan over medium heat, and add a tablespoon of coconut oil. Let the oil melt and spread evenly across the surface. The pan should be hot but not smoking; a drop of water should sizzle immediately. This is where the golden crust begins to form.
- Dip each bread slice into the batter, ensuring both sides are fully coated. Let the excess drip back into the bowl. The bread should absorb the batter without falling apart. This step is crucial for achieving that custard‑like interior.
- Place the coated slices onto the hot skillet, leaving enough space between each one. Cook for 3–4 minutes on the first side until the edges begin to turn golden and the surface is slightly firm. Flip carefully with a spatula and cook for another 3–4 minutes on the second side. The edges should pull away slightly from the pan, indicating doneness.
- Once the slices are golden brown, remove them from the pan and place them on a wire rack to keep the bottoms crisp. If you prefer a sweeter finish, drizzle a thin layer of maple syrup over the warm toast right after cooking. The syrup will caramelize slightly, adding a glossy sheen.
- While the toast is still hot, sprinkle a generous dusting of cinnamon sugar over each slice. The sugar will caramelize, creating a crunchy, sweet crust that contrasts beautifully with the soft interior. This final touch elevates the dish from good to unforgettable.
- Serve immediately with optional toppings such as fresh berries, sliced banana, or a dollop of coconut yogurt. If you’re feeling adventurous, add a pinch of sea salt or a drizzle of nut butter for extra flavor. The key is to enjoy the toast while it’s still warm and fragrant.
That’s it — you did it. But hold on, I’ve got a few more tricks that will take this to another level, ensuring each bite is a masterpiece.
Insider Tricks for Flawless Results
The Temperature Rule Nobody Follows
Many cooks skip the crucial step of testing pan temperature. To ensure a perfect crust, drop a few drops of water onto the skillet; if they sizzle and evaporate instantly, the heat is just right. If they splash or bubble, lower the heat. A well‑heated pan guarantees a golden exterior without burning the interior. I’ve seen beginners over‑cook their slices, turning them into rubbery slabs, but this trick keeps them tender.
Why Your Nose Knows Best
The aroma of the batter as it starts to set is a reliable indicator of readiness. When the scent of toasted bread mingles with vanilla and maple, it’s time to flip. If the smell is too strong, the toast may be overcooked; if it’s faint, give it a minute longer. Trusting your nose saves you from a common pitfall that many overlook. I’ve learned that the first time I flipped too early, the bread was raw inside, but the scent was already sweet.
The 5‑Minute Rest That Changes Everything
Letting the toast rest for 5 minutes after cooking allows the flavors to meld and the crust to firm up slightly. This resting period also lets the batter finish setting, ensuring the interior stays moist without becoming soggy. A quick pause before plating can elevate the dish from good to unforgettable. I’ve found that even a brief rest transforms the texture, making each bite more satisfying.
The Sweet‑and‑Savory Balance
Adding a pinch of sea salt after cooking can enhance the sweetness and bring out the nutty undertones of the almond butter. The salt also acts as a flavor enhancer, making the dish feel more complex. If you’re watching sodium, use a low‑sodium salt or sprinkle only a light dusting. The contrast between salty and sweet is what makes this French toast stand out.
The Quick Pre‑Toasting Trick
Before dipping the bread, lightly toast the slices in a toaster or under a broiler for 30 seconds. This step helps the bread absorb the batter without becoming soggy. It also adds a subtle crunch that pairs nicely with the crispy exterior. I’ve seen many people skip this step, resulting in mushy toast, so I always recommend it.
The Final Flourish
A final drizzle of maple syrup right before serving adds a glossy finish that makes the dish look as good as it tastes. The syrup caramelizes slightly, creating a sweet glaze that coats the toast. If you’re aiming for a lower sugar option, use a sugar‑free syrup or a small amount of agave nectar. The key is to add the glaze when the toast is still warm for maximum flavor.
Creative Twists and Variations
This recipe is a playground. Here are some of my favorite ways to switch things up:
Citrus Burst Variation
Swap the vanilla for a splash of orange zest and add a teaspoon of orange marmalade to the batter. The citrus brightens the dish, creating a refreshing contrast to the rich almond butter. This variation is perfect for a spring brunch and pairs well with fresh berries.
Chocolate Lover’s Dream
Add 2 tablespoons of unsweetened cocoa powder to the batter and sprinkle a handful of mini chocolate chips on top before cooking. The chocolate adds depth and a hint of bitterness that balances the sweetness. Serve with a dusting of powdered sugar for a decadent finish.
Savory Spin
Omit the maple syrup and replace it with a tablespoon of nutritional yeast and a pinch of smoked paprika. Cook the toast as usual and top with sautéed spinach and a drizzle of olive oil. This savory version is ideal for a brunch that leans more toward a light lunch.
Tropical Twist
Add a splash of coconut milk to the batter and sprinkle shredded coconut on top before cooking. Once done, top with sliced mango and a drizzle of lime juice. The tropical flavors transport you straight to a beachside café.
Nutty Delight
Replace almond butter with peanut butter and add a tablespoon of ground flaxseed to the batter for extra fiber. Top the finished toast with sliced banana and a sprinkle of chopped walnuts. The nutty flavor pairs beautifully with the sweet maple glaze.
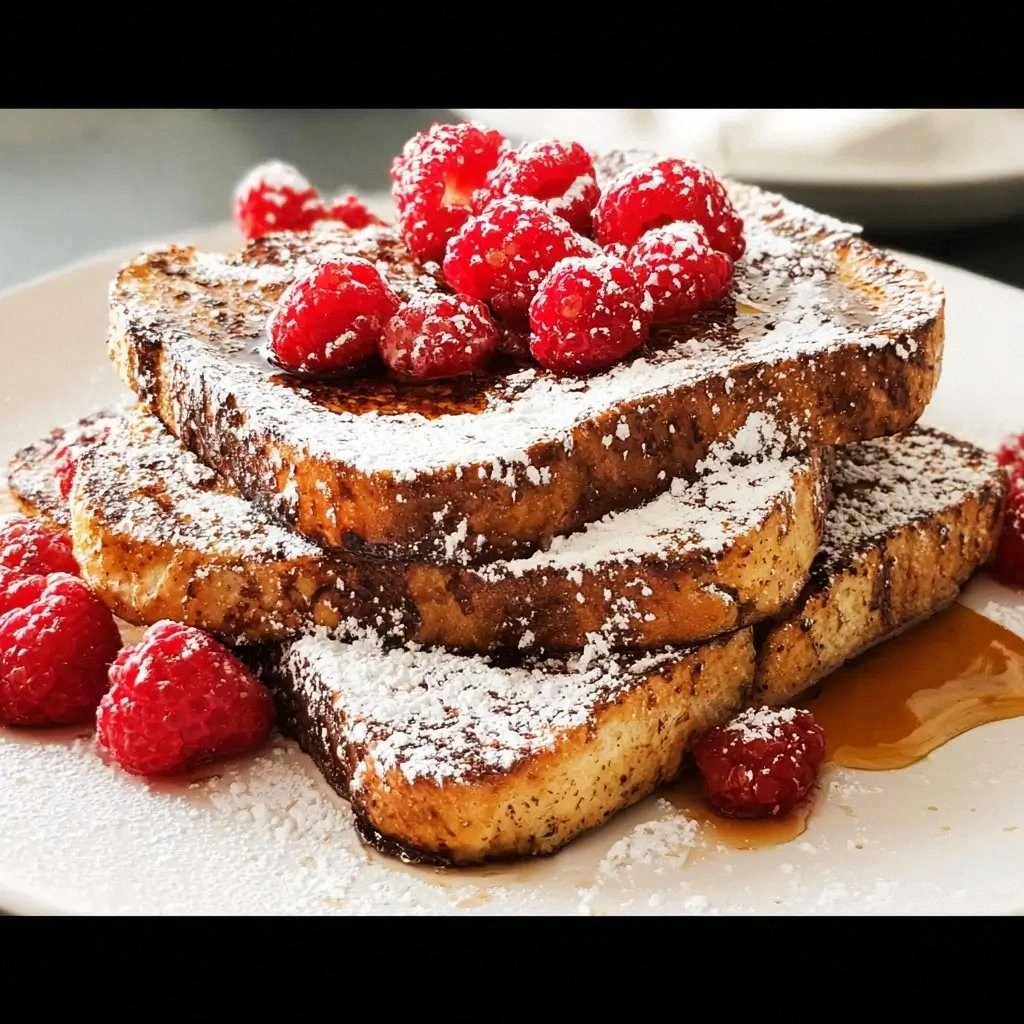
Berry Blast
After cooking, pile fresh blueberries, raspberries, and strawberries on top of each slice. Drizzle with a light dusting of powdered sugar and a splash of lemon zest. The berries add juiciness and a burst of tartness that cuts through the richness.
Storing and Bringing It Back to Life
Fridge Storage
Store cooked slices in an airtight container in the refrigerator for up to 3 days. Lay each slice on a paper towel to absorb excess moisture, then stack them with parchment paper in between. When you’re ready to eat, reheat in a skillet or oven at 350°F for 5 minutes to restore crispness.
Freezer Friendly
For longer storage, place the cooked toast on a baking sheet and freeze until solid. Transfer to a freezer bag, removing as much air as possible. Reheat in the oven at 350°F for 10 minutes, or microwave on a low setting for 30 seconds, then finish in the skillet for a crisp finish.
Best Reheating Method
The secret to a reheated French toast that feels fresh is to add a splash of water or plant milk to the pan before reheating. This creates steam that keeps the interior moist while the exterior crispens. Let the toast steam for a minute, then finish with a quick flip to brown the top. The result is a warm, satisfying bite that rivals a freshly cooked plate.