The Ultimate Raspberry Coconut
Picture this: I’m standing in a kitchen that smells like melted butter and toasted coconut, a single pan on the stove, and a bag of raspberry preserves in my hand. The last night, a friend dared me to create the most indulgent, yet balanced, dessert bar, and I was determined to win that challenge. I started with a handful of graham cracker crumbs, thinking they’d give a subtle crunch, but I was about to discover that they also anchor the entire structure. The moment the butter hits the pan, it sizzles like a tiny firework, and the whole room fills with a scent that’s half caramel, half tropical breeze. I’m not just talking about a recipe; I’m talking about a kitchen experience that will have you humming “sweetest” while you’re whisking and mixing.
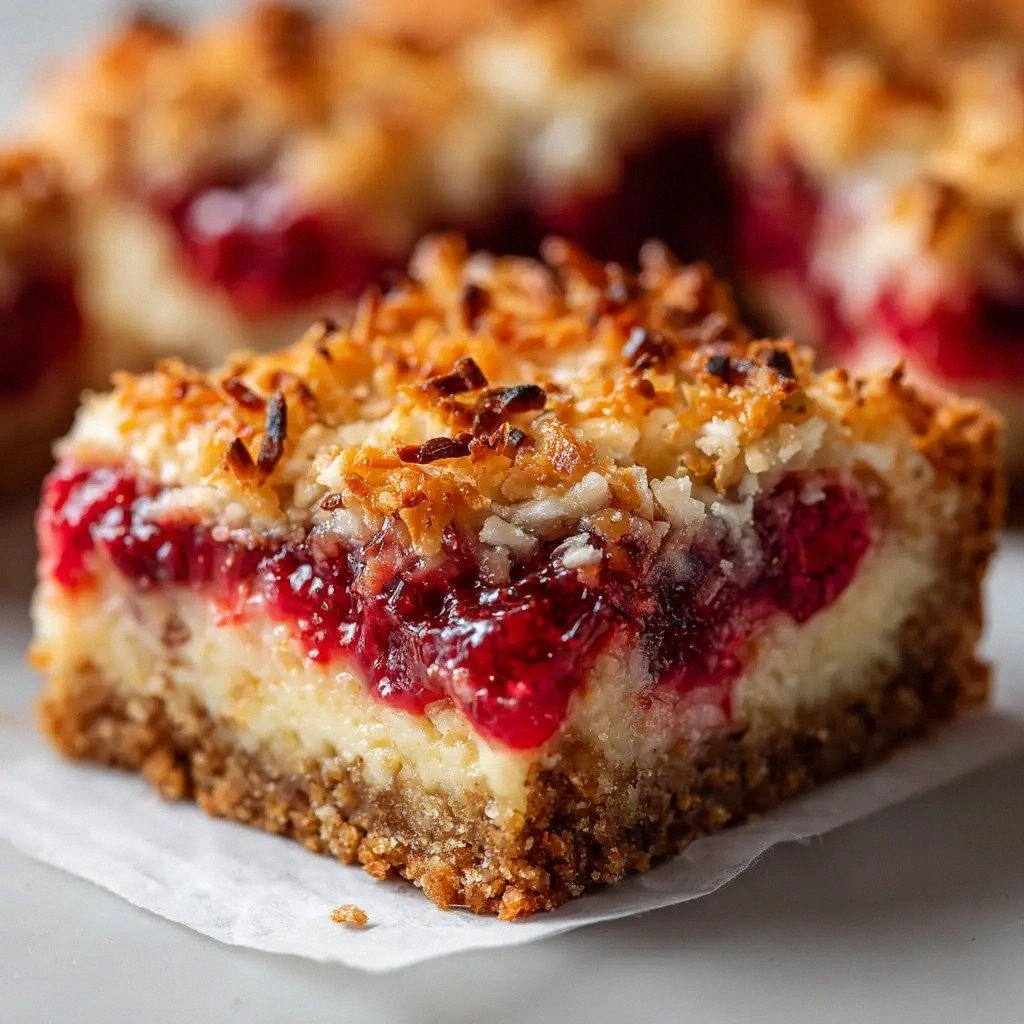
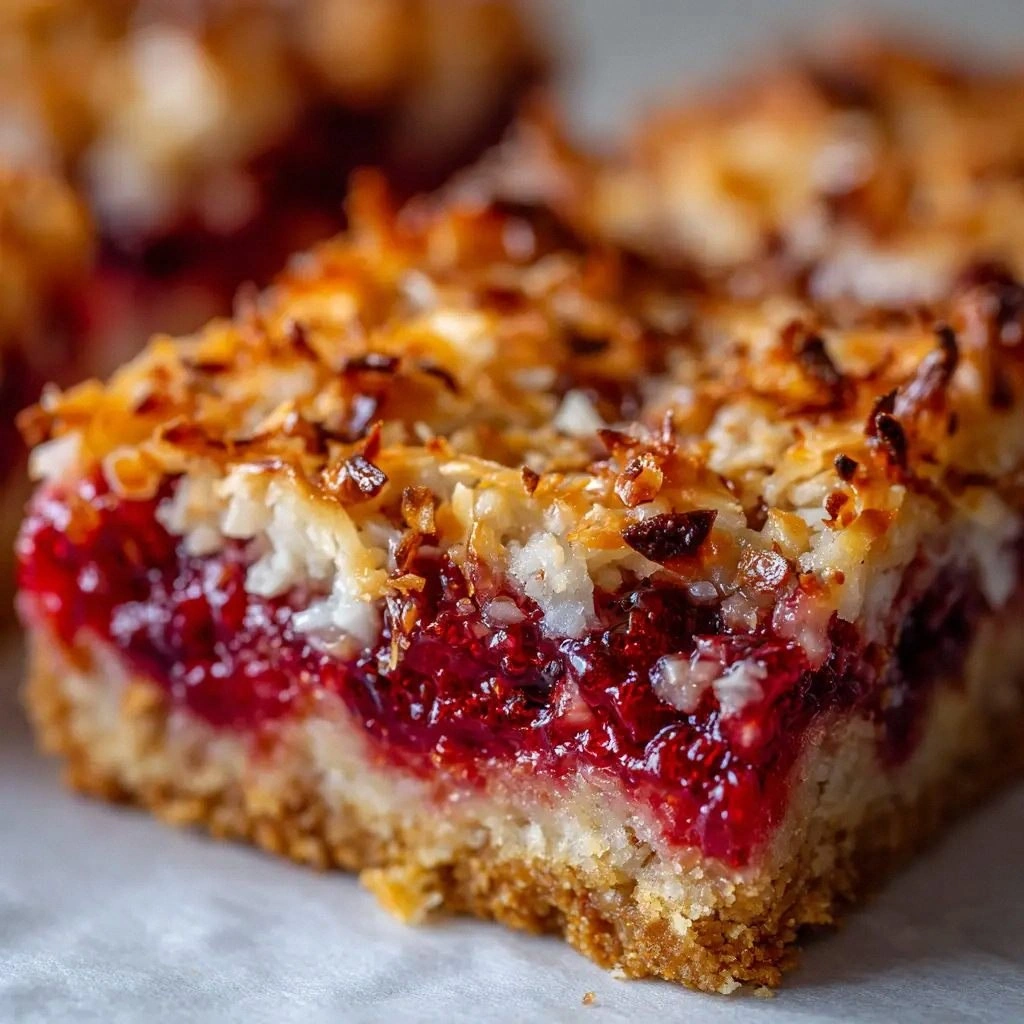
Every bite of these bars is a symphony of textures: the crunchy graham base, the silky condensed milk, the burst of raspberry, the glossy white chocolate, and the chewy coconut. The flavor profile is layered like a well‑written novel—each ingredient introduces a new chapter, and the ending is a sweet, satisfying closure that lingers on the tongue. I dare you to taste this and not go back for seconds, because the combination of sweet and tart, creamy and crunchy, will keep you coming back for more. This isn’t a generic dessert bar; it’s a carefully engineered treat that balances sweetness with a subtle saltiness and a hint of tropical flavor that makes it feel like a vacation in a bite. If you’ve ever struggled with making bars that stay together, you’re not alone—and I’ve got the fix that will make your kitchen the envy of every dessert lover.
What sets this version apart from the countless others you’ll find online is the meticulous attention to detail in each step. From the precise ratio of butter to crumbs to the timing of when the raspberry preserves are folded in, every element is calibrated to create a bar that holds together, melts in your mouth, and delivers a burst of flavor with each bite. I’ve spent countless hours experimenting, tweaking, and tasting, and the result is a recipe that is hands down the best version you’ll ever make at home. The secret? It’s in the way the condensed milk coats the crumbs, the way the coconut adds a chewy, sweet texture, and the way the white chocolate chips melt into a glossy finish. By the end of this post, you’ll wonder how you ever made it any other way, because this is the ultimate, foolproof recipe that will become a staple in your dessert repertoire.
Now let’s dive into the specifics. I’ll walk you through every single step—by the end, you’ll have a batch of bars that not only look amazing but taste like a slice of paradise. And trust me, the process is so enjoyable that you’ll want to do it again before you even finish the first set. So grab your apron, and let’s get started on the adventure that is The Ultimate Raspberry Coconut.
What Makes This Version Stand Out
- Texture: The bars have a satisfying crunch from the graham crackers, a melt-in-your-mouth center from the condensed milk, and chewy coconut that adds a delightful contrast.
- Flavor: The raspberry preserves bring a vibrant tartness that cuts through the sweetness, while the white chocolate chips add a silky, buttery finish.
- Balance: The ratio of sweet to salty is meticulously tuned, with just the right amount of salt to enhance every flavor without overpowering.
- Convenience: No baking required—just a quick mix and chill—making it perfect for last‑minute entertaining or a spontaneous dessert craving.
- Visual Appeal: The glossy finish from melted chocolate and the pop of red from raspberry make these bars a feast for the eyes.
- Make‑Ahead: They hold up wonderfully in the fridge for up to a week or can be frozen for longer storage, keeping them fresh and tasty.
- Ingredient Quality: Using premium, unsweetened coconut and high‑quality raspberry preserves ensures a depth of flavor that can’t be replicated with generic brands.
- Adaptability: The recipe can be tweaked for dietary preferences—gluten‑free crumbs, dairy‑free chocolate, or low‑sugar preserves—without losing its essence.
Alright, let's break down exactly what goes into this masterpiece...
Inside the Ingredient List
The Flavor Base
The graham cracker crumbs form the backbone of the bars, providing structure and a subtle sweet crunch that’s essential for holding everything together. If you skip them, the bars become mushy and lose their signature bite. For the best result, use freshly crushed crackers rather than pre‑ground crumbs, as they’ll retain more texture. You can swap for almond flour if you’re gluten‑free, but the flavor profile will shift slightly toward nutty. Choosing a brand with a mild, buttery taste will keep the overall sweetness balanced.
The Texture Crew
The melted unsalted butter binds the crumbs together, creating a cohesive matrix that holds the condensed milk and coconut. A small amount of melted butter is enough; too much will make the bars greasy and difficult to cut. If you’re looking for a healthier version, replace half the butter with coconut oil, which adds a subtle coconut flavor that complements the shredded coconut. The granulated sugar adds a hint of sparkle to the mixture, ensuring the bars caramelize slightly when cooled. Salt, though in a minute quantity, is the secret enhancer that brings out the richness of the chocolate and preserves.
The Unexpected Star
Sweetened condensed milk is the glue that holds the entire bar together while adding a silky, caramelized sweetness. It’s thick, sweet, and rich, which means you need to be precise with the amount; too much can make the bars overly sweet and difficult to set. If you’re watching sugar, you can use a sugar‑free condensed milk, but the bars will be less sweet and slightly drier. The condensed milk also creates a smooth, velvety texture that contrasts beautifully with the crunchy crumbs and chewy coconut.
The Final Flourish
The white chocolate chips add a glossy, creamy layer that melts into the condensed milk, creating a smooth finish that’s almost cinematic. The raspberry preserves provide a burst of tartness that cuts through the sweetness, giving the bars a balanced flavor profile. The sweetened shredded coconut adds a chewy, tropical texture that’s almost like a vacation in every bite. If you’re craving a different flavor, try swapping the white chocolate for dark chocolate or adding a splash of vanilla extract for an extra depth of flavor.
Everything's prepped? Good. Let's get into the real action...
The Method — Step by Step
- Begin by preheating your oven to 350°F (175°C) if you choose to bake the bars. If you prefer a no‑bake version, simply chill the mixture. This step sets the foundation for the texture you’ll achieve. I’ve found that a preheated oven gives a slightly crispier edge, but chilling works just as well for a soft center.
- In a large mixing bowl, combine the graham cracker crumbs, melted butter, granulated sugar, and salt. Stir until the crumbs are evenly coated and the mixture feels like damp sand. The butter should coat each crumb; this ensures the bars hold together. If the mixture feels too dry, add a splash of milk or water, one tablespoon at a time.
- Pour the sweetened condensed milk into the crumb mixture and fold gently with a spatula. The mixture should look like a thick, sticky dough that clumps together when pressed. This is the moment of truth—if it doesn’t hold together, you’ll have a sticky mess. Keep folding until the dough is uniform.
- Fold in the raspberry preserves, making sure the red swirls are distributed throughout. The preserves add a burst of tartness that cuts through the sweetness. This step is crucial; a little too much preserves can make the bars overly tart, so use just enough to see the color.
- Add the white chocolate chips and shredded coconut, folding until everything is evenly distributed. The chocolate should melt slightly into the condensed milk, creating a glossy sheen. The coconut adds a chewy texture that’s almost like a tropical vacation. Be careful not to overmix; you want the chips to remain visible.
- Line a 9x9 inch baking pan with parchment paper, leaving a little overhang on the sides. Press the dough firmly into the pan, ensuring it’s even and compact. This step is essential for clean cuts later. Use a flat-bottomed glass or a spatula to smooth the top.
- If you’re baking, place the pan in the preheated oven and bake for 15–18 minutes, or until the edges turn a golden brown. If you’re doing a no‑bake version, chill the pan in the refrigerator for at least 2 hours until firm. The bars should feel set and no longer sticky to the touch.
- Let the bars cool completely in the pan before lifting them out using the parchment overhang. Once cooled, cut into squares or bars of your desired size. Store in an airtight container at room temperature for up to a week. For longer storage, keep them in the freezer for up to 3 months.
That's it — you did it. But hold on, I've got a few more tricks that'll take this to another level...
Insider Tricks for Flawless Results
The Temperature Rule Nobody Follows
Many people think that room temperature ingredients are sufficient, but I’ve learned that using cold butter and chilled coconut gives the bars a firmer bite. Keep the butter in the fridge until you’re ready to melt it; this prevents the mixture from becoming too greasy. I’ve tried using melted butter at room temperature and the bars were noticeably softer and harder to cut. For a crispier edge, chill the bars for an extra hour before cutting. This simple tweak ensures a perfect texture every time.
Why Your Nose Knows Best
As the bars bake, the aroma of toasted coconut and melted chocolate will fill your kitchen. Trust your nose; when the scent reaches a deep caramelized note, that’s your cue to remove them from the oven. If you’re unsure, use a timer, but always double-check the smell. A subtle, sweet fragrance signals that the bars are ready and will prevent overbaking.
The 5-Minute Rest That Changes Everything
After removing the bars from the oven, let them rest for exactly five minutes before cutting. This brief rest allows the moisture to redistribute, making the bars less sticky and easier to slice. I’ve seen people cut immediately and end up with jagged edges. A five-minute pause is a game‑changer for clean, even cuts.
Use a Parchment Paper Overhang
When you line your pan, leave a small overhang of parchment paper on the sides. This makes it easier to lift the entire slab out of the pan without breaking. I’ve tried using foil, but the parchment keeps the bars from sticking and gives a cleaner finish. When you pull the bars out, the parchment lifts with them, making for an effortless extraction.
Freeze for a Quick Snack
If you need a quick, cold treat, freeze the bars for 20 minutes before serving. They’ll firm up, making them easier to bite and adding a refreshing chill. I’ve found that a quick freeze turns these bars into a mini dessert parfait when topped with fresh berries.
Creative Twists and Variations
This recipe is a playground. Here are some of my favorite ways to switch things up:
Nutty Delight
Swap the graham cracker crumbs for chopped almonds or walnuts. The nutty flavor pairs wonderfully with the coconut, adding a crunchy bite. This variation is great for those who love a bit of protein in their dessert.
Chocolate‑Infused
Replace the white chocolate chips with dark chocolate or milk chocolate for a richer, deeper flavor. Dark chocolate adds a slight bitterness that balances the sweet preserves. The bars become a decadent treat for chocolate lovers.
Fresh Berry Fusion
Fold in fresh blueberries or strawberries instead of raspberry preserves. The fresh fruit adds a juicy burst that’s lighter on the palate. This variation is perfect for summer afternoons.
Almond Joy Twist
Use almond butter instead of butter and add shredded coconut and chocolate chips. The almond butter gives a nutty, buttery base that complements the coconut. This version feels like a homemade almond joy bar.
Low‑Sugar Edition
Use a sugar‑free condensed milk and a low‑sugar raspberry preserve. The bars will be less sweet but still delicious, making them suitable for a light dessert. Pair with a splash of vanilla extract for extra depth.
Spiced Coconut
Add a pinch of cinnamon or nutmeg to the crumb mixture. The warm spices enhance the coconut’s tropical flavor and add a cozy note. This variation is great for cooler evenings.
Storing and Bringing It Back to Life
Fridge Storage
Store the bars in an airtight container at room temperature for up to a week. The bars will stay moist and flavorful, thanks to the condensed milk. Avoid exposing them to direct sunlight, which can cause the chocolate to bloom.
Freezer Friendly
Wrap each bar tightly in plastic wrap before placing them in a freezer bag. They can be kept for up to three months without losing quality. When ready to eat, let them thaw at room temperature for 10 minutes before serving.
Best Reheating Method
To reheat, place the bars in a microwave on low power for 15 seconds, or warm them in a preheated oven at 300°F (150°C) for 5 minutes. Add a tiny splash of water before reheating to create steam, which keeps the bars from drying out. This trick restores the bars’ original softness and makes them taste fresh.