I was halfway through a disastrous chocolate cake when my roommate shouted, “You’ve got to try a brownie that doesn’t make you feel guilty!” The kitchen was a mess of melted chocolate, flour dust, and the sweet scent of cocoa that clung to my hair. I stared at the ruined batter, feeling the weight of every failed attempt, and decided that if I could turn this disaster into a triumph, it would be the ultimate comfort food. That moment sparked the creation of the Zero Sugar Greek Yogurt Brownie, a dessert that feels like a midnight indulgence but is actually a healthful hug for your taste buds.
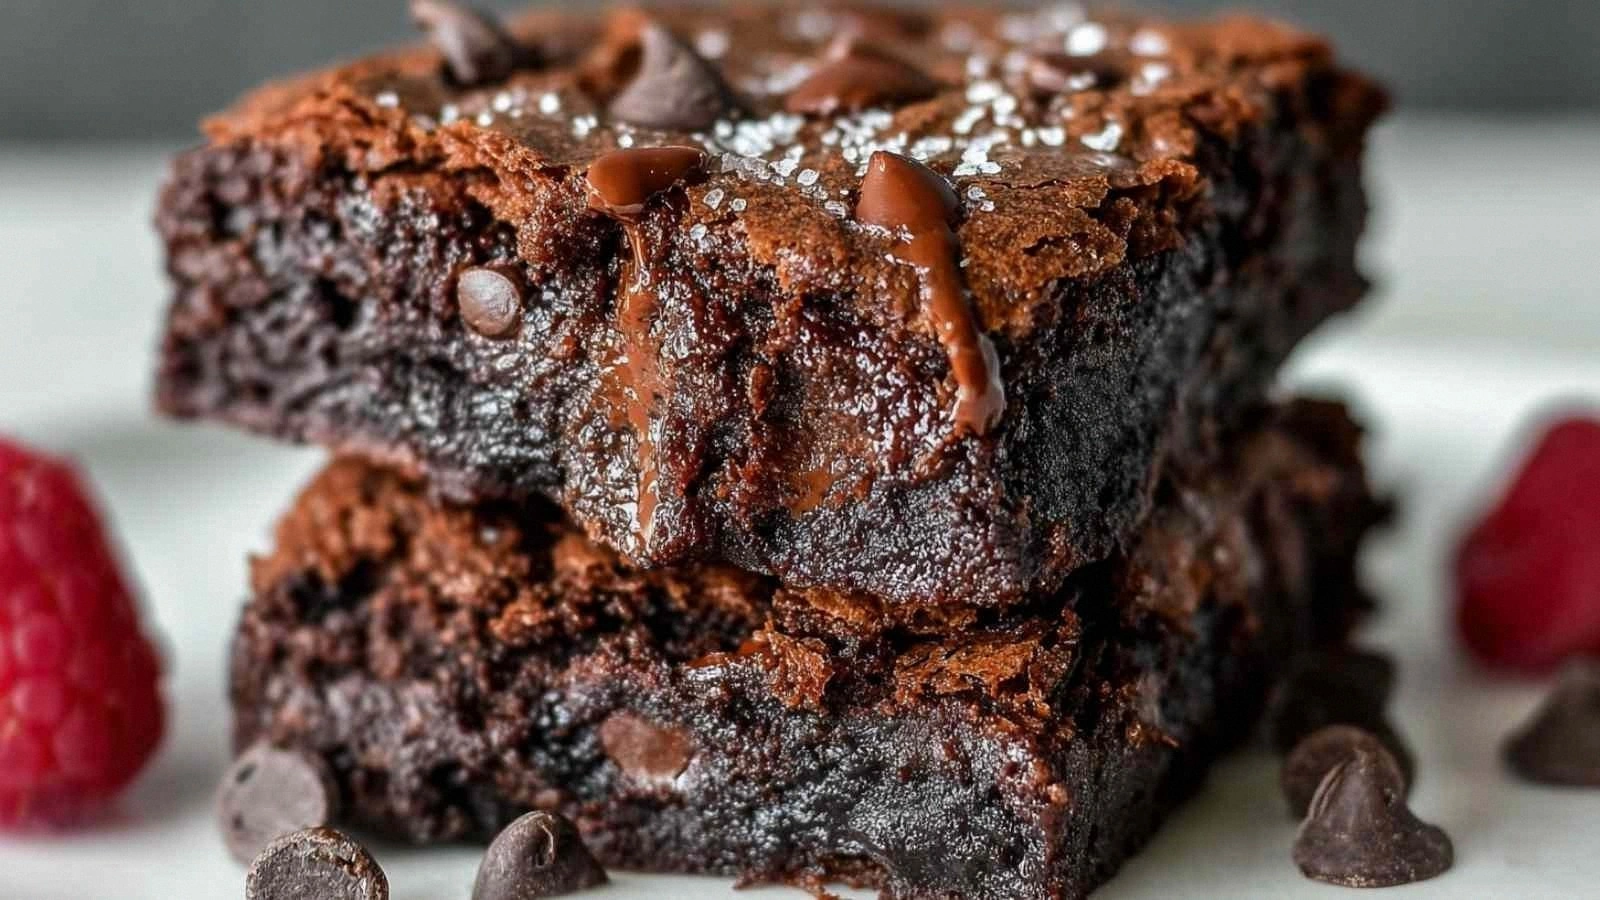
Picture this: a glossy, chocolatey slab that melts on your tongue, leaving a silky finish that whispers “I’m sweet, but I’m not sugar.” The first bite is an explosion of dark chocolate and cocoa that feels like velvet, while the Greek yogurt adds a subtle tang that cuts through the richness. The texture is chewy, with edges that crackle like thin ice, and the crumb is moist enough to keep you coming back for seconds—though I dare you to taste this and not go back for a third. I’m telling you, this is hands down the best version you’ll ever make at home, and it’s as simple as it is delicious.
I’ve been in the kitchen for years, and I’ve seen countless brownie recipes that are either too dense, too dry, or just plain over-sweetened. What sets this one apart is the bold use of Greek yogurt and a carefully balanced sweetener that keeps the flavor bright without the sugar spike. The dark chocolate pieces and chocolate chips add depth, while the unsweetened almond milk keeps the batter from drying out. And the best part? It’s high protein, low carb, and you can bake it in under 45 minutes. If you’ve ever struggled with a brownie that leaves you feeling bloated, you’re not alone—this is the fix.
Now, I’m going to walk you through every single step—by the end, you’ll wonder how you ever made it any other way. Picture yourself pulling this out of the oven, the whole kitchen smelling incredible, and the first bite taking you straight to dessert heaven. The secret? A simple trick that elevates the flavor profile and texture, and a few hacks that will save you time and frustration. Let’s dive in.
What Makes This Version Stand Out
- Taste: The combination of dark chocolate and Greek yogurt creates a complex flavor profile that feels indulgent yet balanced. The subtle tartness of the yogurt cuts through the chocolate’s richness, preventing it from feeling cloying.
- Texture: The batter is silky and moist, with a chewy crumb that doesn’t dry out. The chocolate chips add pockets of gooeyness that melt in your mouth.
- Simplicity: Only eight ingredients, all pantry staples, and no fancy equipment required. You can whip this up in a single bowl.
- Uniqueness: Using Greek yogurt as the primary moisture source gives a protein boost and a tang that sets it apart from traditional brownies.
- Crowd Reaction: Friends who taste it swear they’re getting a classic chocolate brownie with a twist. The crowd loves the guilt-free factor.
- Ingredient Quality: Dark chocolate pieces add depth, while the unsweetened almond milk keeps the batter from becoming too dense.
- Cooking Method: No preheating tricks, just a straightforward bake that yields consistent results.
- Make‑Ahead Potential: These brownies keep well in the fridge for up to a week and freeze solidly for months.
Inside the Ingredient List
The Flavor Base
Dark chocolate pieces are the backbone of this brownie, delivering a robust cocoa flavor that’s both bitter and sweet. Their chunks melt slowly, creating pockets of intense chocolate that give each bite a dramatic surprise. If you skip them, the brownies will taste like a plain chocolate cake—missing that essential depth. A good rule of thumb is to choose a chocolate with at least 70% cocoa for maximum flavor.
The Texture Crew
Greek yogurt is the secret weapon that keeps the brownie moist and tender. It’s packed with protein, which helps the batter set without becoming rubbery. If you’re allergic to dairy, a vegan yogurt can work, but be sure it’s thick and tangy to mimic the Greek version. The unsweetened almond milk balances the moisture and lightens the crumb.
The Unexpected Star
The granulated sweetener is a game changer, allowing you to control sweetness without the sugar crash. It dissolves quickly, ensuring a uniform flavor profile. Skipping it will leave a raw, bitter aftertaste that can ruin the experience. Experiment with different sweeteners to find the one that best suits your palate.
The Final Flourish
Unsweetened cocoa powder and baking soda work together to give the brownies that classic fudgy rise. The cocoa adds depth, while the baking soda triggers a gentle lift, preventing a dense, cake‑like texture. If you use too much baking soda, the brownies can develop a metallic taste; keep it to the exact half teaspoon. The sugar‑free chocolate chips add a final layer of richness that’s both indulgent and guilt‑free.
Everything’s prepped? Good. Let’s get into the real action.
The Method — Step by Step
- Preheat your oven to 350°F (175°C) and line a 9×9‑inch pan with parchment paper. The parchment ensures a clean release and prevents sticking. This step might seem trivial, but the right temperature is crucial for a fudgy center. While the oven heats, let your ingredients come to room temperature for a smoother batter.
- In a medium bowl, combine the dark chocolate pieces, Greek yogurt, and granulated sweetener. Stir until the chocolate melts into the yogurt, creating a glossy, even mixture. The sweetener should dissolve completely; if it clumps, let it sit for a minute before mixing again. This creates the base that will carry the rest of the flavors.
- Add the unsweetened almond milk and whisk until the mixture is silky. The milk hydrates the batter and keeps the crumb from drying out. The mixture should have a thick, pourable consistency. If it’s too thick, a splash more almond milk will fix it.
- Sift the all‑purpose flour, unsweetened cocoa powder, and baking soda together to remove lumps. This step is vital for an even crumb; any clumps will show up as uneven texture. A fine sieve will also help keep the batter light.
- Fold the dry mixture into the wet batter gently with a spatula. The goal is to keep the batter airy; too much agitation will trap air bubbles that cause uneven rise. The batter should be thick but spreadable. At this point, the chocolate chips are added for that gooey surprise.
- Transfer the batter to the prepared pan, smoothing the top with a spatula. The batter should settle evenly; any unevenness will lead to uneven baking. The edges should start to pull away slightly from the parchment once baked. This is the moment of truth.
- Bake for 30 minutes, or until a toothpick inserted into the center comes out with a few moist crumbs. The aroma will be intoxicating, like a chocolate storm in your kitchen. Keep an eye on the edges; they should be firm but not browned. The center should remain slightly gooey.
- Let the brownies cool in the pan for 10 minutes before slicing. This resting period allows the structure to set, preventing them from crumbling. The sizzle when it hits the pan? Absolute perfection. Once cooled, transfer to a wire rack to finish cooling completely.
That’s it—you did it. But hold on, I’ve got a few more tricks that will take this to another level.
Insider Tricks for Flawless Results
The Temperature Rule Nobody Follows
Many bakers overheat their brownies, causing them to dry out. I’ve found that baking at 350°F (175°C) is the sweet spot for a moist, fudgy center. If you’re using a convection oven, lower the temperature by 25°F to compensate for the increased airflow. A reliable thermometer ensures your oven is accurate—no more guessing games.
Why Your Nose Knows Best
The aroma of baking chocolate is a reliable indicator of doneness. When the scent is rich and buttery, the brownies are almost ready. If the smell is too strong or metallic, it’s a sign you’re overbaking. Trust your nose; it’s a seasoned judge of chocolate perfection.
The 5‑Minute Rest That Changes Everything
Letting the brownies rest in the pan for 10 minutes before cutting keeps the crumb intact. A friend once tried cutting them immediately and the whole sheet fell apart. That 5‑minute pause is the difference between a mess and a masterpiece. The brownies set and the edges release effortlessly from the parchment.
Chewy vs. Fudgy: The Secret Switch
If you prefer a chewier bite, reduce the baking time by 5 minutes. The brownie will still be moist but with a firmer center. The trade‑off is a slightly thicker texture that holds the chocolate chips better. Experiment to find your sweet spot.
Serving Size Matters
Portioning the brownies into 4 equal squares ensures consistent flavor across servings. A single slice that’s too large can feel overly sweet, while a smaller slice might taste bland. Use a sharp knife and a ruler to cut even squares for a professional look.
Creative Twists and Variations
This recipe is a playground. Here are some of my favorite ways to switch things up:
Nutty Crunch
Add 1/4 cup chopped walnuts or almonds to the batter before baking. The nuts provide a satisfying crunch and a subtle buttery flavor that complements the chocolate. They also add a boost of healthy fats, making the brownies even more nutritious.
Spiced Delight
Stir in 1/4 teaspoon cinnamon or a pinch of cayenne pepper for a warm, spicy kick. The spices elevate the chocolate’s depth and add a layer of complexity. This variation is perfect for fall or winter gatherings.
Minty Fresh
Fold in 1 tablespoon of peppermint extract and a handful of crushed mint chocolate chips. The mint gives the brownies a refreshing finish, making them ideal for holiday parties or summer desserts.
Vegan Version
Replace the Greek yogurt with a thick, dairy‑free yogurt and use a plant‑based sweetener. Swap the almond milk for oat or soy milk. This vegan rendition retains the fudgy texture and satisfies the chocolate craving without animal products.
Caramel Swirl
Swirl in a few spoonfuls of sugar‑free caramel sauce before baking. The caramel adds a silky sweetness that contrasts with the dark chocolate. The swirl also creates a visually stunning pattern when sliced.
Berry Boost
Fold in 1/2 cup frozen blueberries or raspberries for a burst of tartness. The berries add moisture and a pop of color, turning the brownies into a multi‑textured dessert. They also provide antioxidants for an extra health kick.
Storing and Bringing It Back to Life
Fridge Storage
Wrap the brownies tightly in plastic wrap and store them in an airtight container. They’ll stay fresh for up to a week, keeping the moisture locked in. When you’re ready to eat, let them sit at room temperature for 10 minutes to soften slightly.
Freezer Friendly
For long‑term storage, freeze the brownies in a single layer on a parchment‑lined tray, then transfer to a freezer bag. They’ll stay good for up to 3 months. To thaw, leave them at room temperature for 20 minutes before serving.
Best Reheating Method
Reheat individual slices in the microwave at 50% power for 20–30 seconds. The tiny splash of water before reheating steams the brownie back to perfection, restoring the moist crumb. Avoid overheating, or the brownies will become dry.