I still remember the day I ruined my grandmother's birthday party with a sunken chocolate cake that tasted like bitter disappointment. There I stood, twenty-three years old, clutching a lopsided disaster while relatives politely nibbled the edges and told me "it's the thought that counts." Fast-forward a decade, and I've become the friend who gets texts at midnight begging for "that cupcake recipe that makes people propose marriage." The secret? I fused two of humanity's greatest achievements—moist dark chocolate cake and silky cheesecake—into one portable, frosting-free powerhouse that explodes with flavor the second you bite through its tender crumb. Picture this: a deep cocoa exterior that crackles ever so slightly under your teeth, giving way to a cool, tangy cream cheese center that swirls across your tongue like a silk scarf in the wind. The first time I pulled these from the oven, my neighbor rang the doorbell because the chocolate aroma had drifted across the street and hijacked her Zoom meeting. I dare you to taste one warm, when the cheesecake heart is still molten and the cake is cloud-soft, and not immediately plan a second batch "just in case."
Most recipes treat stuffed cupcakes like a circus stunt: they either bury the cheesecake so deep it vanishes, or they leave it squatting on top like an awkward hat. My version anchors a generous plug of cheesecake right in the sweet spot—high enough to peek through the crown, low enough to stay creamy—and uses a boiling-water chocolate batter that bakes up flat and even, no domes or sinkholes. The result looks bakery-elegant but requires zero piping skills; the oven does all the sculpting while you drink coffee and feel like a genius. If you've ever wrestled with dry edges and raw centers, you're not alone—and I've got the fix. Stay with me here—this is worth it.
Okay, ready for the game-changer? We're going to freeze the cheesecake filling into little pucks so it stays distinct instead of bleeding into the cake. That means every bite delivers two distinct textures instead of a muddled mess. This next part? Pure magic. The cocoa powder gets a quick bloom in boiling water, which unlocks flavor compounds that taste like someone distilled a hundred chocolate bars into one teaspoon. You'll smell the difference the instant you whisk them together—that deep, fudgy aroma that makes you close your eyes and sigh.
And now the fun part. We're assembling these like edible nesting dolls: a spoonful of chocolate batter, a frozen cheesecake disk, more batter to blanket it, and off to the oven. No special pans, no parchment collars, no praying to the pastry gods. By the time you wash the bowls, the kitchen will smell like Willy Wonka's dream and your willpower will be dangling by a thread. Let me walk you through every single step—by the end, you'll wonder how you ever made it any other way.
What Makes This Version Stand Out
Cheesecake Core: Instead of a measly teaspoon of filling, each cupcake hides a full ounce of tangy cream cheese that's purposely under-sweetened, creating a yin-yang balance with the rich cake. The contrast is so addictive that my record-keeping stopped after three recipe-test batches mysteriously disappeared.
Boiling-Water Chocolate: This old-school bakery trick blooms cocoa into a velvet powerhouse, eliminating any dusty or bitter edge. The batter will look alarmingly thin—ignore your panic and press on; that's exactly why the crumb stays moist for days.
Foolproof Assembly: Freeze the cheesecake mixture in a mini ice-cube tray, pop out perfect plugs, and drop them in. No piping bags, no swirling attempts that resemble modern art gone wrong, no raw centers or leaky volcanoes.
One-Bowl Wonder: The chocolate batter comes together in a single bowl with a whisk, no creaming butter or alternating dry ingredients. Translation: fewer dishes, less fuss, more Netflix time.
Make-Ahead Hero: Baked cupcakes freeze like champions for up to two months. Thaw overnight on the counter, give them a five-minute warm-up in a low oven, and they taste fresh-baked—perfect for surprise guests or midnight cravings.
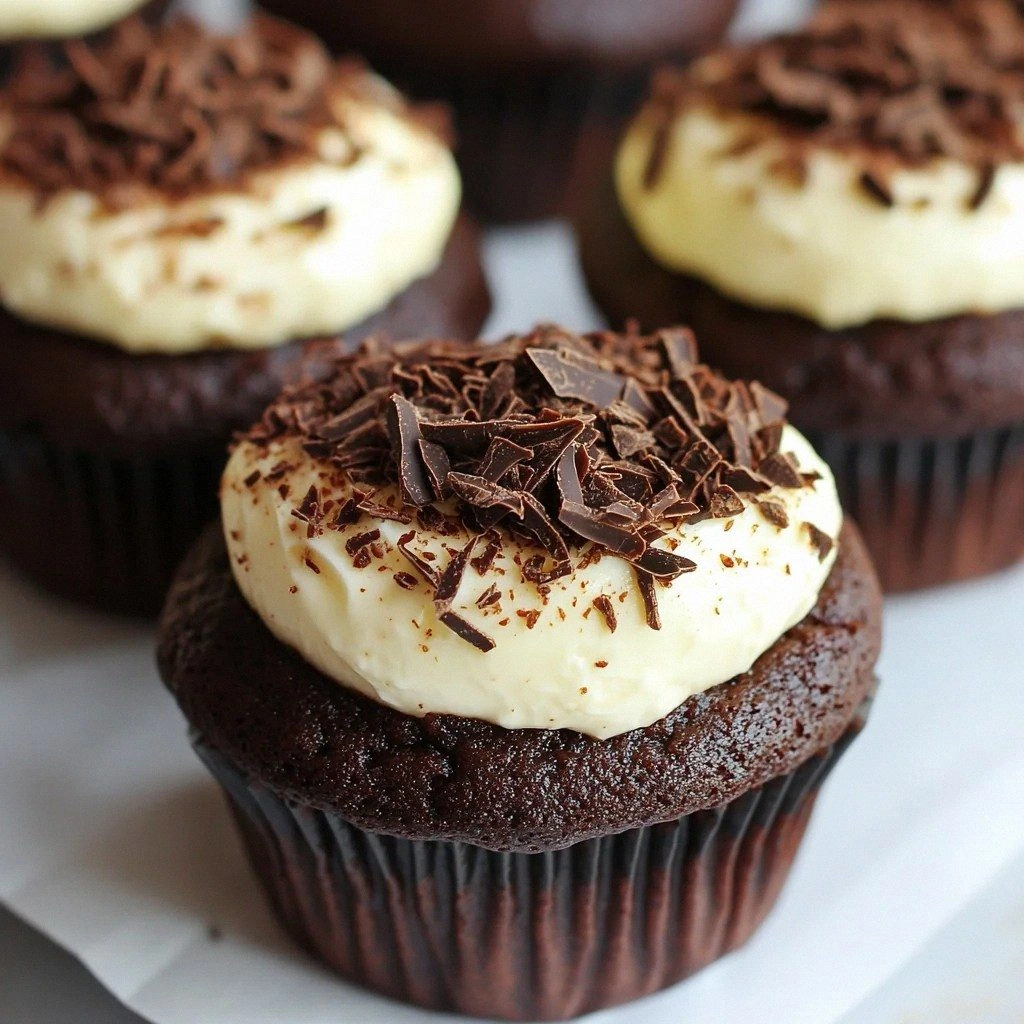
Zero Decoration Needed: The cheesecake crater creates a natural canvas; a dusting of powdered sugar or a few chocolate shavings are plenty. Bring these to a potluck and watch people assume you paid a boutique bakery—then fight over the last one like it's a golden ticket.
Alright, let's break down exactly what goes into this masterpiece...
Inside the Ingredient List
The Flavor Base
All-purpose flour is the quiet scaffolding here; it needs enough protein for structure but not so much that the cake turns rubbery. Stick with the Gold Medal or King Arthur brands—cheap off-label flours can vary in protein and throw off the crumb. Granulated sugar does double duty, sweetening and keeping the cake moist by locking in steam. Swap in light brown sugar if you want a hint of caramel, but know it will darken the color and mute the chocolate slightly. Unsweetened cocoa powder is the star—Dutch-processed gives a mellow, Oreo-like flavor, while natural cocoa adds a brighter, fruitier edge. Either works; just don't reach for sweetened drinking cocoa unless you fancy a cloying disaster.
The Texture Crew
Baking powder and baking soda are the dynamic duo that lift the batter just enough to encase the cheesecake without doming into a mushroom. Buttermilk tenderizes the crumb and reacts with the cocoa for a redder hue; if you're out, whisk a tablespoon of lemon juice into regular milk and let it sit five minutes. Vegetable oil keeps everything plush even when refrigerated—butter would firm up and stale faster than you can say "late-night snack." The egg adds structure and richness; size matters, so grab large, not jumbo or those petite peewees that leave you wondering why the batter looks anemic.
The Unexpected Star
Boiling water sounds like a prank ingredient, but it's the key to unlocking cocoa's deepest flavor notes. The heat melts the powder into a glossy slurry, releasing aromatic compounds that smell like a chocolate river. Pour it in slowly while whisking so you don't scramble the egg; the batter will look runny—think chocolate soup—but that's your insurance against dryness. If you crave mocha vibes, swap half the water for strong hot coffee; nobody will pinpoint the coffee, they'll just swear these are the most complex cupcakes ever.
The Final Flourish
Cream cheese must be brick-style, full-fat, and properly softened so it whips into a lump-free cloud. Low-fat or whipped tubs contain extra water that turns the filling icy and prone to cracks. A single egg binds the cheesecake, while a modest quarter-cup of sugar prevents it from tasting like savory breakfast spread. Pure vanilla extract rounds the edges; imitation vanillin screams "boxed cake mix" and undoes all your artisanal effort. Let the block sit on the counter for two hours—microwaving creates hot edges and a cold center that never homogenize.
Everything's prepped? Good. Let's get into the real action...
The Method — Step by Step
- Start with the cheesecake filling because it needs time to firm up. Beat the softened cream cheese until it looks like satin—about two minutes on medium speed—then scrape the bowl religiously; unmixed blobs will haunt you later. Add the sugar and keep beating until the grit disappears and the mixture shines like white velvet. Drop in the egg and vanilla, beat just until incorporated; over-mixing whips in air that expands in the oven and cracks the surface. Spread the mixture into a mini ice-cube tray or silicone mold, smoothing the tops with an offset spatula. Freeze at least two hours; you're aiming for rock-solid pucks that handle like candy bars.
- While the freezer works its magic, line a 12-cup muffin tin with paper liners and preheat the oven to 350°F. The liners should fit snugly; if they're loose, a quick spritz of nonstick spray underneath keeps them from slumping. Position the rack in the center so the cupcakes bake evenly—too low and the bottoms scorch, too high and the tops brown before the centers set. Give the oven a full fifteen minutes to stabilize; impatient bakers who shove pans into a lukewarm box deserve lopsided cupcakes.
- In a large bowl, whisk together flour, sugar, cocoa, baking powder, baking soda, and salt until the mixture looks like gourmet hot-chocolate mix. Break up any stubborn cocoa lumps with your fingers; those pebbles create bitter pockets that scream "amateur hour." Make a well in the center like you're building a chocolate volcano—this little crater helps the wet ingredients incorporate without flour bombs exploding across your counter.
- Add buttermilk, oil, egg, and vanilla into the well. Whisk with the fervor of a morning-coffee zombie until the batter is smooth and glossy, about sixty seconds. Don't over-beat; gluten development is great for bagels, tragic for cupcakes. The mixture will be thick and spoonable at this stage—think chocolate pudding before the cornstarch sets.
- Here comes the drama: pour in the boiling water (or coffee) in a slow stream while whisking constantly. The batter will hiss and thin out like chocolate river rapids—keep the whisk moving so the heat cooks the cocoa evenly. Once incorporated, let the mixture stand for two minutes; this brief rest allows the starch to hydrate and the bubbles to settle, yielding a tender crumb. You'll end up with a glossy, pourable batter that smells like a chocolate factory in full swing.
- Scoop a modest tablespoon of batter into each liner—just enough to cover the bottom. You're creating a chocolate mattress for the frozen cheesecake plug, so eyeball about a quarter-inch depth. If you add too much, the cake will swallow the filling whole; too little and the cheesecake might stick to the paper. Swirl the pan gently to level the chocolate lake.
- Retrieve the frozen cheesecake cubes and pop one into each cup, pressing lightly so it sits just below the surface but doesn't touch the bottom. Work quickly; the heat from your fingers can soften the edges, leading to blurry layers. Aim for a little cheese iceberg peeking above the chocolate tide—this ensures the top bakes flat and reveals a perfect white circle.
- Divide the remaining batter among the cups, covering each cheesecake island completely. Tap the pan on the counter to dislodge air pockets; those tiny craters can cause the filling to sink. Slide the tin into the oven and bake for 18–22 minutes. The edges should spring back when poked, and a toothpick inserted into the chocolate part should come out with a few moist crumbs—avoid the cheesecake or you'll get a false reading.
- Cool in the pan for five minutes; this short rest lets the structure set so the cupcakes don't tear when you lift them. Transfer to a rack and resist the urge to peel the papers for at least thirty minutes—steam trapped inside will finish baking the centers. Once fully cool, dust with powdered sugar or drizzle with ganache if you want to gild the lily. Store leftovers in an airtight container, assuming you possess superhuman restraint.
That's it—you did it. But hold on, I've got a few more tricks that'll take this to another level...
Insider Tricks for Flawless Results
The Temperature Rule Nobody Follows
Room-temperature dairy and eggs aren't just snobby baker talk; they emulsify into a smooth batter that traps air evenly, producing a velvety crumb. Cold ingredients seize the batter into curdled blobs that bake into tunnels. Set everything out an hour before baking—or, if you're me and perpetually impatient, submerge sealed containers in lukewarm water for ten minutes. Your future self will thank you when the cupcakes rise like synchronized swimmers instead of sad, lopsided rafts.
Why Your Nose Knows Best
Ignore the timer tyrants; your oven is a unique snowflake with hot spots and attitude. Start sniffing around the 15-minute mark—when the aroma shifts from raw cocoa to fresh-baked brownie, you're two minutes from done. The edges will also look matte instead of glossy, and the cheesecake will puff like a tiny white pillow. Pull them out a hair early; residual heat finishes the bake, and over-baked cheesecake filling turns rubbery like a bounced check.
The 5-Minute Rest That Changes Everything
Once baked, let the pan sit on a cold burner for exactly five minutes—no more, no less. This brief sauna relaxes the crumb so the cupcakes don't shrink from the liners, yet it's short enough to prevent the bottoms from steaming into leather. Use a thin knife edge to gently release any edges clinging to the tin; a rough tug rips the crust and unleashes a hailstorm of crumbs. Transfer to a rack with the grace of a ballerina, not a bulldozer.
The Overnight Flavor Flip
These cupcakes taste better the next day once the cocoa and cheesecake have mingled in the fridge like introverts at a book club. Wrap them loosely so condensation doesn't sog the tops, then bring back to room temp for thirty minutes before serving. The chocolate deepens, the tang mellows, and the texture turns fudgy at the edges while staying fluffy in the middle. I dare you to taste this and not go back for seconds.
Creative Twists and Variations
This recipe is a playground. Here are some of my favorite ways to switch things up:
Mocha Cheesecake Edition
Dissolve two teaspoons of instant espresso into the boiling water. The coffee amplifies the cocoa's complexity without screaming "latte." Add a whisper of cinnamon to the cheesecake for Mexican-chocolate vibes. Top with a chocolate-covered espresso bean so people know what's coming. Perfect for brunch when you want dessert disguised as caffeine.
Raspberry Ripple Surprise
Swirl a teaspoon of seedless raspberry jam into each cheesecake puck before freezing. The tart fruit cuts through the richness like a neon sign in a noir film. Dust the finished cupcakes with freeze-dried raspberry powder for color and punch. Your Valentine will propose all over again, even if you've been married twenty years.
Salted Caramel Core
Replace two tablespoons of cream cheese with thick caramel sauce and a pinch of flaky salt. The salt heightens sweetness and makes the chocolate taste darker than it is. Drizzle cooled cupcakes with extra caramel just before serving so it stays glossy. Warning: people will lick their fingers in public.
Orange-Chocolate Dreamsicle
Add a teaspoon of orange zest and a few drops of orange oil to the cheesecake. The citrus perfume wafts up as the cakes bake, making your kitchen smell like a Terry's Chocolate Orange exploded—in the best way. Garnish with candied peel for vintage bakery elegance. Ideal for Christmas cookie swaps when everyone is bored of peppermint.
Peanut Butter Pocket
Beat two tablespoons of creamy peanut butter into the cheesecake mixture, then press a mini peanut-butter cup on top of each frozen puck before covering with batter. The result is a triple-threat of chocolate, peanut, and cream cheese that tastes like a Reese's got a college degree. Pro tip: sprinkle chopped peanuts on top for crunch and bragging rights.
Triple-Chocolate Threat
Fold mini chocolate chips into the cheesecake, and swap the boiling water for hot ganache. Once baked, shower the tops with grated dark chocolate so they look like tiny edible Jackson Pollocks. This version is so decadent that I once witnessed a self-proclaimed "not a dessert person" eat three in a row and then ask if I shipped nationwide.
Storing and Bringing It Back to Life
Fridge Storage
Place completely cooled cupcakes in an airtight container lined with a paper towel to absorb excess moisture. They'll keep for up to five days, though the cheesecake will firm into a pleasantly dense truffle texture after day three. Bring to room temperature for twenty minutes before serving; cold chocolate tastes flat, and nobody wants flat chocolate. If the liners feel slightly damp, peel them off and stand the cupcakes on a wire rack for ten minutes to re-crisp the edges.
Freezer Friendly
Flash-freeze unwrapped cupcakes on a tray until solid, then transfer to a zip-top bag with as much air sucked out as humanly possible. They'll stay pristine for two months—longer if you vacuum-seal, but who has that kind of dedication? Label the bag with the date and a skull-and-crossbones symbol to ward off freezer-bandit family members. Thaw overnight in the fridge, then warm at 300°F for five minutes to resurrect that fresh-baked aroma.
Best Reheating Method
Microwaves are the enemy of cheesecake, turning it into rubbery disappointment. Instead, tent cupcakes with foil and warm in a 300°F oven for 8–10 minutes. Add a tiny splash of water to the pan before covering; the gentle steam rehydrates the crumb without turning it soggy. Serve immediately with cold milk or hot coffee for maximum contrast. Picture yourself pulling this out of the oven, the whole kitchen smelling incredible, and suddenly remembering why you bake in the first place.