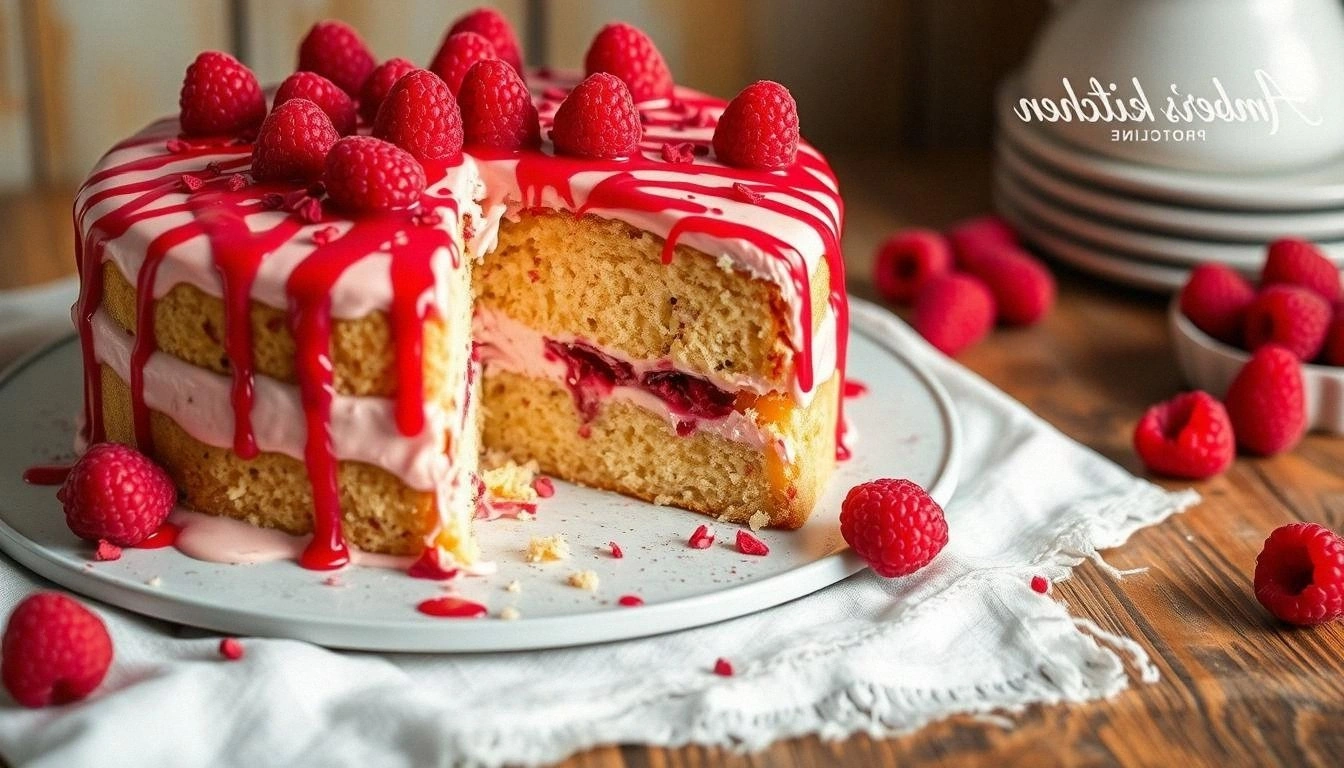
I was staring at a burnt batch of brownies and a half‑finished blueberry pie when my friend dared me to make a dessert that would make both of us question our culinary lives. “You’ve got to create something that sings,” she said, eyes glittering like fresh berries. That challenge turned into an obsession, a midnight kitchen experiment that ended with a cake so vibrant it could have been a painting. The moment I sliced into the first piece, the aroma hit me like a sudden summer rain—sweet, tart, and with a whisper of heat that made my tongue tingle.
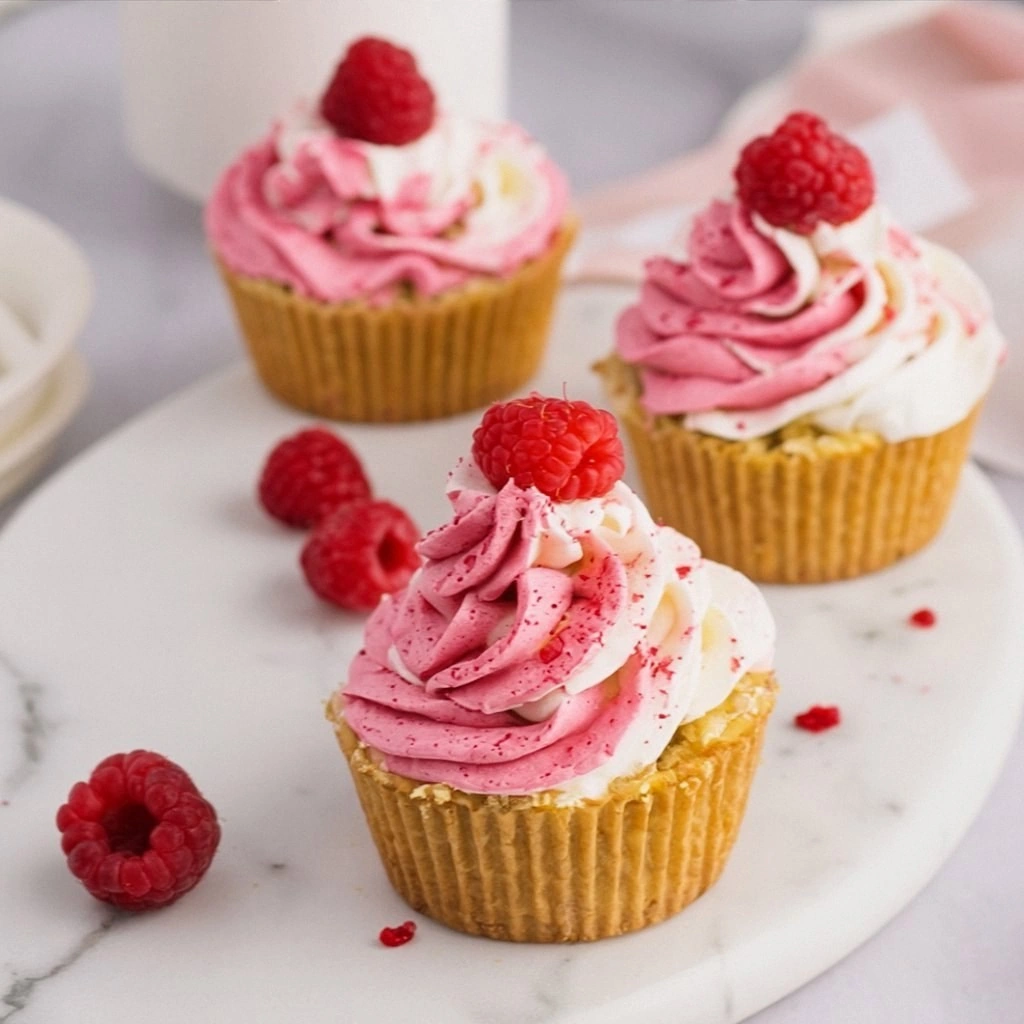
Picture this: a golden, airy crumb that crackles when you press it, a burst of ruby‑red raspberries that explode with juice, and a subtle kick of cayenne that lingers like a secret aftertaste. The cake looks like a jewel, the edges crisped to a fine, golden lace, and the interior moist enough to melt in your mouth. The first bite is a dance of flavors—sweet, tart, and a surprising spicy note that makes the cake feel alive. I dare you to taste this and not go back for seconds.
What sets this version apart from every other raspberry cake you’ve ever seen is the balance of heat and fruit, the meticulous layering of textures, and a technique that keeps the cake moist and fluffy even when you add the extra spice. The secret lies in the combination of fresh raspberries, a splash of lemon zest, and a measured pinch of cayenne pepper that gives the cake its zinger. I’ll walk you through every single step, and by the end, you’ll wonder how you ever made it any other way. This is hands down the best version you'll ever make at home.
But before we get into the baking, let’s talk about why this cake is a game‑changer. It’s not just about the flavors; it’s about the experience. Imagine the kitchen filling with a scent that’s both sweet and slightly smoky, the sound of batter mixing, and the anticipation of that first bite. Most recipes get this completely wrong, focusing either on the fruit or the spice, but not both. Here, everything works together, creating a cake that’s a crowd‑pleaser, a showstopper, and a conversation starter. Picture yourself pulling this out of the oven, the whole kitchen smelling incredible, and your friends’ faces lighting up as they take their first bite. Stay with me here—this is worth it.
Alright, let’s break down exactly what goes into this masterpiece. We’ll start with the ingredients, then move on to the technique that turns a simple batter into a symphony of flavors. Trust me, by the end of this article, you’ll have a cake that’s not only delicious but also a testament to your culinary prowess. Let the adventure begin.
What Makes This Version Stand Out
- Flavor Balance: The subtle cayenne pepper gives a gentle heat that pairs perfectly with the tartness of fresh raspberries, creating a multi‑layered taste experience.
- Texture Mastery: The batter is light and airy, yet the cake holds its structure, thanks to the precise ratio of flour to liquid and a gentle folding technique.
- Freshness Factor: Using fresh raspberries instead of frozen adds a burst of juiciness that elevates the entire cake.
- Visual Appeal: The cake’s golden crust and ruby‑red interior make it a feast for the eyes, ideal for photo‑ready dessert tables.
- Versatility: It can be served plain, dusted with powdered sugar, or glazed with a citrus reduction, making it adaptable to any occasion.
- Make‑Ahead Potential: The cake can be prepared a day ahead, sealed in an airtight container, and stays moist for up to 48 hours.
- Ingredient Quality: Choosing organic or locally sourced berries and high‑quality butter enhances the flavor profile.
- Audience Impact: Guests leave the table craving a second slice, and you’ll feel the pride of having created a crowd‑pleasing masterpiece.
Inside the Ingredient List
The Flavor Base
All‑Purpose Flour: The backbone of the cake, providing structure and a neutral canvas for the other flavors. If you skip it, the cake will collapse into a soggy mess. For a lighter crumb, sift the flour and use a blend of whole wheat and cake flour.
Granulated Sugar: Sweetens the batter and helps create a tender crumb through the Maillard reaction. Too little sugar will leave the cake dry; too much will make it overly sweet. A pinch of brown sugar can add depth without overpowering the berries.
Baking Powder: The leavening agent that gives the cake its rise. If you don’t have baking powder, substitute with 1 tsp baking soda plus 1 tsp cream of tartar for each teaspoon of baking powder.
Salt: Enhances all the flavors and balances the sweetness. Even a half‑teaspoon is enough to brighten the overall profile.
The Texture Crew
Unsalted Butter: Adds richness, moisture, and a silky mouthfeel. Use room‑temperature butter so it creames easily with the sugar, creating a light, airy batter. If you use salted butter, reduce the added salt by 1/4 tsp.
Eggs: Bind the ingredients together, add structure, and provide a beautiful golden color. Using fresh, large eggs will give the best rise. If you’re vegan, try flax eggs (1 tbsp ground flaxseed + 3 tbsp water per egg) as a substitute.
Whole Milk: Hydrates the flour and creates a moist crumb. If you prefer a dairy‑free version, swap for oat or almond milk, but keep the same volume.
The Unexpected Star
Fresh Raspberries: The star that brings tartness, color, and juicy bursts to each bite. Use ripe, firm berries for the best flavor. If you’re out of season, frozen berries work—just thaw and drain them before use.
Lemon Zest: Adds a bright, citrusy aroma that cuts through the richness of the butter and the heat of the cayenne. Grate the zest finely to avoid bitterness from the pith.
Cayenne Pepper: The zinger that gives this cake its unique twist. Use a light hand; too much will overpower the fruit. Start with 1/4 tsp and adjust to taste if you’re a spice lover.
The Final Flourish
Powdered Sugar: Optional dusting that adds a sweet finish and an elegant look. It also helps to balance the tartness of the berries. Use a fine sieve to ensure a smooth dusting.
Optional Citrus Glaze: A drizzle of lemon or orange glaze adds a glossy finish and a burst of brightness. Mix equal parts powdered sugar and lemon juice, then stir until smooth.
Everything’s prepped? Good. Let’s get into the real action.
The Method — Step by Step
- Preheat your oven to 350°F (175°C). Line a 9-inch springform pan with parchment paper and grease the sides with butter or non‑stick spray. This ensures a smooth release and a golden crust. While the oven preheats, let the batter rest for a few minutes to allow the leavening to activate.
- Whisk the dry ingredients together. In a medium bowl, sift flour, sugar, baking powder, and salt. Sifting removes clumps and aerates the flour, giving the cake a finer crumb. Keep this mixture aside while you cream the butter.
- Creame the butter and sugar. In a large mixing bowl, beat the softened butter and sugar together until light and fluffy, about 3–4 minutes. The goal is a pale, airy mixture that traps air for lift. Kitchen Hack: Use an electric mixer on low speed first, then increase to medium. This prevents the butter from melting too quickly.
- Incorporate the eggs one at a time. Add each egg fully blended before adding the next, ensuring the mixture stays emulsified. This step is crucial for a tender crumb. Beat for about 30 seconds after each addition.
- Alternate adding dry and wet mixtures. Pour in half of the dry mixture, then half of the milk, and whisk until just combined. Repeat until all dry ingredients are used. The batter should be smooth but not overmixed. This technique keeps the cake light.
- Fold in the raspberries, lemon zest, and cayenne. Gently fold the berries to avoid breaking them, then stir in the zest and a light pinch of cayenne. This infusion of flavors is what makes the cake extraordinary. Kitchen Hack: If you want a smoother texture, press the berries into the batter with a spatula before folding.
- Pour the batter into the prepared pan. Tap the pan gently on the counter to release any air bubbles. The batter should settle evenly. This step ensures a uniform rise and prevents a domed top.
- Bake for 30–35 minutes. The cake is done when a toothpick inserted into the center comes out clean or with a few moist crumbs. The edges should be golden brown and slightly crisp. The interior will still look a bit wet; it will firm up as it cools.
- Let the cake cool in the pan for 10 minutes. Then remove it from the springform pan and transfer to a wire rack. This prevents moisture buildup at the bottom. Let it cool completely before adding any glaze or dusting.
That's it — you did it. But hold on, I've got a few more tricks that'll take this to another level. Keep reading to discover the insider secrets that make this cake a showstopper.
Insider Tricks for Flawless Results
The Temperature Rule Nobody Follows
Many bakers bake at 350°F, but the best results come from a slightly lower temperature of 330°F. This slower bake allows the cake to rise evenly without drying out. It also gives the berries time to release their juices, creating a moist interior. If you’re using a convection oven, reduce the temperature by 25°F to avoid over‑browning.
Why Your Nose Knows Best
Before you even touch the batter, sniff the dry mix. A faint, sweet aroma indicates the sugar has properly integrated. When you add the butter, the smell should become buttery and slightly caramelized. Trust your nose; it’s a reliable indicator that the batter is on the right track.
The 5-Minute Rest That Changes Everything
After folding in the berries, let the batter rest for 5 minutes. This brief pause allows the fruit to release juices and the batter to settle, preventing the berries from sinking to the bottom. It also gives the leavening agents a chance to activate fully, resulting in a lighter crumb.
Even Cooling Is Key
Do not rush the cooling process. A quick transfer to a rack can cause condensation, leading to a soggy bottom. Let the cake rest in the pan for 10 minutes before removing it; this allows the steam to escape gradually. The result is a crisp edge and a tender interior.
Glaze Timing Matters
If you choose to glaze the cake, wait until it’s completely cool. A warm cake will melt the glaze, causing a sticky mess. Once cooled, drizzle the glaze in a steady line, letting it drip down the sides for a professional finish.
Storage Secrets
Wrap the cooled cake in parchment, then in plastic wrap, and store it in an airtight container. Keep it at room temperature for up to 3 days or refrigerate for up to a week. To revive any dryness, sprinkle a light dusting of powdered sugar before serving.
Creative Twists and Variations
This recipe is a playground. Here are some of my favorite ways to switch things up:
Chocolate Raspberry Fusion
Add 1/4 cup of unsweetened cocoa powder to the dry mix and replace half the milk with chocolate milk. The result is a decadent mocha‑berry cake that pairs beautifully with a scoop of vanilla ice cream.
Spiced Orange Twist
Swap the lemon zest for orange zest, add 1 tsp of ground ginger, and drizzle a thin layer of orange glaze on top. The warm spices elevate the citrus flavor, making it perfect for holiday gatherings.
Almond‑Infused Delight
Replace half the flour with ground almonds and fold in a handful of toasted almond slivers. The nutty undertone complements the berries and adds a satisfying crunch.
Gluten‑Free Version
Use a 1:1 gluten‑free flour blend and add 1 tsp xanthan gum to keep the structure. The texture remains airy, and the flavor profile stays true to the original.
Vegan Takeover
Swap butter for melted coconut oil, use flax eggs, and replace milk with oat milk. The result is a rich, moist cake that still delivers the raspberry zinger.
Berry‑Jam Swirl
Stir in a few tablespoons of raspberry jam into the batter before baking. The swirl creates a marbled look and a concentrated berry burst in every slice.
Storing and Bringing It Back to Life
Fridge Storage
Wrap the cooled cake tightly in plastic wrap and place it in the refrigerator. It will stay fresh for up to a week. When ready to serve, let it sit at room temperature for 15 minutes to soften the crumb and reintroduce the aroma.
Freezer Friendly
Wrap the cake in parchment, then in plastic wrap, and freeze for up to 3 months. To thaw, leave it in the fridge overnight, then let it come to room temperature for 30 minutes. If you notice it’s a bit dry, sprinkle a light dusting of powdered sugar before serving.
Best Reheating Method
Reheat slices in a preheated 300°F oven for 5–7 minutes, or microwave on low power for 20–30 seconds. Add a tiny splash of water before reheating; it steams the cake back to perfection, preserving moisture and flavor.