I was standing in my kitchen, eyes glued to the screen of my phone, when the alarm on my air fryer blared like a tiny, impatient drummer. A half‑baked chocolate lava cake had slid off the counter, melted into a sticky, chocolaty puddle that looked more like a disaster movie than dessert. I stared at the gooey mess, a mix of disappointment and a sudden spark of daring. That moment was the catalyst that pushed me to experiment, to turn a kitchen calamity into a culinary triumph.
The scent of dark chocolate wafting through the air was the first thing that caught my attention—rich, almost metallic, like the promise of a midnight stroll through a chocolate factory. My ears caught the faint hiss of the air fryer’s fan, a steady, comforting drone that whispered “ready.” I could feel the heat radiating off the countertop, a gentle, anticipatory warmth that made my skin tingle. The taste, though yet to be experienced, was already dancing in my imagination, a symphony of sweet, bitter, and molten bliss. And the texture? I imagined a crisp exterior that cracks like brittle ice, revealing a molten center that oozes like liquid gold.
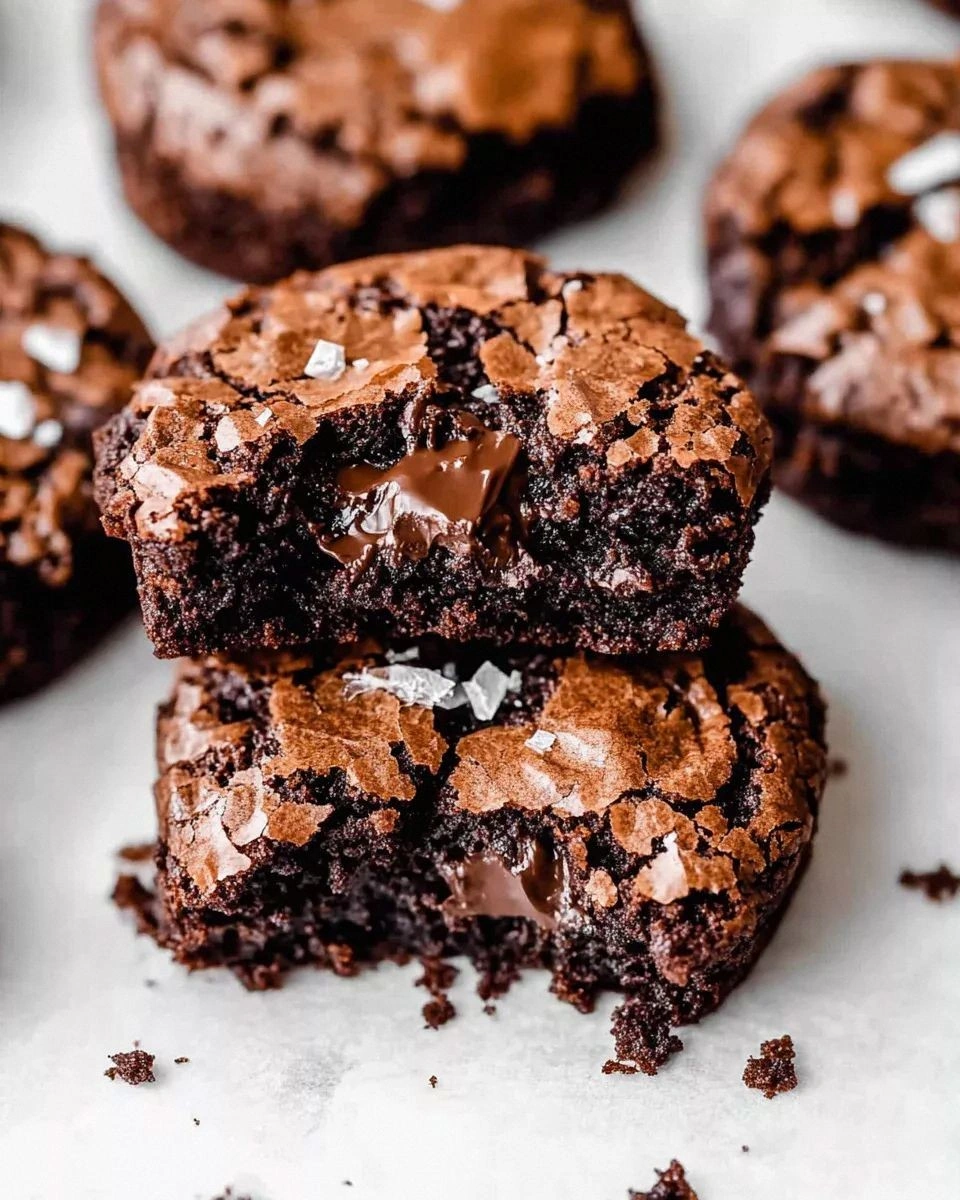
What sets this version apart from every other air fryer lava cake recipe is that it strips away the fluff and focuses on pure, unadulterated chocolate. I’ve discovered that the secret lies in using only a handful of high‑quality ingredients: a generous piece of chocolate, butter that melts like butter, and eggs that bind the dream together. The air fryer’s circulating hot air creates a golden crust in minutes, while the interior stays liquid, giving that signature “lava” effect. No extra pan, no stovetop, no waiting for a pot to boil—just a single appliance, a few minutes, and a dessert that feels like a reward for being bold.
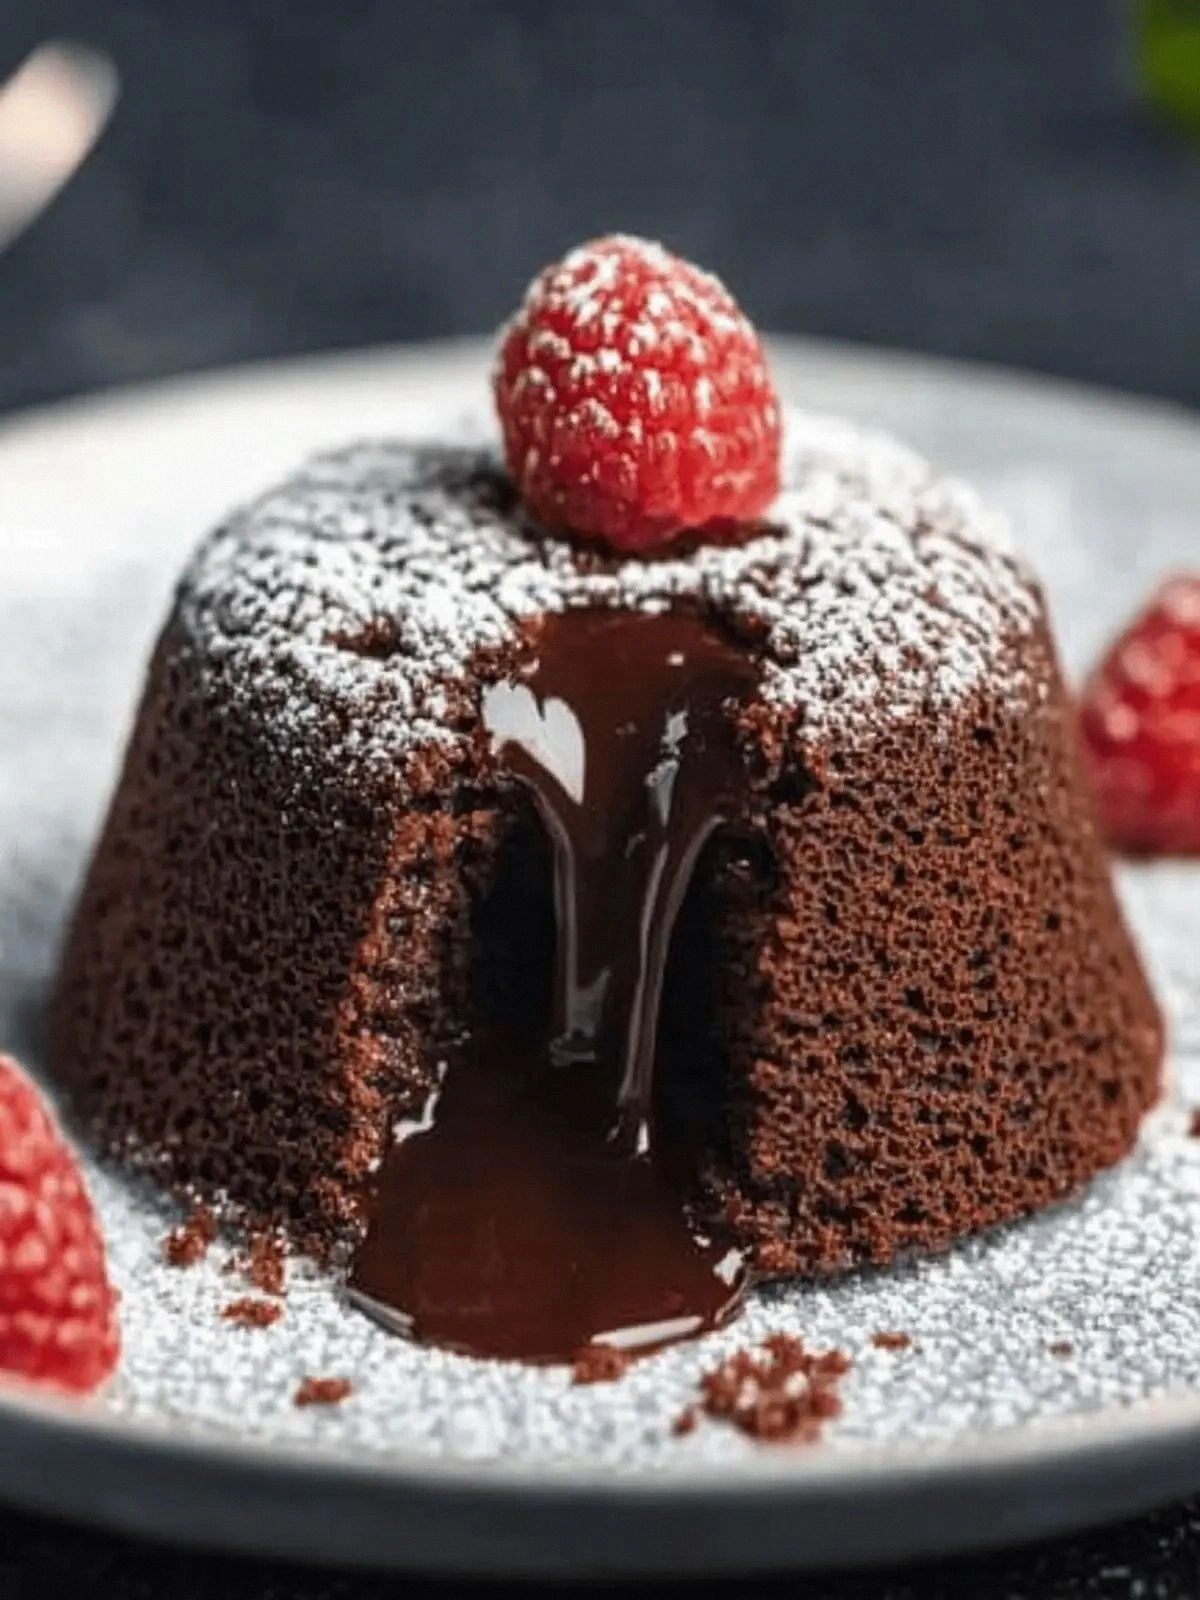
Picture yourself pulling this out of the air fryer, the whole kitchen smelling incredible, the steam curling around the plate like a sweet fog. The moment the lid opens, a burst of chocolate aroma hits you like a wave, and the molten center glistens, inviting you to dig in. I dare you to taste this and not go back for seconds. I’ll be honest—I ate half the batch before anyone else got to try it. The next time you think about a simple dessert, remember that a little daring and a good air fryer can turn a kitchen mishap into a moment of pure joy.
Okay, ready for the game‑changer? Let me walk you through every single step—by the end, you’ll wonder how you ever made it any other way. This isn’t just a recipe; it’s a story of turning a mess into a masterpiece.
What Makes This Version Stand Out
- Flavor: The use of premium dark chocolate with a high cocoa content delivers a depth that feels almost velvety against the palate. The butter adds a buttery undertone that balances the bitterness, creating a harmony that makes each bite a revelation. This is hands down the best version you’ll ever make at home.
- Texture: The air fryer’s rapid, even heat creates a crisp outer shell that shatters like thin ice when you cut into it, exposing a gooey, molten center that’s a dream. The contrast is pure sensory fireworks—crunch meets ooze in one bite.
- Simplicity: With only seven ingredients, no special equipment, and a single appliance, this recipe is a breeze for beginners and a quick fix for busy evenings. No more juggling pans or waiting for water to boil.
- Uniqueness: Unlike traditional stovetop lava cakes that require constant monitoring, the air fryer keeps everything in check, giving you a consistent result every time. The process is almost magical.
- Crowd Reaction: Friends who’ve tried it swear the moment they see the molten center, they’re instantly captivated. It’s a conversation starter that turns ordinary gatherings into memorable events.
- Ingredient Quality: Using a single high‑quality chocolate piece ensures that every bite is rich and complex, while the butter’s flavor elevates the entire dish. The eggs provide structure without overpowering the chocolate.
Alright, let's break down exactly what goes into this masterpiece. Everything’s prepped? Good. Let’s get into the real action.
Inside the Ingredient List
The Flavor Base
The 3 ounces of dark chocolate are the star of this show. Their cocoa solids carry a bittersweet punch that anchors the dessert. If you skip this step and use white chocolate, the result is a sweet, buttery cake with no depth. For a richer flavor, choose chocolate with at least 70% cocoa.
The unsalted butter, measured at 4 tablespoons, provides the necessary fat to create a silky mouthfeel. It also helps the chocolate melt evenly, preventing lumps. If you substitute salted butter, you’ll need to reduce any added salt in the recipe to avoid an overly salty finish.
The Texture Crew
Two large eggs act as the binder that holds the cake together. Their yolks bring richness and help the cake set without becoming rubbery. If you’re vegan, a flaxseed meal and water mixture can mimic the egg’s binding properties.
An additional egg white, measured at one large, adds lift and a lighter crumb. It’s the secret to that airy, slightly puffy exterior that contrasts with the molten center. If you prefer a denser cake, omit the egg white; the cake will still be delicious but slightly heavier.
The Unexpected Star
The 1/3 cup of granulated sugar sweetens the cake, balancing the bitterness of the chocolate. It also contributes to the Maillard reaction, giving the crust a beautiful golden hue. If you’re watching your sugar intake, you can swap in a sugar substitute that measures by volume.
The 1/4 cup of all‑purpose flour adds structure without making the cake tough. It helps the batter hold its shape during cooking. A gluten‑free flour blend can replace it if you’re gluten‑sensitive, but adjust the quantity to avoid a gritty texture.
The Final Flourish
The teaspoon of confectioner’s sugar is the finishing touch, dusted on top to give a subtle sweetness and an elegant look. It also adds a slight crunch when you bite into the crust. If you’re craving a bit of sparkle, you can replace it with a pinch of cocoa powder.
Everything’s prepped? Good. Let’s get into the real action.
The Method — Step by Step
- Preheat your air fryer to 350°F (175°C) for about 3 minutes. This ensures a consistent temperature that will give the cake a crisp shell. While the air fryer warms, set up a double boiler on the stove, bringing a pot of water to a gentle simmer. The double boiler will help melt the chocolate evenly without scorching.
- Melt the chocolate in the double boiler, stirring constantly until it’s smooth. The chocolate should be glossy and free of lumps. If you see any browned bits, discard them and start over to avoid bitterness.
- Add the butter to the melted chocolate and stir until it’s fully incorporated. The butter will give the batter a silky texture and help the chocolate distribute evenly. Let the mixture cool slightly; you don’t want it too hot when you add the eggs.
- Whisk the two large eggs in a separate bowl until the whites are slightly frothy. This aerates the eggs, creating a light, airy base for the cake. Gently fold the eggs into the chocolate mixture, mixing until just combined. Be careful not to overmix, or you’ll lose the airy quality.
- In a third bowl, whisk the egg white until it forms soft peaks. This step is crucial for the cake’s rise. Fold the egg white into the batter, adding it in small batches to maintain its volume. The batter should look glossy and slightly thick.
- Sift the 1/3 cup of sugar and 1/4 cup of flour over the batter, then fold gently until just incorporated. The sugar will caramelize on the surface, giving a beautiful crust, while the flour ensures the cake holds its shape. Avoid overmixing to keep the interior molten.
- Line the air fryer basket with parchment paper or a silicone liner. This prevents sticking and makes cleanup a breeze. Spoon the batter into the basket, filling it about 3/4 full. The batter should spread slightly as it cooks.
- Cook at 350°F (175°C) for 12–14 minutes. The cake’s edges should turn golden brown, and the center should still look slightly wet. The exact time may vary depending on your air fryer model; keep a close eye on the cake’s progress. Once done, remove the basket and let the cake cool for 2 minutes before transferring it to a plate.
- Dust the top with the teaspoon of confectioner’s sugar for a subtle sweet finish. The sugar adds a fine crunch and a touch of elegance. Serve immediately for the best molten experience, or let it sit for a few minutes if you prefer a slightly firmer center.
- To enhance the lava effect, drizzle a thin ribbon of warm chocolate ganache over the top right before serving. The ganache will melt into the cake, creating a cascading flow of chocolate that’s both visual and gustatory delight. This final touch is optional but highly recommended for the ultimate indulgence.
That’s it — you did it. But hold on, I’ve got a few more tricks that’ll take this to another level. These insider tips will help you avoid common pitfalls and elevate your dessert to a professional standard.
Insider Tricks for Flawless Results
The Temperature Rule Nobody Follows
Most people set their air fryer to the highest setting, hoping for a quick crust. The truth is, a lower temperature—around 350°F—creates a more even bake, preserving the molten center while giving the crust a golden finish. If you’re using a convection oven, set it to 350°F and use the convection setting for the best results.
Why Your Nose Knows Best
Your nose can tell you when the cake is done before the timer does. As the batter cooks, it will emit a sweet, chocolatey aroma that’s unmistakably rich. If the scent is strong and slightly buttery, you’re likely at the perfect moment. Trust your senses; they’re the best judge.
The 5‑Minute Rest That Changes Everything
After removing the cake from the air fryer, let it rest for exactly five minutes. This pause allows the heat to distribute evenly, ensuring the center remains molten while the edges set just right. A quick rest also makes the cake easier to slice cleanly.
Use a Silicone Baking Dish for Even Cooking
If your air fryer basket is too shallow, transfer the batter to a silicone mold that fits the basket. The mold will keep the batter level and prevent overflow, giving a uniform rise. Silicone molds also release the cake effortlessly after cooking.
Keep the Parchment Paper Flat
When lining the basket, press the parchment paper flat against the sides. This prevents the paper from lifting and exposing the batter to direct heat, which can cause uneven browning. A flat surface ensures consistent cooking.
These tricks are not just tips—they’re game‑changers that turn a simple recipe into an unforgettable experience. Try them, and watch the difference.
Creative Twists and Variations
This recipe is a playground. Here are some of my favorite ways to switch things up:
Nutty Lava Cake
Add 1/4 cup chopped almonds or hazelnuts to the batter before cooking. The nuts add crunch and a subtle earthy flavor that pairs beautifully with the chocolate. Roast the nuts beforehand for an extra layer of depth.
Spiced Lava Delight
Stir in 1/4 teaspoon cinnamon or a pinch of cayenne pepper to give the cake a warm, spicy kick. The spices elevate the chocolate’s complexity, making each bite a layered experience. Adjust the spice level to your preference.
Berry‑Infused Lava
Fold in 1/4 cup fresh raspberries or blueberries before cooking. The berries burst during baking, adding a sweet-tart note that cuts through the richness. Serve with a dollop of whipped cream for a balanced dessert.
Minty Chocolate Lava
Add 1 teaspoon mint extract or a few drops of peppermint oil to the batter. The mint gives a refreshing aftertaste that contrasts nicely with the chocolate’s deep flavor. Pair with a scoop of vanilla ice cream for a classic twist.
Vegan Lava Cake
Replace the eggs with a flaxseed meal and water mixture (1 tablespoon flaxseed + 3 tablespoons water). Use a dairy‑free chocolate bar and vegan butter. The result is a plant‑based lava cake that still delivers the same molten experience.
Salted Caramel Lava
Drizzle a thin layer of salted caramel sauce over the top before serving. The caramel adds a buttery sweetness that complements the chocolate. Sprinkle a pinch of sea salt on top for a caramelized crunch.
Each variation brings a new dimension to the base recipe, making it suitable for any occasion or mood. Feel free to experiment and make it your own.
Storing and Bringing It Back to Life
Fridge Storage
Store the cooled cake in an airtight container in the refrigerator for up to 3 days. The cake’s structure will hold up, but the molten center may firm slightly. Let it sit at room temperature for 10 minutes before serving to restore some softness.
Freezer Friendly
Wrap the cake tightly in plastic wrap and place it in a freezer bag. It can be frozen for up to 2 weeks. Thaw overnight in the fridge, then let it reach room temperature before serving. The texture will remain rich, and the chocolate will stay intact.
Best Reheating Method
To revive a chilled or frozen cake, preheat your air fryer to 300°F (150°C). Place the cake in the basket for 5 minutes, then check the center. If it’s still slightly firm, add an extra minute or two. A tiny splash of water on a paper towel inside the basket can create steam, helping the cake reheat evenly.
With these storage tips, you can enjoy this indulgent treat anytime, whether fresh or reheated, and it will always taste like a fresh, molten masterpiece.