It started with a kitchen mishap that could have been a cautionary tale, but I turned it into a triumph. I was trying to impress a friend with a quick, elegant dinner and somehow the salmon fillets ended up looking like a sad, limp pancake. The scent of burnt fish filled the air, the sound of a sizzling pan was replaced by a muffled hiss, and the taste? Nothing but disappointment. I stared at the gray, soggy skin, my confidence evaporated faster than the steam. That night, I vowed to master the art of pan‑seared salmon so that every bite would crackle like applause.
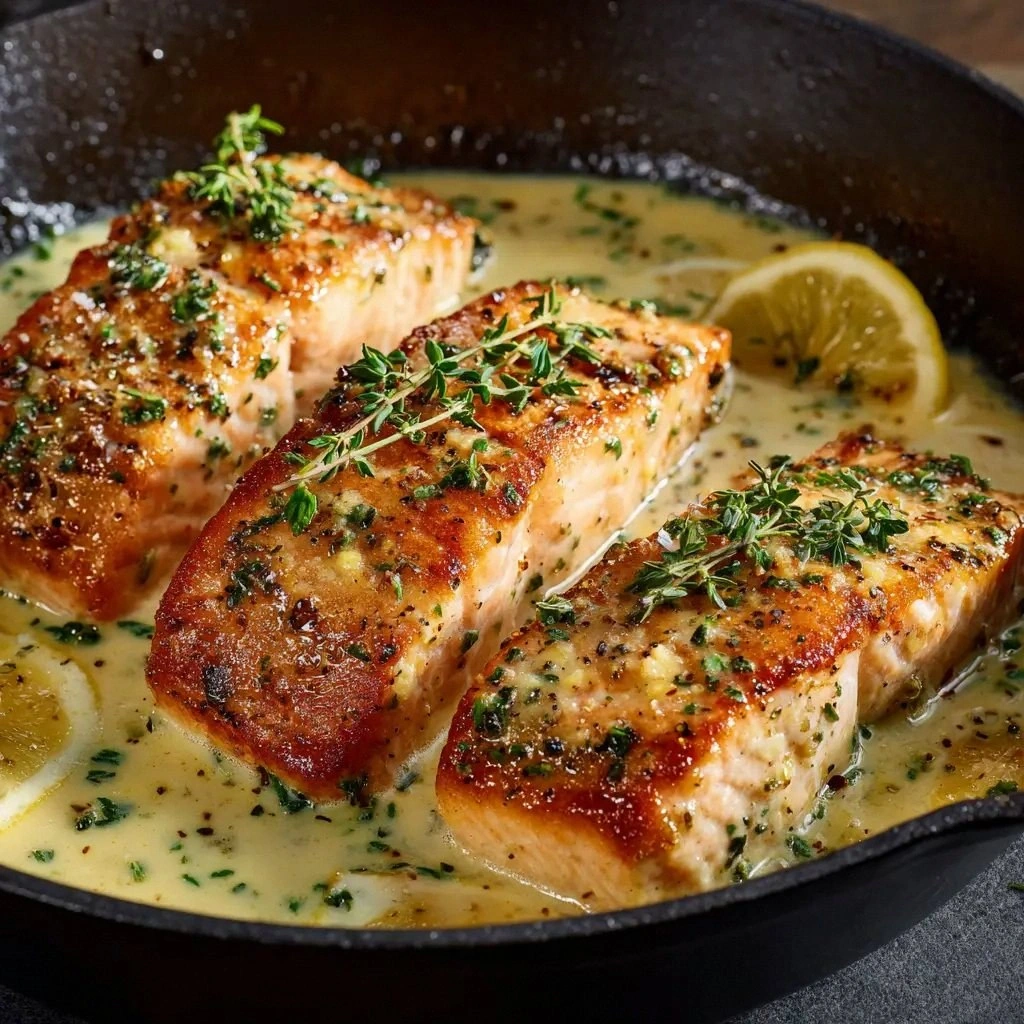
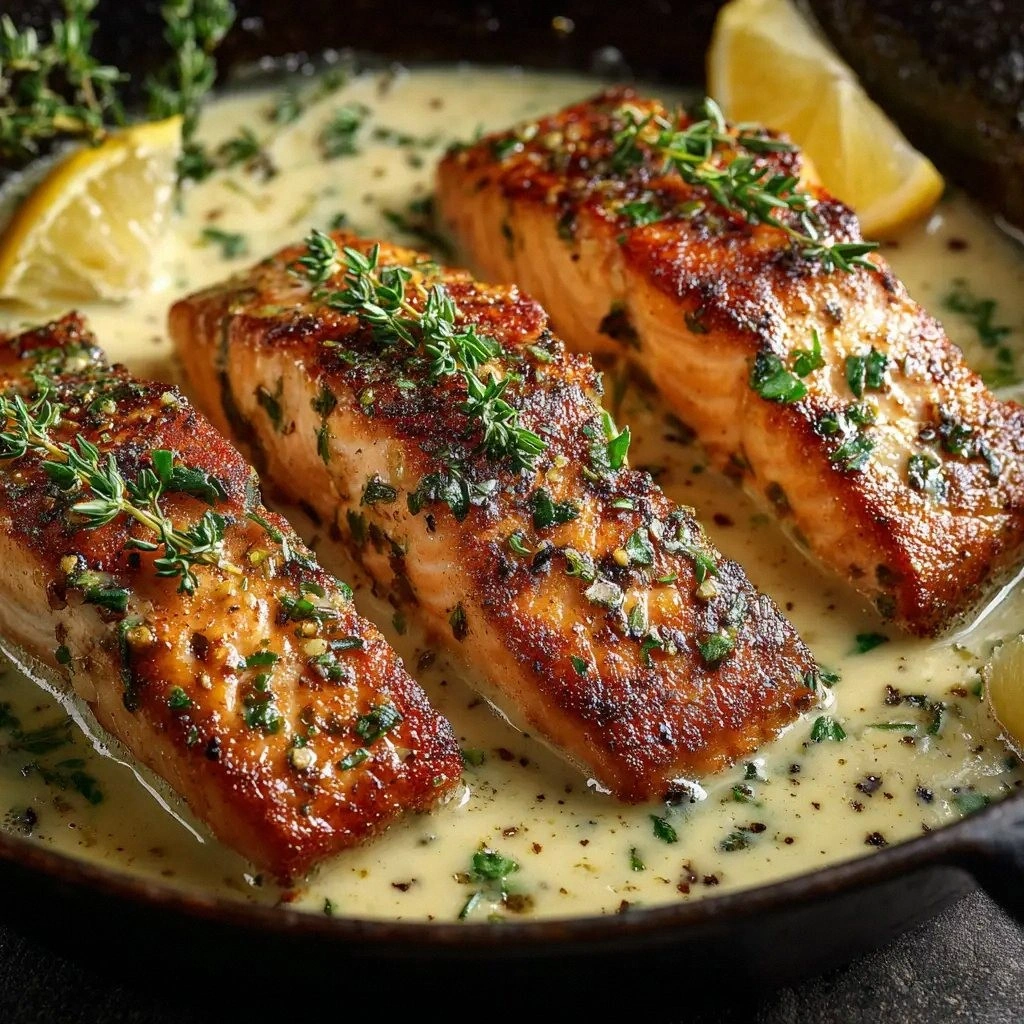
Fast forward to today, and I’m about to hand you the recipe that will forever change how you think about fish. Picture a plate where the salmon’s skin is a deep, golden‑brown armor that shatters under the first bite, revealing a moist, buttery interior that practically melts in your mouth. Imagine the aroma of garlic and butter mingling with a splash of lemon, creating a perfume that makes your kitchen feel like a five‑star restaurant. The texture is a contrast of crisp edges and tender flesh, a harmony that sings in your mouth with every forkful. I’ve refined this method to the point where the skin’s crunch is a guaranteed showstopper, and the flavor is so balanced it could be a secret weapon in your culinary arsenal.
You might wonder, “What makes this version different from the countless pan‑seared salmon recipes out there?” The answer is simple: I’ve distilled the technique to its purest form, eliminating the usual pitfalls and adding a few unexpected twists that elevate the dish from ordinary to unforgettable. I’ve also cracked the code to achieving that perfect, blister‑free skin that most people either over‑cook or under‑cook. And the best part? It only takes ten minutes to get the skin crispy while the inside stays flaky and juicy. By the end of this post, you’ll not only know how to cook salmon like a pro, but you’ll also have the confidence to impress anyone who walks into your kitchen.
So, let’s dive in. I’ll walk you through every single step, from the moment you pull the fillets out of the fridge to the final garnish that turns a simple dish into a masterpiece. I dare you to taste this and not go back for seconds. Trust me, you’ll be begging for the recipe again and again.
What Makes This Version Stand Out
- Flavor: The marriage of avocado oil, butter, and garlic creates a rich, buttery base that envelops the salmon in a subtle, nutty flavor that feels like a warm hug.
- Texture: The skin turns out blister‑free, crisp, and golden—shattering like thin ice when you bite into it, while the flesh remains silky and flaky.
- Simplicity: With only eight ingredients, you can achieve restaurant‑level results without a pantry full of exotic spices.
- Speed: The entire process takes less than twenty minutes, making it a perfect go‑to for busy weeknights.
- Visual Appeal: The contrast of the dark, caramelized skin against the pale flesh is a feast for the eyes, turning any plate into a showpiece.
- Versatility: The base technique works with any fillet—salmon, trout, or even scallops—so you can swap proteins without losing the magic.
- Health Conscious: By using avocado oil and a modest amount of butter, you keep the dish heart‑healthy while still indulging in a buttery finish.
- Audience: Whether you’re a seasoned chef or a kitchen novice, this recipe offers a fail‑proof method that guarantees a crowd‑pleasing result.
Alright, let’s break down exactly what goes into this masterpiece…
Inside the Ingredient List
The Flavor Base
Avocado oil is the unsung hero of this recipe. Its high smoke point (around 520°F) means it can withstand the high heat required to crisp the skin without burning. Unlike olive oil, which can develop a bitter taste at high temperatures, avocado oil keeps the flavor clean and lets the salmon shine. If you’re out of avocado oil, grapeseed or light sunflower oil will work, but the buttery finish will be slightly different.
Butter adds that luxurious mouthfeel and a hint of caramelization. I always use unsalted butter to keep control over the salt levels. The butter melts into the skin, creating a glossy sheen that makes the salmon look even more appetizing. If you’re watching calories, you can reduce the butter by half and add a splash of water to maintain moisture.
Garlic is the aromatic backbone. Two cloves, minced finely, release a sweet, almost floral note that balances the richness of the oil and butter. I like to press the garlic into the skin before searing; this technique allows the flavor to seep into the meat without overwhelming it. If you’re a garlic purist, feel free to double the amount—just be prepared for a stronger bite.
The Texture Crew
The salmon fillets themselves are the star. I always choose fresh, skin‑on fillets that weigh 6 oz each; the skin is essential for achieving that coveted crunch. If you can’t find fresh fillets, frozen ones are acceptable—just thaw them completely and pat them dry. The 6 oz size is perfect for two servings; if you’re cooking for more, simply double the quantity.
A half‑lemon is the citrus twist that lifts the entire dish. The acidity cuts through the fat, brightening the flavor and preventing the fish from feeling greasy. I squeeze the lemon over the fillets right before serving, but you can also add a thin slice of lemon to the pan for an extra burst of aroma during cooking.
Coarse sea salt and black pepper are the seasoning duo that brings the dish together. The coarse salt adheres to the skin, creating a subtle crunch when it caramelizes. The pepper adds a mild heat that balances the buttery richness. I recommend using a pinch of each, then taste and adjust—this recipe is designed to let the salmon’s natural flavor shine.
The Unexpected Star
Fresh parsley is the finishing touch that adds a pop of color and a fresh, herbal note. It also provides a slight crunch if you choose to leave it whole. Parsley’s bright green hue contrasts beautifully with the golden skin, making the dish visually stunning. If you’re not a fan of parsley, a sprinkle of dill or chives works just as well.
Everything's prepped? Good. Let's get into the real action…
The Method — Step by Step
- Begin by patting the salmon fillets dry with paper towels. Moisture is the enemy of crisp skin, so a dry surface is essential. Season both sides generously with coarse sea salt and freshly ground black pepper. Let the fillets rest at room temperature for about five minutes; this helps them cook evenly.
- Heat a heavy, non‑stick skillet over medium‑high heat. Add the avocado oil and swirl to coat the bottom. The oil should shimmer but not smoke. This step is critical; the high smoke point ensures the oil can reach the temperature needed for a blister‑free crust.
- Place the salmon fillets skin side down into the hot pan. You should hear an immediate sizzle—if not, the pan isn’t hot enough. Press the fillets gently with a spatula for the first 10 seconds to keep the skin from curling. This is the moment of truth: the skin should begin to crackle softly.
- Let the fillets cook untouched for about 4-5 minutes. The key is patience; moving them too soon will cause the skin to tear. Watch for the color change: the flesh should shift from translucent to opaque, and the edges will start to pull away from the pan. When the underside is a deep, golden brown, it’s ready for the next step.
- Add the butter, minced garlic, and a splash of lemon juice to the pan. Swirl the pan to coat the fillets with the butter mixture. The garlic will release its aroma, and the butter will create a glossy, flavorful glaze that will coat the salmon.
- Flip the fillets carefully with a spatula. Sear the flesh side for another 2-3 minutes, depending on thickness. If you prefer a slightly less cooked center, reduce the time by a minute. The garlic will brown slightly, adding depth without bitterness.
- While the fillets finish cooking, add a small splash of water or broth to the pan. This creates steam that helps keep the salmon moist and adds a subtle savory note. Let the water bubble gently for 30 seconds, then remove it with a spoon to avoid sogginess.
- Remove the salmon from the pan and let it rest on a cutting board for one minute. This allows the juices to redistribute, ensuring every bite stays succulent. Garnish with chopped fresh parsley and a wedge of lemon for a burst of color and freshness.
That’s it—you did it. But hold on, I've got a few more tricks that'll take this to another level…
Insider Tricks for Flawless Results
The Temperature Rule Nobody Follows
The secret to blister‑free skin is maintaining a steady, medium‑high heat. Too hot, and the fat renders before the skin gets a chance to crisp. Too low, and the fillet will steam instead of sear. I like to test the temperature by flicking a small drop of water into the pan—if it sizzles instantly, you’re good.
Why Your Nose Knows Best
Trust your sense of smell. As the salmon cooks, the aroma will change from raw fish to a buttery, slightly caramelized scent. When you smell the first hint of nutty butter, that’s the cue to flip the fillet. If you wait too long, the skin will become soggy.
The 5‑Minute Rest That Changes Everything
Letting the salmon rest after cooking is essential. It allows the juices to redistribute and prevents the surface from drying out. I always let it sit on a plate for exactly five minutes before plating. If you’re short on time, a one‑minute rest still works, but the flavor will be slightly less harmonious.
The Garlic‑Butter Balance
If you’re a garlic lover, add an extra clove or two. Just be mindful that the garlic can burn quickly; keep the heat moderate once you’ve added it. Alternatively, you can use garlic powder for a milder, evenly distributed flavor.
The Lemon‑Oil Fusion
A splash of lemon juice right before serving brightens the dish and cuts through the richness. Some chefs add a zest of lemon to the butter mixture for an extra burst of citrus. I prefer to squeeze fresh lemon over the fillets just before plating; it adds a fresh, zesty finish.
Creative Twists and Variations
This recipe is a playground. Here are some of my favorite ways to switch things up:
Asian Glaze
Swap the butter for a mixture of soy sauce, honey, and a dash of sesame oil. Add a pinch of crushed red pepper for heat. The result is a sticky, umami‑rich glaze that pairs wonderfully with steamed rice.
Herb‑Crusted Salmon
Create a crust by mixing chopped dill, thyme, and a tablespoon of olive oil. Press the mixture onto the skin side before searing. The herbs infuse the salmon with a fragrant, earthy flavor.
Spicy Chipotle Butter
Blend softened butter with a spoonful of chipotle in adobo sauce and a squeeze of lime. Spread this over the fillets after searing. The smoky heat pairs beautifully with the buttery base.
Citrus Burst
Replace the lemon with orange zest and a splash of orange juice. Add a pinch of fennel seeds for a sweet, aromatic twist that transports you to a tropical beach.
Mediterranean Flair
After searing, drizzle the salmon with a reduction of white wine, capers, and a splash of olive oil. Garnish with chopped sun‑dried tomatoes for a burst of umami and color.
Breakfast‑Style Salmon
Serve the salmon over a bed of sautéed spinach and quinoa, topped with a poached egg. The richness of the egg yolk complements the buttery salmon, making for a hearty, protein‑packed breakfast.
Storing and Bringing It Back to Life
Fridge Storage
Store leftover salmon in an airtight container in the refrigerator for up to two days. The skin may lose some crispness, so reheat in a hot skillet for a few seconds to revive the texture. Add a splash of water to keep the flesh moist.
Freezer Friendly
Wrap the cooked fillets individually in parchment paper, then place in a freezer bag. They’ll keep for up to three months. When ready, thaw in the refrigerator overnight and reheat gently.
Best Reheating Method
Reheat the salmon in a preheated skillet over medium heat for one to two minutes per side. If you’re reheating from frozen, add a tablespoon of water or broth to the pan to create steam, preventing the fish from drying out. Finish with a quick squeeze of fresh lemon for a bright finish.