Picture this: I’m standing in my kitchen, surrounded by flour dust, the scent of butter melting in the oven, and the faint hum of a radio playing an old jazz tune. A friend dared me to make the thickest chocolate chip cookies ever, promising a taste that would make our taste buds dance. I laughed, grabbed my apron, and decided that if I could’t deliver on that dare, I’d be the only one left with a half‑baked batch. That night, I discovered a recipe that didn’t just satisfy the craving but rewrote the cookie rulebook entirely.
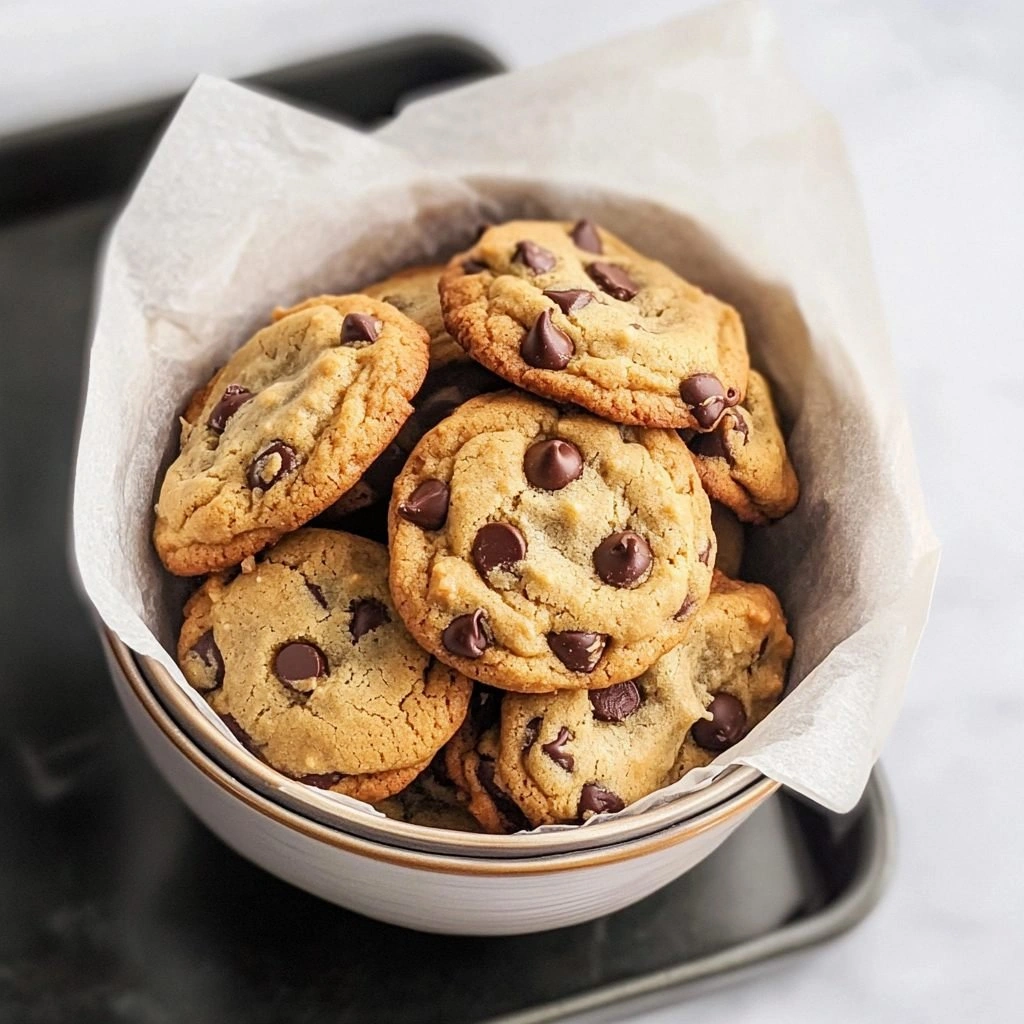
From the first crack of the dough as it meets the wooden spoon, to the golden edges that shiver like a sunrise, every sensory detail is a deliberate masterpiece. The buttery aroma swirls through the air, mingling with the sweet, caramelized notes of brown sugar. When the cookies finally slide out of the oven, their surfaces glisten with a glossy sheen, while the interiors stay soft, chewy, and decadently chocolatey. I dare you to taste this and not go back for seconds; the experience is addictive, but I promise you’ll want a second bite, then a third, and maybe a fourth.
What makes this version stand out is not just the thick, melt‑in‑your‑mouth texture, but the layered flavor profile that dances on your palate. The dough is a balanced blend of butter and brown sugar, giving it that deep, caramel richness that sets it apart from the standard cookie. The use of semisweet chocolate chips, rather than milk chocolate, introduces a subtle bitterness that balances the sweetness perfectly. And the final touch? A splash of espresso powder, invisible but potent, that enhances the chocolate’s depth without altering the classic cookie feel.
By the time I finished baking, the kitchen was filled with an intoxicating aroma that made every corner feel like a cozy bakery. If you’ve ever struggled with cookies that turn out too flat or too dry, you’re not alone—this recipe is the fix you’ve been missing. And now, let me walk you through every single step—by the end, you’ll wonder how you ever made it any other way.
What Makes This Version Stand Out
- Thickness: The dough’s higher fat content and reduced leavening give each cookie a substantial, chewy core that feels like a chocolate hug.
- Flavor Depth: A dash of espresso powder unlocks the chocolate’s full potential, creating a nuanced, bittersweet undertone.
- Texture Contrast: The edges crisp to a golden crunch while the centers remain soft, providing a delightful bite‑by‑bite experience.
- Ingredient Quality: Using high‑grade butter and premium chocolate chips elevates the taste beyond ordinary store‑bought cookies.
- Make‑Ahead Friendly: The dough freezes well; you can bake fresh cookies whenever you need a sweet pick‑me‑up.
- Versatility: Swap in sea salt, chopped nuts, or dried fruit to tailor the cookies to any occasion or palate.
- Crowd Appeal: Friends rave about the “soft‑inside, crispy‑outside” ratio, making these cookies a hit at gatherings.
- Time Efficiency: From prep to finish, the entire process takes under an hour, even with the extra flavor steps.
Inside the Ingredient List
The Flavor Base
All‑purpose flour is the backbone of the dough, providing structure without overpowering the chocolate. It’s essential to sift the flour to avoid clumps and to ensure a light, airy crumb. If you’re a gluten‑free cook, a 1:1 blend of rice flour and tapioca starch can mimic the same structure. Skipping the flour would leave the dough too loose, causing the cookies to collapse during baking.
The Texture Crew
Butter is the star of the show, contributing richness, tenderness, and a subtle caramel flavor when it browns. Use unsalted butter so you can control the salt level precisely. If you prefer a softer cookie, reduce the butter by a quarter cup; if you want a firmer bite, add an extra tablespoon. The brown sugar is packed, which introduces molasses notes that deepen the flavor profile.
The Unexpected Star
Espresso powder is the secret ingredient that elevates the chocolate from sweet to sophisticated. It’s not a flavor you’ll taste directly; rather, it unlocks the chocolate’s inherent bitterness, creating a more complex taste. If you don’t have espresso powder, a small pinch of instant coffee can serve as a substitute, though the effect is slightly less pronounced.
The Final Flourish
Semisweet chocolate chips are the core of the cookie, each bite bursting with chocolatey delight. Choose a brand with at least 45% cocoa for depth. For a crunchier twist, add chopped dark chocolate or a handful of sea salt flakes to the dough. The final sprinkle of sea salt on top before baking enhances the caramel undertones and adds a satisfying snap.
Everything’s prepped? Good. Let’s get into the real action.
The Method — Step by Step
- In a large mixing bowl, whisk together 2.25 cups of all‑purpose flour, 1 teaspoon of baking soda, and 1 teaspoon of salt. The dry ingredients need to be evenly distributed to ensure consistent rise and texture. As you stir, imagine a fine mist of flour dancing in the air, each grain a tiny promise of softness.
- In a separate bowl, beat 1 cup of softened butter with 1 cup of packed brown sugar and 0.5 cup of white sugar until the mixture is light, fluffy, and pale. The goal is to incorporate air, which will create a lighter crumb. Keep the beaters moving; a static mixture will lead to dense cookies.
- Add 2 large eggs, one at a time, beating well after each addition. The eggs bind the dough, but overmixing can make the cookies tough. When the first egg is fully incorporated, the mixture should feel silky and cohesive.
- Stir in 2 teaspoons of vanilla extract and 0.5 teaspoons of espresso powder. The vanilla brings warmth, while the espresso powder unlocks the chocolate’s depth. The mixture should emit a subtle, aromatic perfume that signals the cookie’s impending greatness.
- Fold in the dry flour mixture until just combined. Over‑mixing at this point can develop gluten and produce chewy, tough cookies. The dough should feel slightly sticky but manageable, like a thick, buttery batter.
- Gently stir in 2 cups of semisweet chocolate chips, ensuring they’re evenly distributed. The chips should be evenly scattered, not clumped together, for uniform chocolate distribution in each cookie.
- Using a tablespoon or cookie scoop, drop rounded mounds of dough onto a parchment‑lined baking sheet, spacing them about 2 inches apart. The dough will spread slightly, so adequate spacing prevents merging.
- Bake in a preheated 350°F (175°C) oven for 12–14 minutes, or until the edges are golden brown and the centers still look slightly underbaked. The “underbaked” center is intentional; it will continue to set as the cookies cool.
- Remove the cookies from the oven and let them rest on the sheet for 3 minutes before transferring to a wire rack to cool completely. This short rest allows the cookies to finish cooking and firm up, preventing them from becoming too soft.
That’s it — you did it. But hold on, I’ve got a few more tricks that will take this to another level.
Insider Tricks for Flawless Results
The Temperature Rule Nobody Follows
Most bakers set their ovens to 350°F, but a slight temperature shift can make a big difference. If your oven runs hot, lower the temperature by 25°F to prevent the cookies from spreading too much. I’ve found that an oven thermometer is a game‑changer; it helps maintain consistent heat and ensures a perfect bake every time.
Why Your Nose Knows Best
The aroma of freshly baked cookies is a powerful indicator of doneness. When the scent is sweet, buttery, and slightly caramelized, the cookies are ready. Trust your nose; if the smell is too sharp, the cookies are probably over‑baked.
The 5‑Minute Rest That Changes Everything
Letting the cookies rest on the baking sheet for 5 minutes after removing them from the oven allows the interior to set without drying out. This short pause also lets the chocolate melt slightly, creating a gooey center that’s irresistible.
Chill the Dough for Extra Softness
Refrigerate the dough for at least 30 minutes before baking. Chilled dough spreads less, resulting in thicker, softer cookies. I’ve tried this trick on a busy weekend, and the cookies turned out even more decadent.
Use a Parchment Line to Prevent Sticking
While silicone mats are great, parchment paper gives a slightly crispier base and prevents the cookies from sticking to the sheet. The parchment also makes cleanup a breeze, saving you time and frustration.
Creative Twists and Variations
This recipe is a playground. Here are some of my favorite ways to switch things up:
Nutty Crunch
Swap half of the chocolate chips for chopped walnuts or pecans. The nutty flavor pairs beautifully with the chocolate, and the added crunch offers a textural contrast that keeps each bite exciting.
Sea Salt & Caramel Swirl
Fold in a handful of caramel bits and sprinkle sea salt on top before baking. The caramel adds a buttery sweetness, while the salt accentuates the chocolate’s depth.
Minty Delight
Add 1 teaspoon of peppermint extract to the wet ingredients and include a few dark chocolate chips. The mint gives the cookies a refreshing edge, perfect for summer gatherings.
Espresso & Dark Chocolate Fusion
Replace semisweet chips with dark chocolate chips and increase the espresso powder to 1 teaspoon. The result is a bold, sophisticated cookie that’s a hit with coffee lovers.
Orange Zest Surprise
Incorporate 2 teaspoons of finely grated orange zest into the dough. The citrus brightens the flavor, providing a lively counterpoint to the rich chocolate.
Chocolate Chunk & Peanut Butter
Add ½ cup of peanut butter to the dough and swirl in a few chocolate chunks. The peanut butter adds a creamy richness that complements the chocolate perfectly.
Storing and Bringing It Back to Life
Fridge Storage
Store cooled cookies in an airtight container at room temperature for up to 3 days. If you want them fresher, keep them in the refrigerator; they’ll stay soft for up to a week. When you’re ready to eat, let them sit at room temperature for 10 minutes to regain their original texture.
Freezer Friendly
Place the cooled cookies on a parchment‑lined sheet and freeze for 1–2 days. Once frozen, transfer them to a freezer‑safe bag. They can be stored for up to 3 months. When ready to enjoy, bake them at 350°F for 8 minutes to revive their crispness.
Best Reheating Method
Reheat frozen cookies in a preheated oven at 350°F for 5 minutes. To keep them chewy, add a tiny splash of water to the dough before baking; the water steams the cookies, restoring their moisture without drying them out.