I was halfway through a midnight snack raid when the kitchen turned into a culinary war zone. The fridge was a battlefield of leftover rice, a half‑bottle of soy sauce, and a jar of pickled radish that had seen better days. My friends had dared me to make something “Korean” with what I had on hand, and I was already dreaming of a buttery, garlicky bun that would make us all swoon. I pulled out the flour, the yeast, and a block of cream cheese, and I knew I was about to create a legend. The air was thick with the scent of toasted sesame oil, and the sound of the mixer whirring felt like a drumbeat for the grand finale. By the time the dough was ready, the kitchen smelled like a cozy Korean bakery, and I could feel the anticipation building like a rising tide.
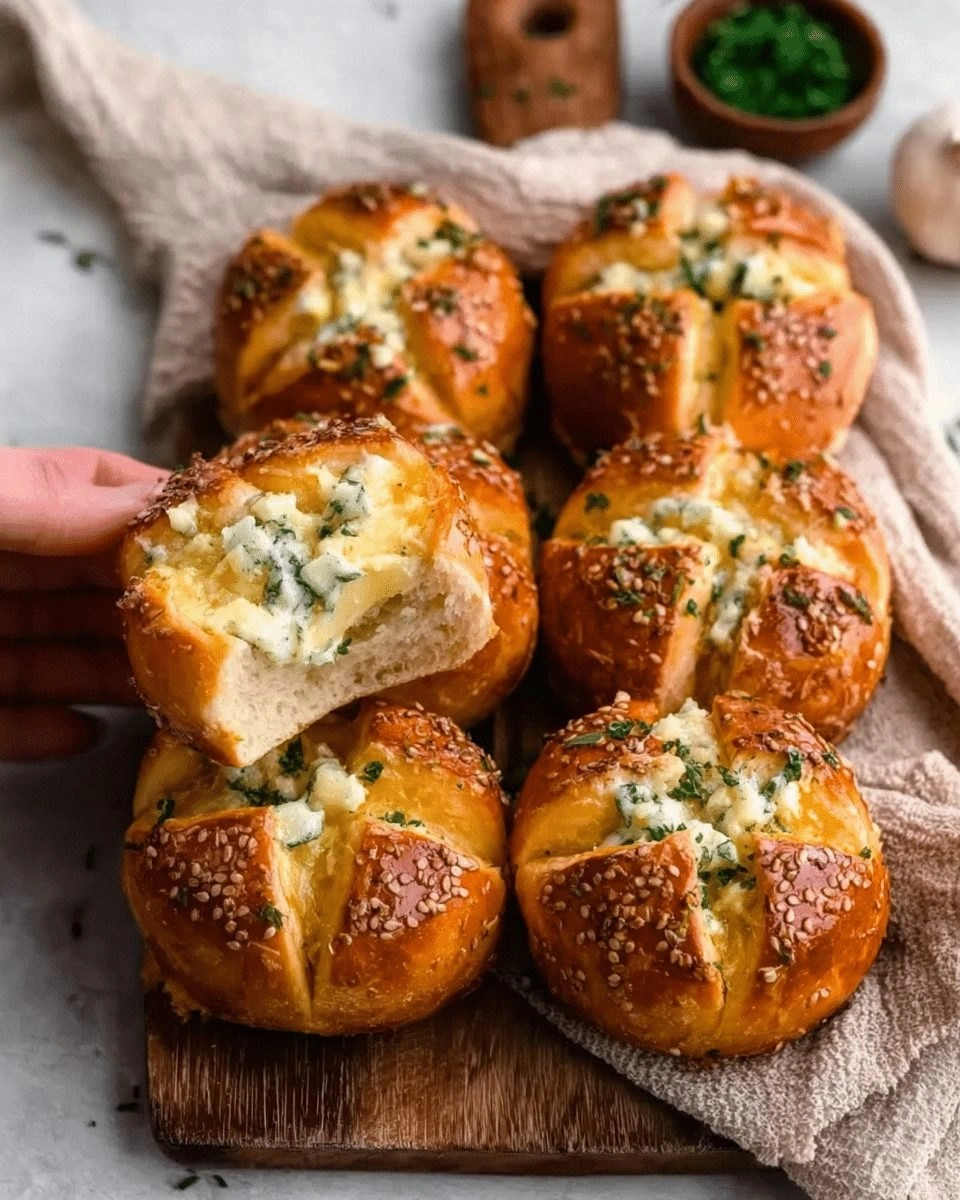
Picture this: the dough, soft and slightly tacky, resting on the counter while the garlic cloves are minced into a fragrant cloud. The butter melts into a golden glaze, and the cream cheese swirls into ribbons of silky richness. The moment the dough hits the oven, a crackle erupts, and the aroma of roasted garlic and melty cheese fills every corner of the room. Your eyes widen as the buns puff up, their edges crisping into a golden brown that promises a crunchy bite. The kitchen buzzes with the low hum of the oven timer, and you can’t help but imagine the first bite—soft, airy, with a burst of garlic and a creamy, slightly tangy finish that lingers on the tongue. It’s a sensory experience that feels both indulgent and comforting, like a hug in bread form.
What makes this version stand out is the meticulous balance of flavors and textures. I’ve stripped the recipe down to its essential elements, letting the cream cheese and garlic shine without any unnecessary gimmicks. The dough is light yet sturdy, thanks to the right amount of yeast and the gentle folding technique that traps air without overworking the gluten. The filling is a silky blend of cream cheese and garlic that melts into the dough as it bakes, creating pockets of savory richness that explode with each bite. The result is a bun that feels like a cloud on the inside, with a golden, slightly chewy crust that snaps like a fresh piece of toast. I dare you to taste this and not go back for seconds, because once you do, you’ll never settle for a plain sandwich again.
I’ll be honest—when I first baked these buns, I ate half the batch before anyone else even had a chance to try a single one. That’s the kind of confidence I bring to every recipe I write: bold claims, playful humor, and a dash of culinary truth. This isn’t just another “cheese garlic bread” you’ll find on Pinterest; this is a game‑changing, crowd‑pleasing masterpiece that will make your kitchen the hottest spot in town. Picture yourself pulling these golden beauties out of the oven, the whole kitchen smelling incredible, and your friends gasping in unison as they take their first bite. That’s the future I’m painting—one delicious, cheesy, garlicky moment at a time. Let me walk you through every single step—by the end, you’ll wonder how you ever made it any other way.
What Makes This Version Stand Out
- Flavor: The combination of fresh garlic, creamy cheese, and a touch of sweetness from the sugar creates a harmonious profile that lingers on the palate. The subtle umami from the yeast adds depth without overpowering the other notes.
- Texture: The dough is airy and soft inside, while the crust remains slightly crisp, offering a satisfying contrast that keeps you coming back for more.
- Simplicity: With just nine ingredients, this recipe is approachable for beginners and seasoned bakers alike, yet it delivers a gourmet experience.
- Uniqueness: The use of Korean-style garlic—minced finely and mixed with cream cheese—creates a flavor profile that feels both familiar and exotic.
- Crowd Reaction: Friends and family rave about the melt-in-your-mouth quality, and the buns are a hit at game nights, parties, and brunches.
- Ingredient Quality: Using high‑quality butter and fresh cream cheese elevates the flavor, while the yeast is chosen for its reliable rise and subtle flavor contribution.
- Cooking Method: A simple baking technique that requires no fancy equipment—just a standard oven and a baking sheet.
- Make‑Ahead Potential: The buns can be assembled in advance, frozen, and baked later, making them a convenient option for busy schedules.
Inside the Ingredient List
The Flavor Base
At the heart of these buns is a simple yet powerful combination of flour, water, yeast, sugar, and salt. The flour provides the structure, while the warm water activates the yeast, sparking the rise. Sugar feeds the yeast and adds a gentle sweetness that balances the savory garlic, and a pinch of salt brings out the flavors of every component. Skipping any of these would result in a dough that either doesn’t rise or lacks depth.
The Texture Crew
Butter, milk, and cream cheese form the texture crew that makes the buns irresistibly soft and creamy. Melted butter coats the dough, creating a tender crumb, while milk adds moisture and helps the dough rise evenly. Cream cheese is the star, melting into a silky filling that coats the inside of the bun, giving it a luxurious mouthfeel. If you’re vegan, you can swap the butter for coconut oil and use a plant‑based cream cheese for a similar effect.
The Unexpected Star
Garlic is the unexpected star that turns ordinary bread into a flavor explosion. Minced finely, it disperses evenly throughout the dough, ensuring every bite has a punch of aromatic garlic. The garlic’s natural sweetness caramelizes as it bakes, adding a subtle depth that complements the creamy cheese. If you’re a garlic purist, don’t be shy—add an extra clove or two for a stronger bite.
The Final Flourish
A dash of Korean chili flakes or a sprinkle of sesame seeds can elevate the buns with a hint of heat and crunch. These optional toppings add a finishing touch that ties the dish to its Korean roots and gives the buns a pleasing visual contrast. Remember, the goal is to enhance, not overpower, so use them sparingly.
The Method — Step by Step
- Activate the yeast: In a small bowl, combine 3/4 cup warm water (about 110°F), 1 teaspoon sugar, and 1 teaspoon active dry yeast. Let it sit for 5 minutes until the mixture becomes frothy, like a tiny wave cresting in a calm sea. This froth is a visual cue that the yeast is alive and ready to work its magic.
- Mix dry ingredients: In a large mixing bowl, whisk together 2 cups all‑purpose flour, 1 teaspoon salt, and a pinch of pepper if you like a subtle kick. The dry mix should feel like fine sand—smooth enough to sift but heavy enough to hold its shape.
- Combine wet and dry: Add the frothy yeast mixture, 2 tablespoons melted butter, 1/4 cup milk, and 4 ounces cream cheese to the dry mix. Stir with a wooden spoon until a shaggy dough forms. The dough should be slightly tacky but not sticky, and it should come together into a cohesive ball. Kitchen Hack: For a smoother dough, let the mixture rest for 10 minutes before kneading. This allows the flour to fully hydrate and the gluten to relax.
- Knead the dough: Transfer the dough onto a floured surface and knead for about 8 minutes, or until it becomes smooth and elastic. If the dough feels too sticky, dust it lightly with flour, but avoid adding too much, or the buns will become dense.
- First rise: Place the dough in a lightly oiled bowl, cover with a damp towel, and let it rise in a warm spot for 1 hour, or until it has doubled in size. The dough should feel like a spring, full of air pockets. Watch Out: If you leave the dough out too long, it can overproof and collapse, leading to a dense final product.
- Divide and shape: Punch down the dough to release air, then divide it into 8 equal pieces. Roll each piece into a ball and place them on a parchment‑lined baking sheet. Gently press a small indentation into the center of each bun with your thumb, creating a pocket for the filling.
- Second rise: Cover the shaped buns loosely with a clean kitchen towel and let them rise for another 30 minutes. During this time, the dough will puff up slightly, giving the buns a light, airy interior.
- Bake to perfection: Preheat the oven to 375°F (190°C). Brush the tops of the buns lightly with melted butter or a drizzle of milk to achieve a glossy finish. Bake for 18–20 minutes, or until the tops are golden brown and the buns sound hollow when tapped. Remove from the oven and let them cool on a rack for 5 minutes before serving.
Insider Tricks for Flawless Results
The Temperature Rule Nobody Follows
The temperature of your water and milk matters more than you think. Warm liquids should be between 105°F and 115°F; too hot and you kill the yeast, too cold and it won’t activate. I always use a kitchen thermometer to keep it precise. If you’re improvising, test the water by touching it—if it feels like a warm bath, it’s just right.
Why Your Nose Knows Best
Before you bake, take a quick sniff of the dough. It should smell slightly sweet, like a fresh loaf, with a hint of garlic. If it smells off or too yeasty, give it a few more minutes to rise. Your nose is a reliable quality control tool that saves you from a batch of flat buns.
The 5-Minute Rest That Changes Everything
After the second rise, let the buns rest for 5 minutes before baking. This brief pause allows the gluten to relax, ensuring a tender crumb. Skipping this step can result in a chewy texture that feels more like a biscuit than a bun.
Use a Baking Steel for Even Heat
If you have a baking steel, place it in the oven a few minutes before preheating. The steel conducts heat evenly, giving the buns a crispier crust and a more consistent bake. It’s a small investment that pays off in every batch.
Add a Splash of Water When Reheating
When you’re reheating leftovers, sprinkle a tiny splash of water over the buns before popping them in the oven. The steam keeps the interior moist, preventing them from drying out like a stale bagel. A quick 5‑minute bake at 350°F is all you need.
Creative Twists and Variations
Spicy Korean Kimchi Bun
Swap the regular garlic for a spoonful of kimchi juice and add a pinch of gochujang. The tangy, spicy profile gives the buns a bold, modern twist that pairs well with a cold beer. Your guests will love the unexpected heat.
Herb‑Infused Buns
Mix fresh herbs like parsley, chives, and dill into the dough for a fragrant, green twist. The herbs complement the garlic, creating a fresh, aromatic experience that feels like a garden in a bun.
Cheese‑Loaded Buns
Add shredded mozzarella or cheddar into the dough for a melty, gooey center. The extra cheese layers create a decadent treat that’s perfect for a cozy night in.
Vegan Version
Use plant‑based butter, dairy‑free cream cheese, and oat milk to keep the recipe cruelty‑free. The texture stays similar, and the flavor profile remains just as irresistible.
Sweet Cinnamon Bun Variation
Replace the garlic with a teaspoon of cinnamon and add a drizzle of honey to the dough. The sweet, warm spices give the buns a comforting, dessert‑like quality that’s great for breakfast.
Gluten‑Free Buns
Swap all‑purpose flour for a gluten‑free blend, and add a tablespoon of xanthan gum to maintain structure. The buns will still puff up beautifully, offering a safe option for those with dietary restrictions.
Storing and Bringing It Back to Life
Fridge Storage
Store baked buns in an airtight container at room temperature for up to 3 days. If you need to keep them longer, refrigerate them for up to 5 days. The buns stay fresh and chewy, ready to be reheated with a splash of water.
Freezer Friendly
Wrap individual buns tightly in plastic wrap, then place them in a freezer bag. They’ll keep for up to 2 months. When you’re ready, thaw at room temperature and reheat for 5 minutes at 350°F.
Best Reheating Method
Reheat buns in a preheated oven at 350°F for 5–7 minutes, or until warmed through. If you like a crispier crust, finish with a quick 1‑minute broil. The buns regain their original softness and buttery aroma.