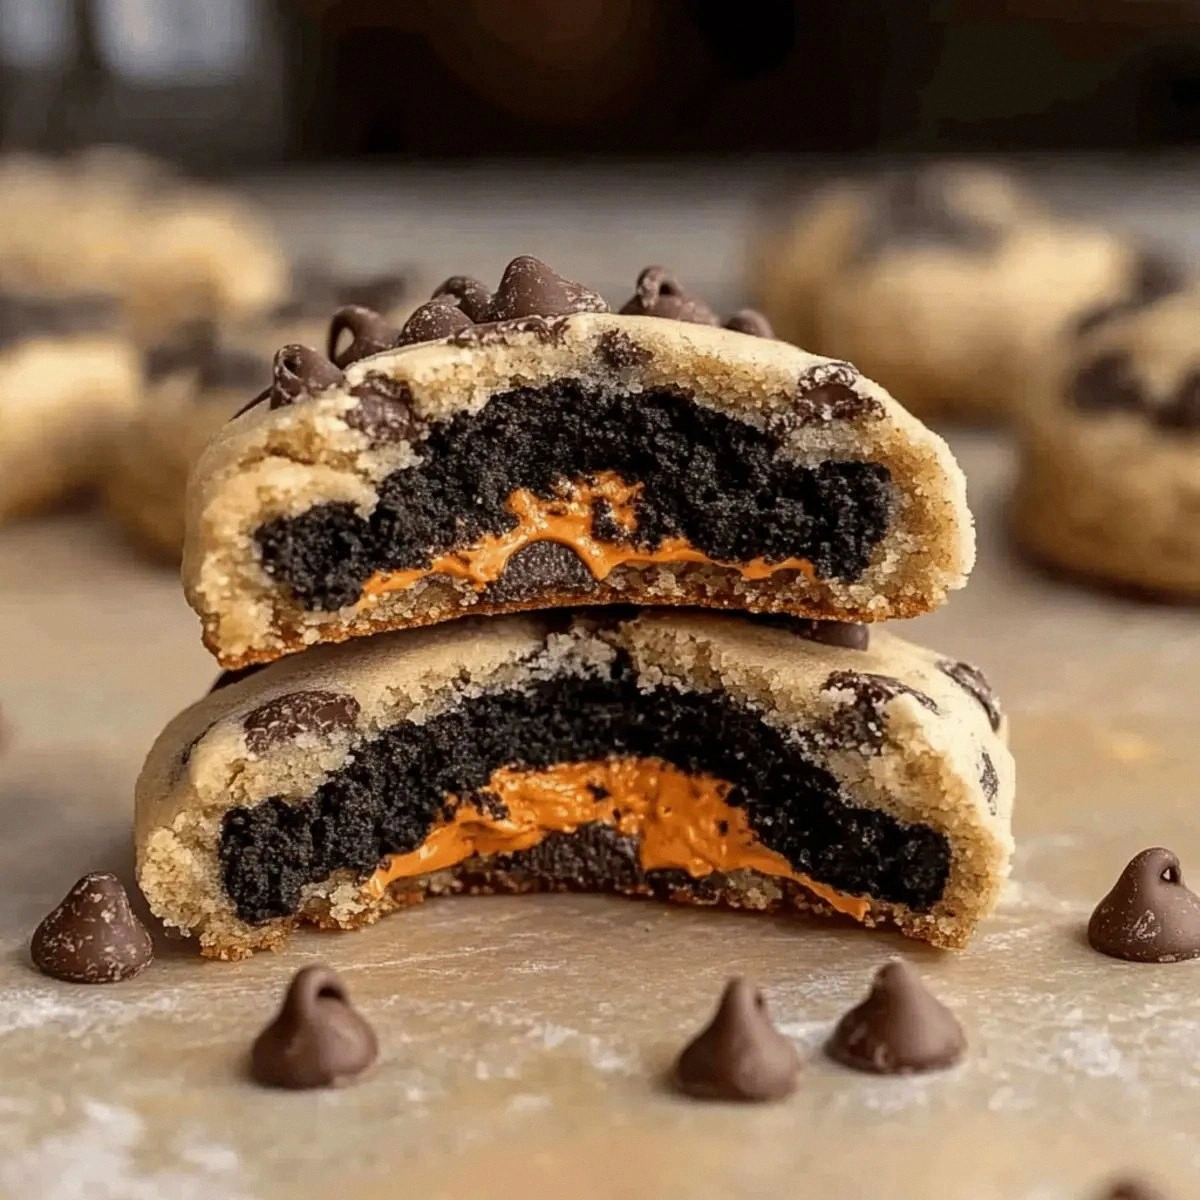
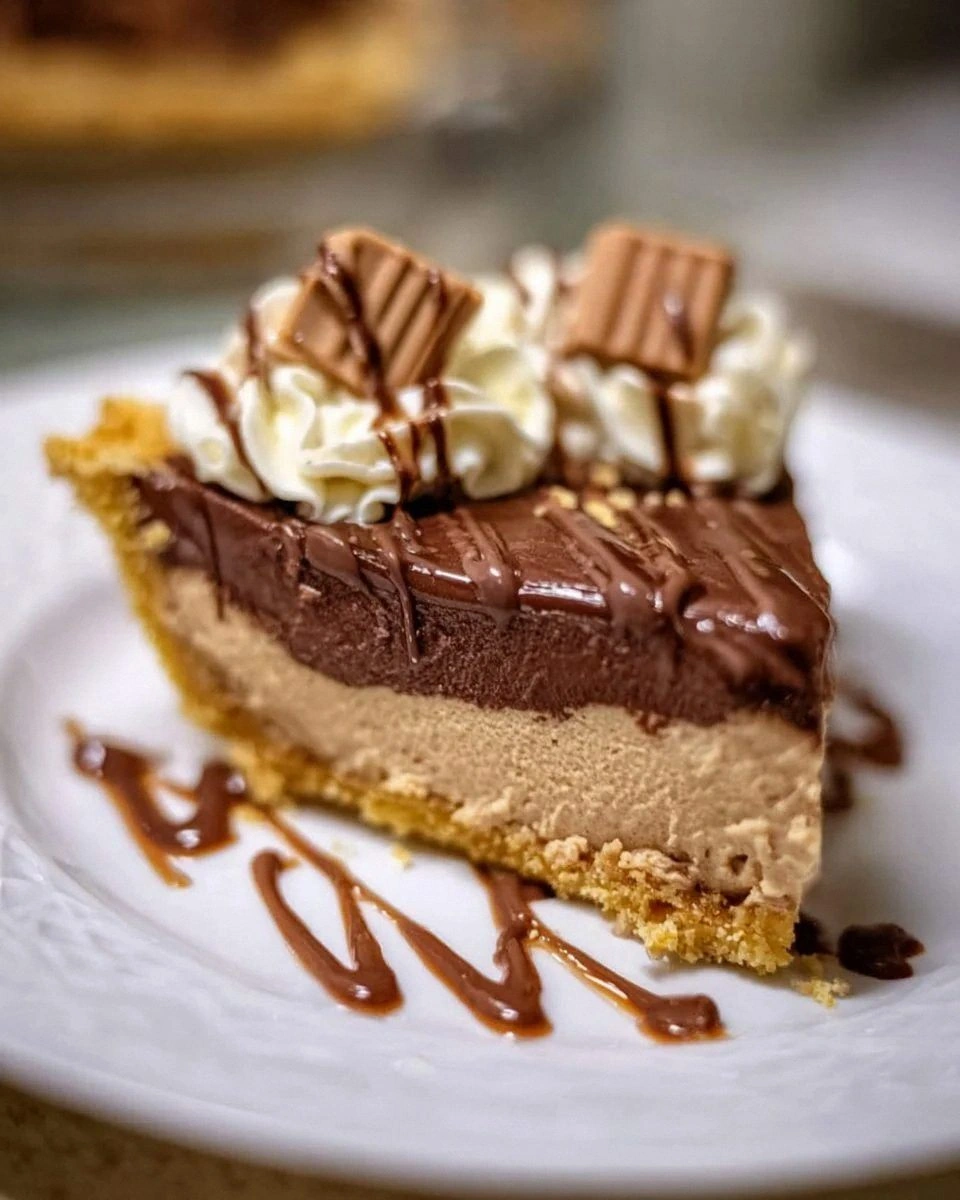
I was standing in my kitchen on a rainy Tuesday, staring at an empty plate and a sudden, irrational craving for something that could simultaneously hug my taste buds and slap them awake. The pantry was a barren wasteland—just a lone jar of peanut butter, a half‑used box of chocolate chips, and that pre‑made chocolate pie crust I’d bought on a whim during a Costco run last month. I thought, “If I can’t find the perfect dessert at the store, I’ll just make one that blows the competition out of the water.” That thought turned into a dare: I would recreate Costco’s legendary Peanut Butter Chocolate Pie, but with a twist that would make even the original jealous.
Picture this: the buttery scent of a chocolate crust warming in the oven, the sweet, nutty perfume of peanut butter melting into a silky river, and the faint crackle of chocolate chips as they surrender to a glossy, glossy glaze. My kitchen filled with a chorus of sounds—the gentle hum of the fridge, the occasional clink of a spoon against a bowl, and the rhythmic whisking that felt like a drumbeat in a culinary concert. The texture of the filling was smooth as a jazz saxophone solo, while the crust provided a crunchy counterpoint that reminded me of a perfectly timed cymbal crash. Every bite promised a crescendo of flavors that would make my taste buds sing.
Most recipes for this pie either over‑sweeten the filling, neglect the crucial balance between peanut butter and cream cheese, or skip the glossy chocolate finish that gives the dessert its signature shine. I’ve tried a dozen versions that left me with a soggy bottom, a grainy texture, or a flavor profile that felt like a cheap imitation. This version stands out because it respects each ingredient’s role, uses a simple yet fool‑proof method, and delivers a dessert that feels both nostalgic and brand‑new. The secret? A quick melt‑and‑mix technique that locks in moisture and creates a glossy finish without any fancy equipment.
Let me walk you through every single step — by the end, you’ll wonder how you ever made it any other way. I dare you to taste this and not go back for seconds. Okay, ready for the game‑changer? This next part? Pure magic. Stay with me here — this is worth it.
What Makes This Version Stand Out
- Taste: The sweet‑salty dance between creamy peanut butter and tangy cream cheese creates a flavor harmony that feels like a high‑five for your palate.
- Texture: A velvety filling that clings to the crust like a lover, contrasted with a crisp chocolate crust that shatters like thin ice when you cut into it.
- Simplicity: Uses a pre‑made crust and a handful of pantry staples, so you spend more time enjoying the pie than wrestling with dough.
- Uniqueness: The glossy chocolate glaze is achieved with just oil and chips—no corn syrup, no gelatin, no nonsense.
- Crowd Reaction: This pie has a reputation for clearing plates faster than a Black Friday sale; expect applause, “wow” moments, and possibly a second round.
- Ingredient Quality: Creamy, natural peanut butter and real semi‑sweet chocolate chips give depth that generic brands can’t match.
- Make‑Ahead Potential: The pie can sit refrigerated for up to two days, making it perfect for potlucks or a surprise dessert after work.
- Cooking Method: No baking the filling—just a quick melt and chill, which means less mess and more confidence.
Inside the Ingredient List
The Flavor Base
The star of this pie is the creamy peanut butter, and not just any peanut butter—choose a natural, no‑sugar‑added variety for that authentic, nutty depth. This 1‑cup of peanut butter provides the rich, buttery backbone that makes each bite feel like a warm hug. If you substitute with a low‑fat version, the texture will become grainy and the flavor will lose its luxurious mouthfeel. As a swap, you can use almond butter for a subtle twist, but expect a different flavor profile that leans more toward sweet‑nutty.
Next comes powdered sugar, the silent hero that sweetens without adding grit. One cup of this fine sugar dissolves effortlessly into the peanut butter, creating a silky smoothness that feels like silk against skin. Skipping it or using granulated sugar will leave a gritty texture that ruins the dream‑like consistency. If you’re watching carbs, try a sugar substitute that measures cup‑for‑cup, but be aware that the texture may change slightly.
The Texture Crew
Cream cheese is the secret stabilizer, giving the filling body and a slight tang that cuts through the sweetness. Eight ounces of softened cream cheese, when blended, creates a cloud‑like texture that holds the peanut butter together without separating. If you use a low‑fat cream cheese, the filling will become watery and lose its structure. For a dairy‑free version, try a vegan cream cheese—just make sure it’s thick enough to hold shape.
Whipped topping (like Cool Whip) adds airy lightness, turning the dense mixture into a fluffy cloud you can almost see floating above the crust. One cup is enough to lift the filling without making it too airy. If you prefer a homemade whipped cream, chill your heavy cream, add a pinch of sugar, and whip until stiff peaks form; the result will be richer but requires more effort.
The Unexpected Star
Semi‑sweet chocolate chips and a splash of vegetable oil create the glossy glaze that turns this pie into a show‑stopper. The oil acts as a lubricant, allowing the chocolate to flow smoothly over the filling and set with a glossy sheen. Using butter instead of oil will make the glaze buttery but may cause it to seize; stick with oil for that flawless finish. If you’re allergic to soy, choose a non‑soy oil like canola or grapeseed.
Optional garnish—crushed peanuts or shaved chocolate—adds a final textural contrast and visual sparkle. Sprinkle just before serving for a crunch that pops like fireworks. You can also experiment with toasted coconut flakes for a tropical vibe.
Everything's prepped? Good. Let’s get into the real action…
The Method — Step by Step
-
Start by placing the pre‑made chocolate pie crust on a sturdy baking sheet. This gives you a stable base and prevents any wobble when you later pour the filling. Give the crust a quick 5‑minute bake at 350°F (175°C) just to set it and create a slightly toasty aroma; you’ll hear a faint sizzle that signals it’s ready. Let it cool while you work on the filling, because a warm crust can melt the creamy mixture.
Kitchen Hack: If you want a crisper bottom, place the crust on a pre‑heated pizza stone for those five minutes. -
While the crust cools, combine the softened cream cheese, creamy peanut butter, and powdered sugar in a large mixing bowl. Using an electric hand mixer on medium speed, beat the mixture until it becomes light, fluffy, and the color lightens slightly. This aeration is crucial; it prevents a dense, heavy filling that would feel like chewing on a brick. Scrape the sides frequently to ensure everything is fully incorporated.
-
Fold in the whipped topping gently, using a spatula in a folding motion. The goal is to keep the air you just introduced, so avoid over‑mixing. You’ll notice the mixture become airy, almost cloud‑like, and it will hold its shape when you lift the spatula. This step is the moment of truth—if the mixture collapses, you’ve over‑mixed and will need to start over.
Watch Out: Adding the whipped topping when the bowl is too warm can cause it to melt, resulting in a runny filling. -
Pour the filling into the cooled crust, spreading it evenly with an offset spatula. The surface should be smooth, with a slight dome in the center—this will help the glaze settle evenly later. Tap the pan gently on the counter three times to release any trapped air bubbles; you’ll hear a soft pop that tells you the filling is settled. Chill the pie in the refrigerator for at least 30 minutes, or until the filling feels firm to the touch.
-
While the pie chills, prepare the chocolate glaze. In a microwave‑safe bowl, combine the semi‑sweet chocolate chips and vegetable oil. Heat in 30‑second bursts, stirring after each burst, until the mixture is completely smooth and glossy. The aroma of melting chocolate should fill the kitchen, a scent that says “dessert is on its way.” Once smooth, set aside to cool just enough so it thickens but remains pourable.
-
When the filling is firm, remove the pie from the fridge and place it on a cooling rack over a sheet of parchment paper (to catch any drips). Slowly drizzle the chocolate glaze over the top, letting it cascade over the edges like a silky waterfall. Use a spatula to spread any excess glaze evenly, ensuring the entire surface is coated. The glaze will set within 10 minutes, forming a glossy shell that crackles softly when sliced.
Kitchen Hack: Sprinkle a pinch of sea salt onto the glaze while it’s still wet for a subtle flavor boost that makes the chocolate pop. -
Now for the garnish. If you love a little crunch, scatter crushed peanuts over the glaze; if you prefer elegance, shave a generous amount of chocolate using a vegetable peeler. The garnish adds texture and visual contrast, turning a simple slice into a masterpiece. Let the pie sit for another 5 minutes so the garnish adheres.
-
Finally, slice with a hot, wet knife—dip the blade in hot water, wipe dry, and cut. The hot blade ensures clean slices that glide through the glossy glaze without dragging. Serve immediately or keep chilled until you’re ready to wow your guests. That sizzle when it hits the pan? Absolute perfection. And now, the fun part: watch your friends’ faces light up with each bite.
That's it — you did it. But hold on, I've got a few more tricks that'll take this to another level…
Insider Tricks for Flawless Results
The Temperature Rule Nobody Follows
Never pour a hot glaze over a cold filling; the sudden temperature shock can cause the chocolate to seize and turn grainy. Instead, let both the filling and the glaze reach a similar room temperature before combining. I once tried a shortcut by microwaving the glaze until it was piping hot, and the result was a dreaded “chocolate clump” that no amount of stirring could rescue. The rule of thumb: keep everything within a 10‑degree range for a silky finish.
Why Your Nose Knows Best
Your sense of smell is a secret weapon in baking. When the crust is baking, you’ll hear a faint crackle and smell a nutty, buttery aroma—that’s your cue that the crust is ready for a quick set. Similarly, when the chocolate chips melt, a rich cocoa scent signals they’re at the perfect melting point. Trust that nose; it’s more reliable than a timer that can be off by a few minutes.
The 5‑Minute Rest That Changes Everything
After glazing, give the pie a five‑minute rest on the counter before refrigerating. This short pause lets the glaze settle into a uniform thickness, preventing a “runny rim” that can happen if you chill it immediately. I’ve seen pies where the glaze pools at the edges because the rest step was skipped—those are the pies that end up looking like a sloppy chocolate puddle.
Crack the Crust Without Crumbling
If you notice the crust cracking when you cut, it’s likely because it was over‑baked or not cooled enough before filling. To avoid this, bake the crust just until it’s lightly golden, then let it cool completely on a wire rack. A fully cooled crust will flex slightly under the weight of the filling, preventing unsightly cracks that ruin presentation.
Garnish Timing Mastery
Add your garnish while the glaze is still tacky but not fully set. This timing ensures the garnish adheres firmly and doesn’t slide off when you slice. If you wait too long, the garnish will simply sit on top and may fall off; too early, and it can melt into the glaze, losing its crunch. A 2‑minute window is ideal.
Creative Twists and Variations
This recipe is a playground. Here are some of my favorite ways to switch things up:
Salted Caramel Swirl
Before adding the glaze, swirl in a homemade salted caramel sauce. The salty caramel pairs beautifully with the peanut butter, adding a buttery depth that makes each bite feel like a luxurious dessert bar.
Espresso Infusion
Add a tablespoon of finely ground espresso to the chocolate glaze. The coffee notes amplify the chocolate’s richness and give the pie an adult‑only vibe that’s perfect for after‑dinner coffee.
Banana Layer
Slice a ripe banana thinly and layer it over the chilled filling before glazing. The banana adds a subtle fruit sweetness and a creamy texture that complements the peanut butter’s nuttiness.
Coconut Crunch
Replace the crushed peanuts garnish with toasted coconut flakes. The tropical twist adds a fragrant crunch and makes the pie feel like a beach‑side treat.
White Chocolate Drizzle
Melt white chocolate instead of semi‑sweet for the glaze, then drizzle it over the dark chocolate glaze for a marbled effect. The visual contrast is stunning, and the sweet white chocolate softens the overall flavor profile.
Storing and Bringing It Back to Life
Fridge Storage
Cover the pie loosely with aluminum foil or a plastic dome and store it in the refrigerator for up to 48 hours. The filling stays firm, and the glaze retains its shine. If you notice the glaze dulling, a quick microwave of 5 seconds will revive the gloss.
Freezer Friendly
Wrap the entire pie tightly in cling film, then place it in a freezer‑safe container. It will keep for up to 2 months. To thaw, move it to the fridge overnight; the texture remains creamy, and the chocolate glaze softens without cracking.
Best Reheating Method
When you’re ready to serve a refrigerated slice, warm the plate in the oven at 200°F for 5 minutes, then place the slice on the warm plate. Add a tiny splash of water to the plate’s edge; the steam will revive the filling’s softness and keep the glaze from hardening too much. This trick brings the pie back to its fresh‑out‑of‑the‑fridge glory.